Concur Refresher Quick Guide
This Refresher Quick Guide reviews the basics of Concur with links to resources where you can get more in-depth training. Refer to the Travel and Expense Portal for all Travel and Expense and Concur information.
Topics
If you provide support to help book travel or submit Expense Reports for a colleague, they can set you up as a Delegate in Concur to act on their behalf. You can also setup the Concur Profile on their behalf, once they have made you a delegate. Refer to the Job Aid: Managing Delegates for guidance on how to set up Delegates. Refer the Setting up Your Concur Profile Training Guide for additional information on how to setup a Travel and Expense Profile.
- Navigate to the Travel and Expense website and Log into Concur. Click the Profile icon on the top right of your screen.
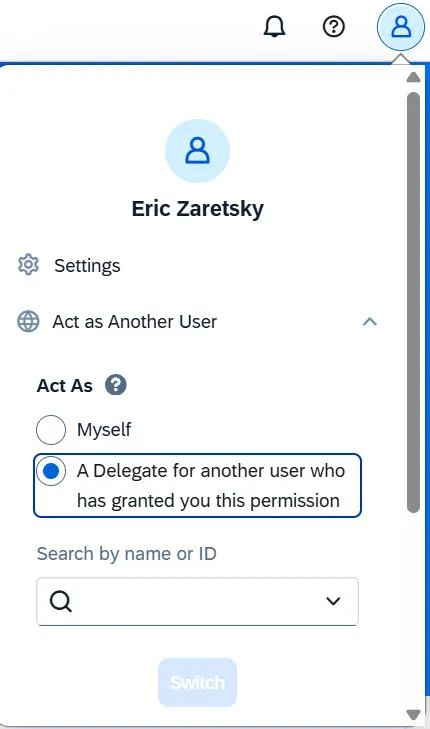
- Select Act as another user and select A Delegate for another user who has granted you this permission.
- Search by name or UNI of the colleague. Only those users that have given you Delegate access will appear.
- Select the name of the person you want to act on behalf of.
- Click Switch.
For complete instructions on completing Report Details, adding Expense Items to your Expense Report or the expense report of a Guest or Student, and submitting the Report into workflow, please refer to the Creating Expense Reports in Concur job aid. You can also use the Concur mobile app; refer to the Creating an Expense Report Using the Concur Mobile App job aid.
- Click the Navigation menu and then select Expense > Manage Expenses.
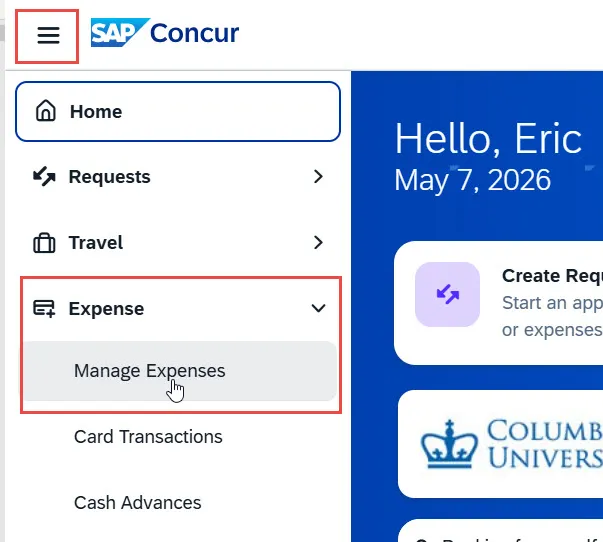
The Manage Expenses screen appears.
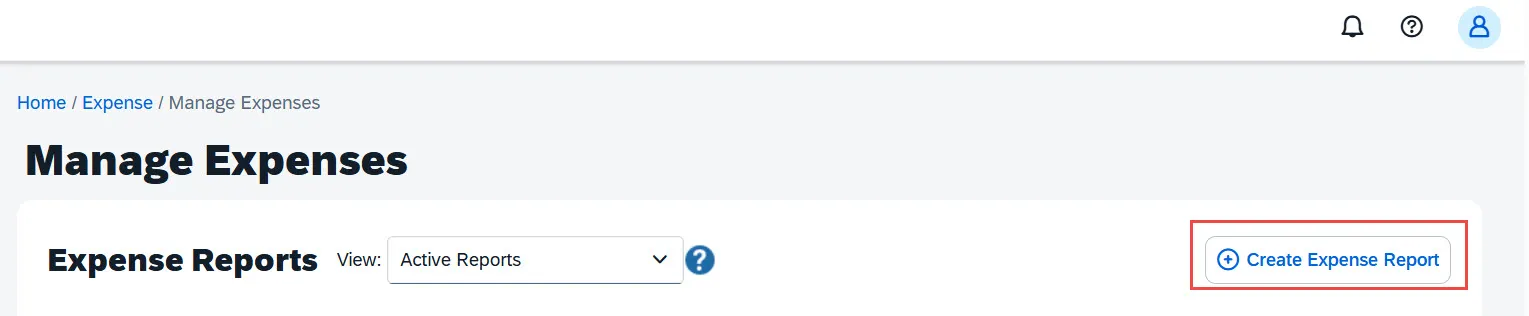
- Click the Create Expense Report button. The Create New Report screen appears. Refer to the training guidance for more detail.
To learn how to add a group meal to an Expense Report in Concur, exclude tax / tip, and itemize when the meal expense includes alcohol and/or exceeds the policy thresholds, refer to the Expensing Group Meals in Concur training guide.
After initially creating your Expense Report, you will be on the Manage Expenses screen of your Report.
- Click Add Expense.and select Manually Create Expense The Add Expense screen appears.
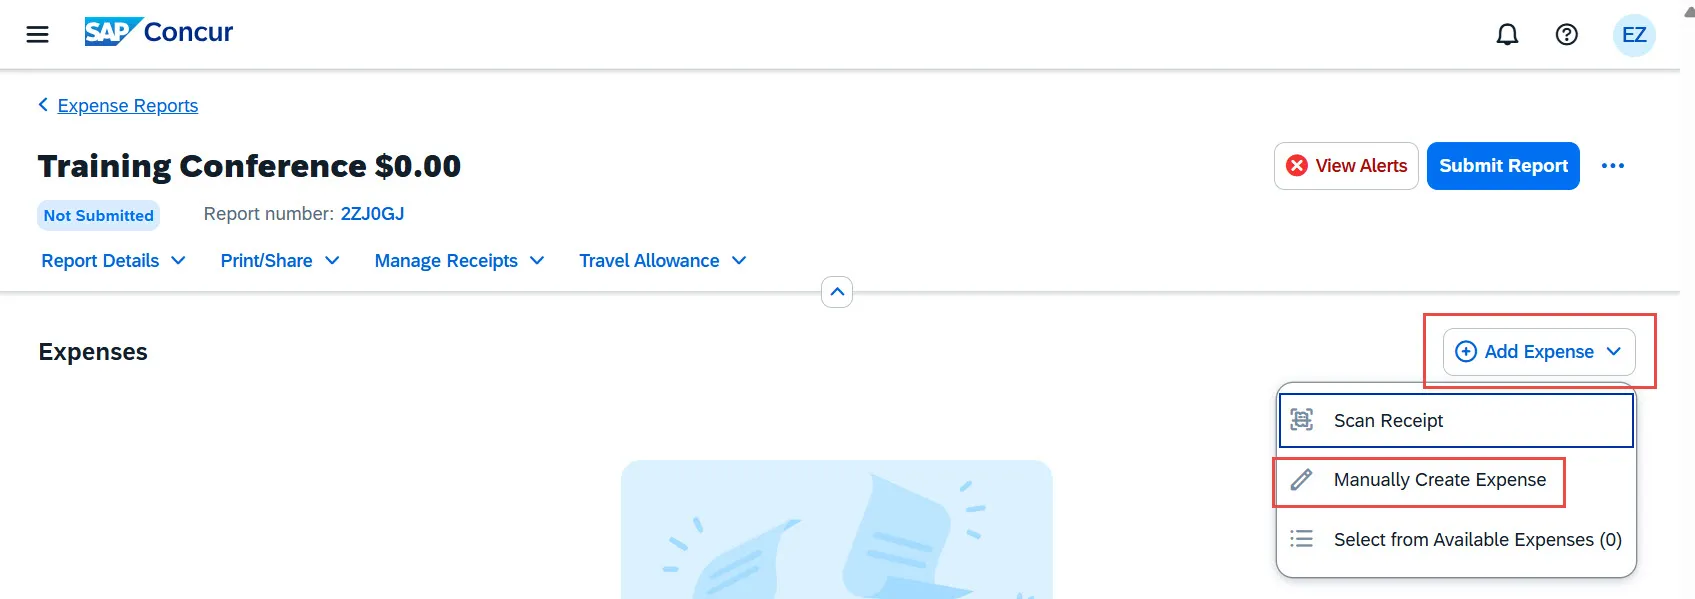
The Manually Create Expense screen appears.
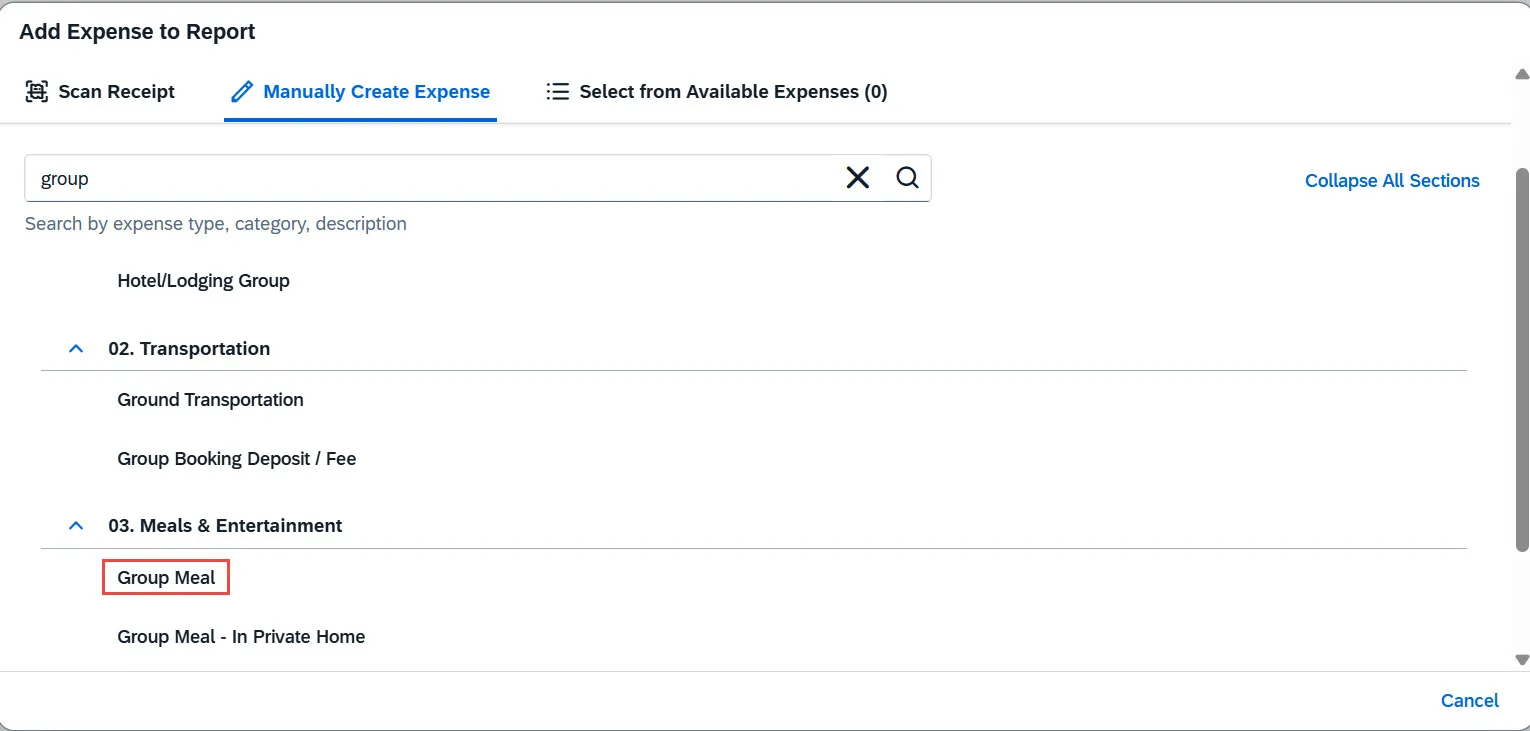
- Search and select the Group Meal Expense type. Refer to the training guidance to continue.
If you were required to submit a Pre-Trip Request, you will need to attach the approved Request to an Expense Report in order to be reimbursed for expenses. If you submitted a Travel/Cash Advance, you will need to attach the approved Request to an Expense Report in order to reconcile the advance. For complete detailed instructions, refer to the Reconciling Pre-Trip and Travel/Cash Advance Requests in Concur job aid.
- Navigate to Manage Requests to access the Active Requests. The Request must have an Approved status in order to reconcile it.
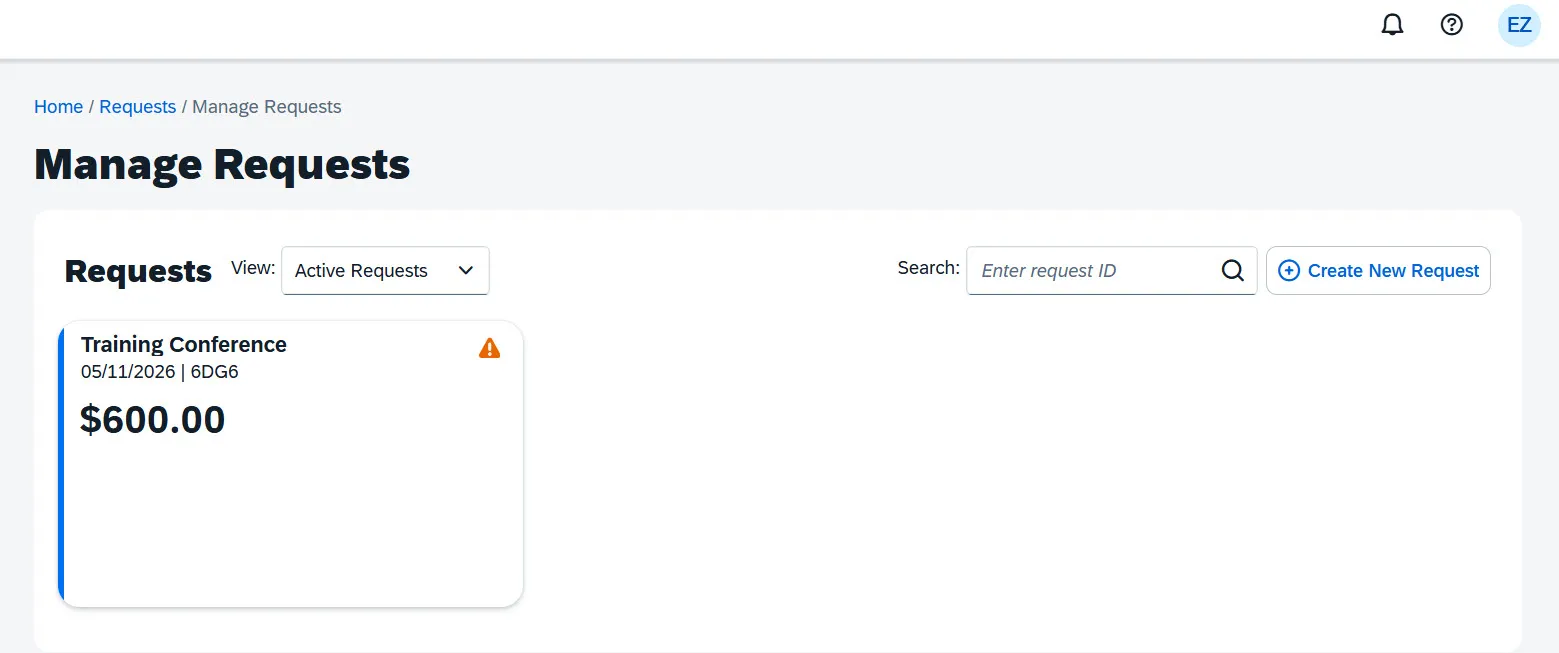
- Click the Request to open and click Create Expense Report. Refer to the training guidance for more detail.
If you used your Travel and Expense Corporate Card to make purchases or the Columbia Air/Rail Central Pay mechanism to purchase air or rail tickets, you must reconcile those transactions in an Expense Report after returning from your trip. Refer to the Reconciling Corporate Card and Columbia Air/Rail Central Pay Transactions in Concur video for detailed instructions.
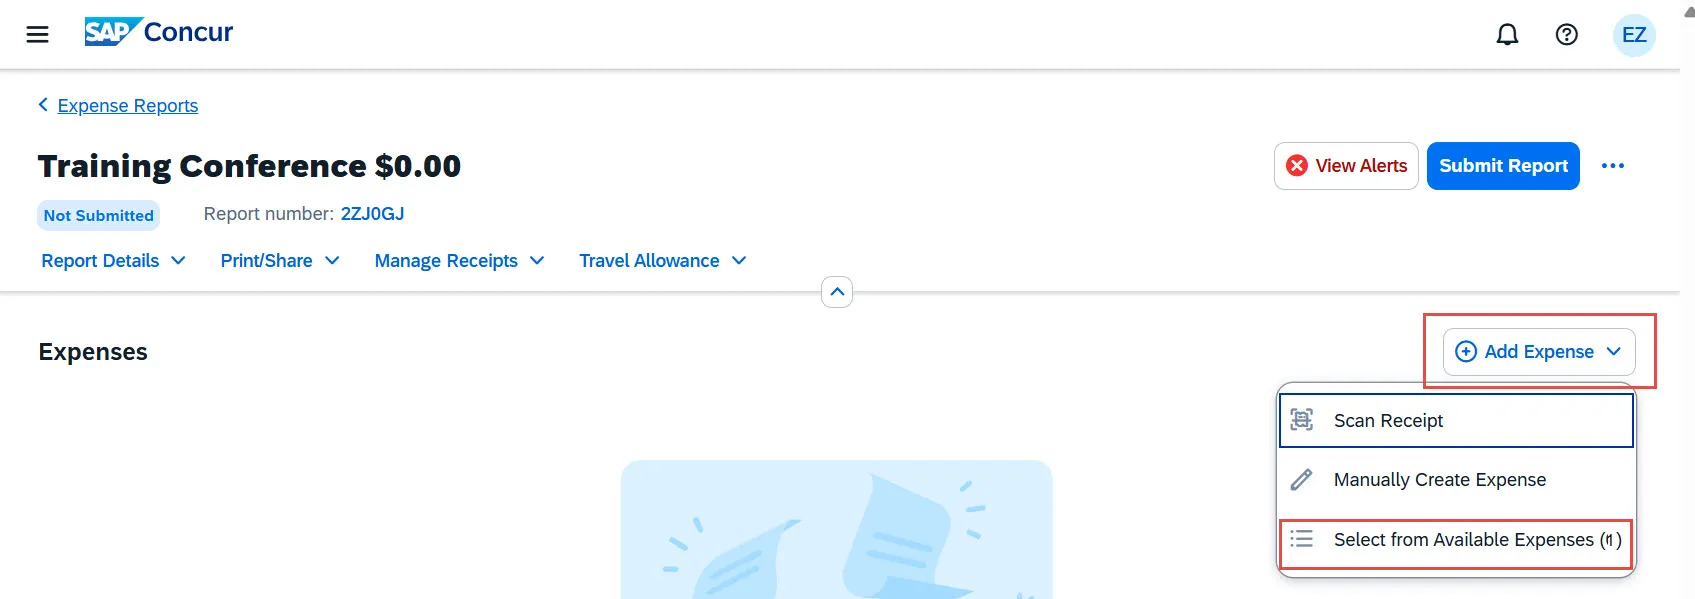
After initially creating your Expense Report, you will be on the Manage Expenses screen of your Report.
- Click Add Expense and select Select from Available Expenses.
The Add Expense screen appears.
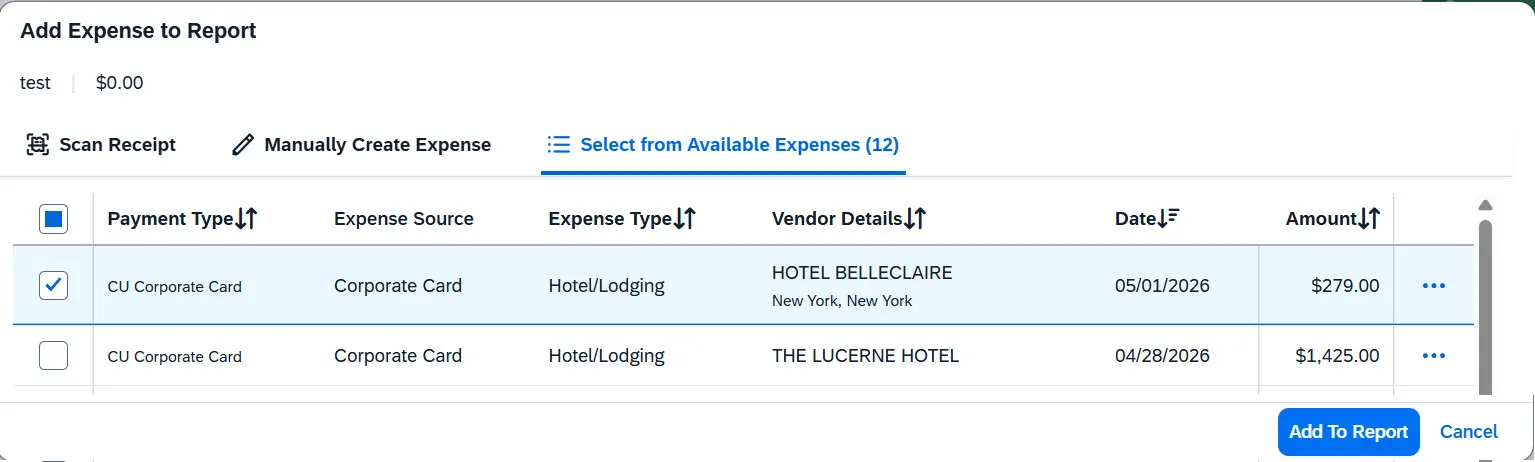
The Available Expenses tab displays unreconciled Corporate Card and Columbia Air/Rail Central Pay transactions.
- Select the check box for the transaction and click Add to Report. Refer to the training guidance for more detail.
Original receipts must be provided if the expense is equal to or in excess of $50 and for all air, lodging, and rental car expenses. For Expense items missing receipts, a Missing Receipt Declaration must be added and justification is required by the payee. The Missing Receipt Declaration cannot be added by a Preparer Delegate or Approver. Please refer to the Adding a Missing Receipt Declaration to a Concur Expense Item job aid for detailed instructions, including guidance on how to add additional supporting documentation.
- When viewing the Expense list in your Expense Report, where one or more Expense items are missing receipts, click the Manage Receipts drop down menu and select Missing Receipt Declaration.

The Create Receipt Declaration appears.
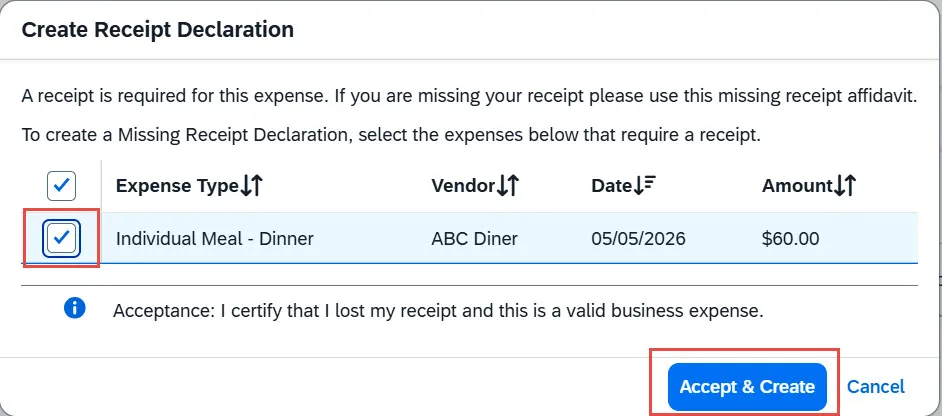
- Select the checkboxes for the Expense Items that are missing receipts and click Accept & Create.