Copying or Deleting General Journals or Internal Transfers
The purpose of this job aid is to provide guidance on how to copy and delete a general journal or internal transfer. You also have the ability to delete multiple Journals that you created at once. Select Central users will be able to delete Journals created by other users.
Last Revision: November 2023
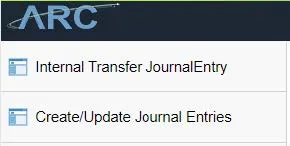
- In ARC, navigate to the Journals tile and then select Internal Transfer JournalEntry (for Internal Transfers) or Create/Update Journal Entries (for General Journals).
Or, For General Journals, Click Nav Bar > General Ledger > Journals > Journal Entry > Create/Update Journal Entries.
For Internal Transfers, NavBar > Columbia Specific > General Ledger > Internal Transfer Journal Entry. You can also use the Navigator Search.
- Click on Find an Existing Value tab.
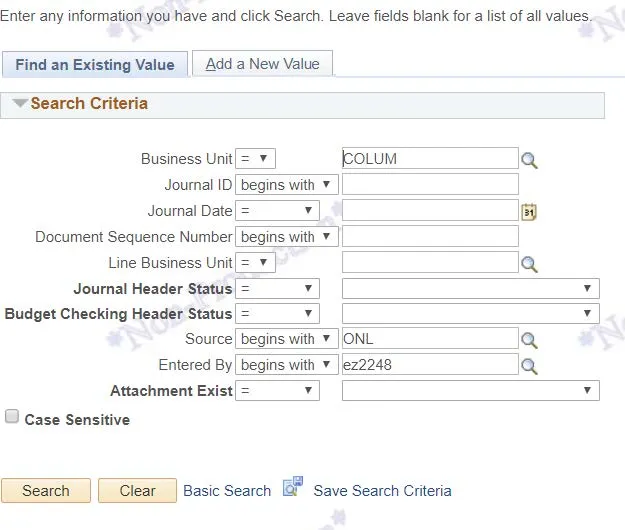
- Enter Search Criteria for the desired Journal Entry and click Search.
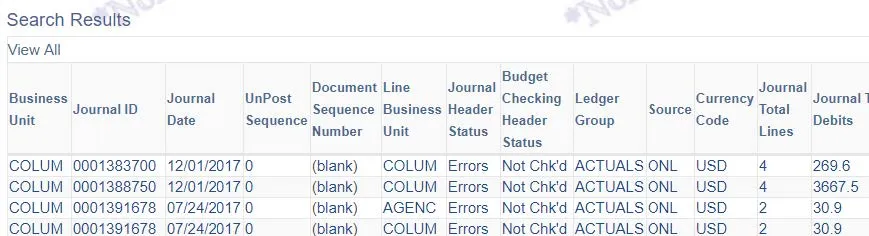
- Click the Journal ID of the desired Journal Entry form the search results to view the Journal Entry screen.
-
Click the Lines tab.
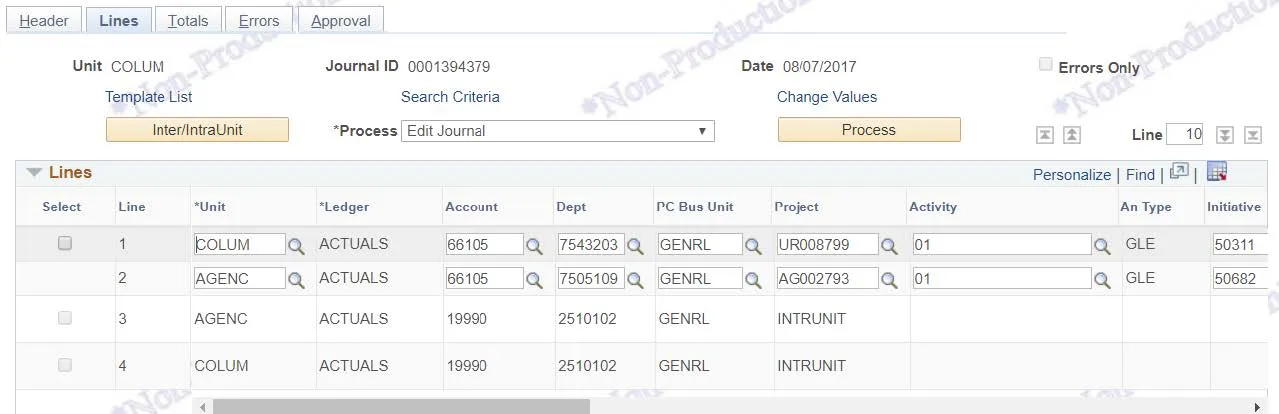
Details
- Select Copy Journal from the Process dropdown menu.

- Click Process. The Journal Entry Copy window appears.
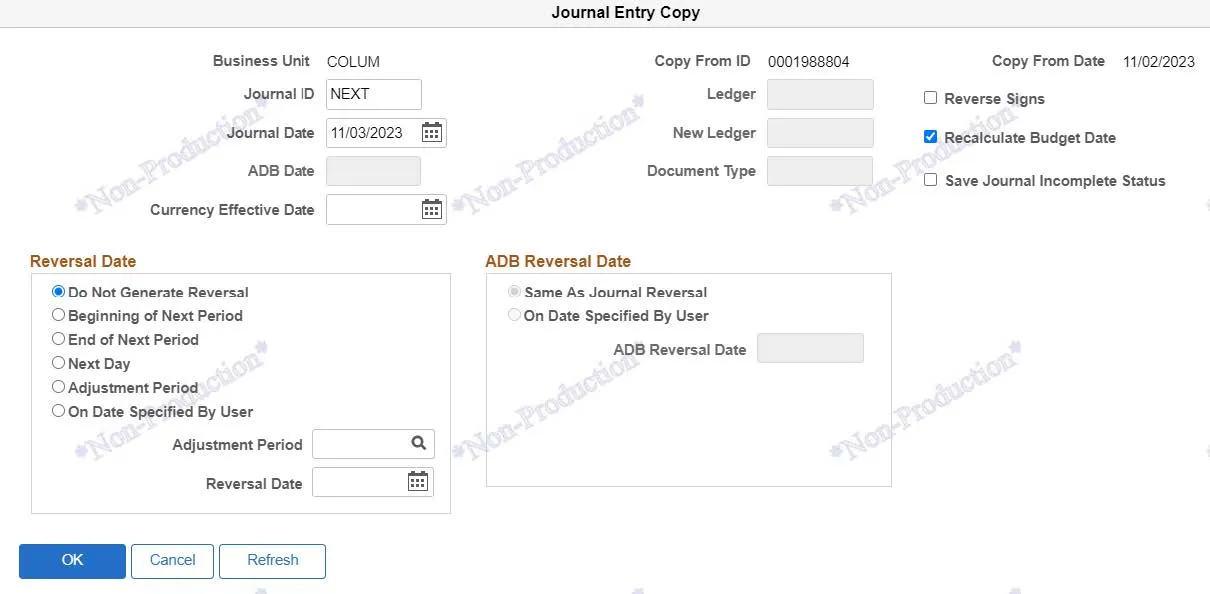
- Select the check box for Recalculate Budget Date. If desired, edit the Journal Date or other details.
- Click OK. The new journal is created, displayed, and ready to be Processed (edit validation, budget check, approvals and posting.)
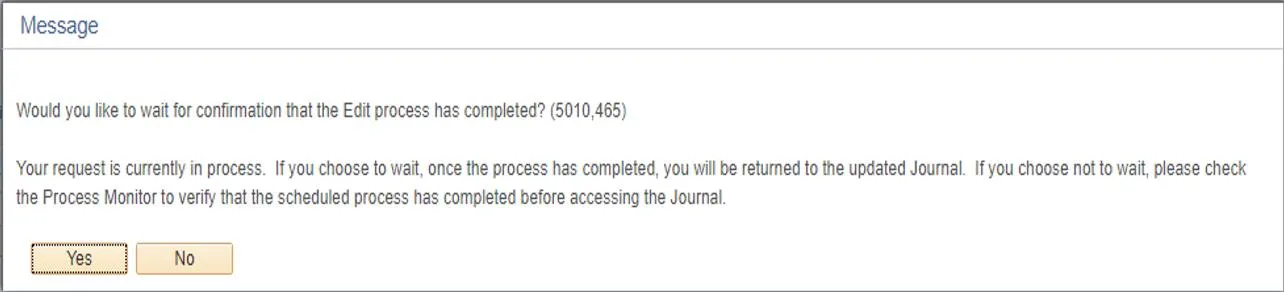
- After Processing the journal, click Yes for the confirmation Message. The option to wait for confirmation or proceed appears.
Note: See the section on accessing the Process Monitor. In addition, if there is a processing
error the journal will indicate the error - Clicking No allows you to work on something else while the process completes in the background.
- Select Delete Journal from the Process dropdown menu.

- Click Process.
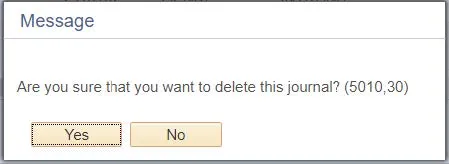
- Click Yes for the confirmation Message. The option to wait for confirmation or proceed appears.
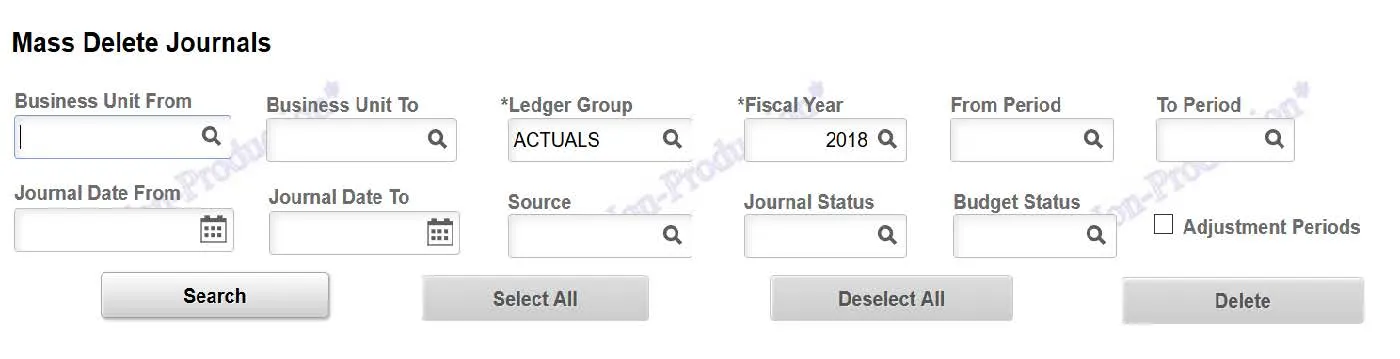
You can delete multiple journals at once using the Mass Delete Journals page. You will only be able to delete Journals that you created. Select Central users will be able to delete Journals created by other users.
- Click NavBar>General Ledger>Journals>Process Journals>Mass Delete Journals. You can also use the Navigator Search. The Mass Delete Journals page appear.
-
Enter Search criteria in the fields to locate Journals
-
Click Search. A list of matching Journals appears.
-
Select the desired Journals to delete. You can use the Select All or Deselect All buttons.
-
Click Delete.
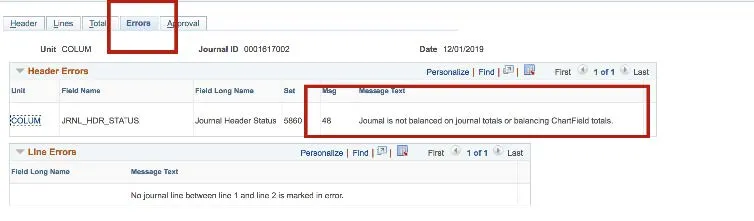
ARC verifies that Journals are balanced (i.e., debits equal credits) and ChartField values are valid.
Only successfully validated journals are eligible for posting. The Process Monitor allows you view the Run Status and Details of Journals.
- Click PeopleTools > Process Scheduler > Process Monitor.

- Search by User ID or Process Instance ID referenced in the Process Confirmation message.
- Click Refresh. The Process List appears. If there are Journal errors, the Run Status displays ‘Warning’.
-
To view errors, navigate back to General Ledger > Journals > Journal Entry > Create/Update Journal Entries, search for your Journal ID, and click the Errors tab.