Creating and Approving Internal Transfer Journal Entries in ARC
This job aid contains instructions on how to create, approve and post an Internal Transfer Journal Entry in ARC.
You will learn how to:
- Run the journal edit process
- Run the budget checking process
- Submit the internal transfer journal for approval
- Post the internal transfer journal
Last Revision: July 2021

Details
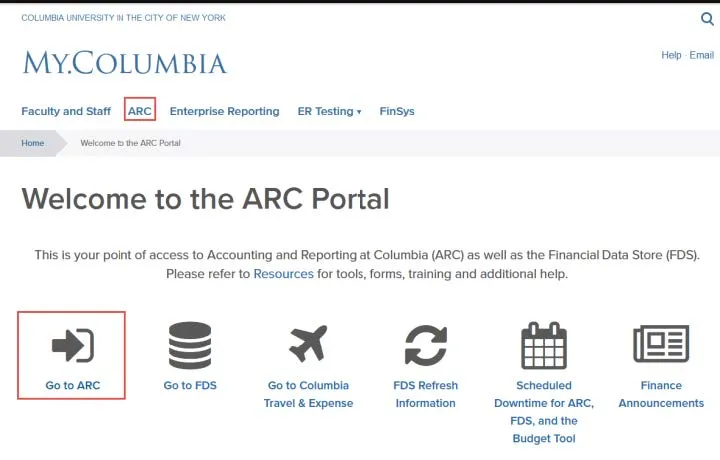
- From my.columbia.edu, click ARC and then Go To ARC.
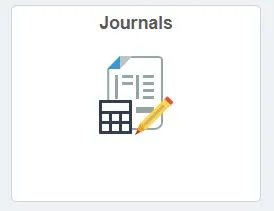
- Click the Journals tile.
Or, click the NavBar > Main Menu > Columbia Specific > General Ledger > Internal Transfer JournalEntry.
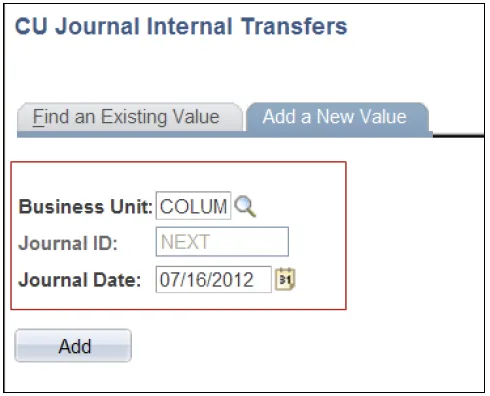
The CU Journal Internal Transfers appears. Business Unit (COLUM), Journal ID (NEXT) and Journal Date will be prepopulated. Click Add.
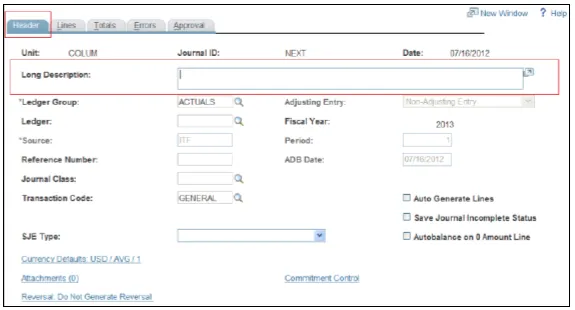
- In the create Journal Entry Page, click the Header tab. Enter a Long Description and click on the Lines tab.
- Enter the Journal Line information and click Save.
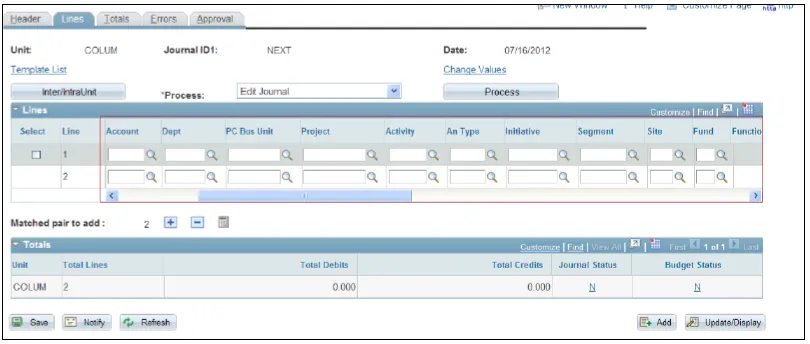
Business Unit, Account, Department, PC Bus Unit, Project, Activity, Initiative, Segment, Site (if applicable) and Amount. Speed Type, Fund and Function will be left blank.
Note: When an account number is entered, the matched pair account defaults on the second row.
Note: It is very important to remember that in ARC, credits must be entered as negative numbers. Therefore, if you are crediting your ChartString for a recovery and want to debit another ChartString for the charge, you must enter the recovery as a negative number and the charge as a positive number.
- Click the + button to create an additional Journal Entry line and populate the journal information in the additional rows.

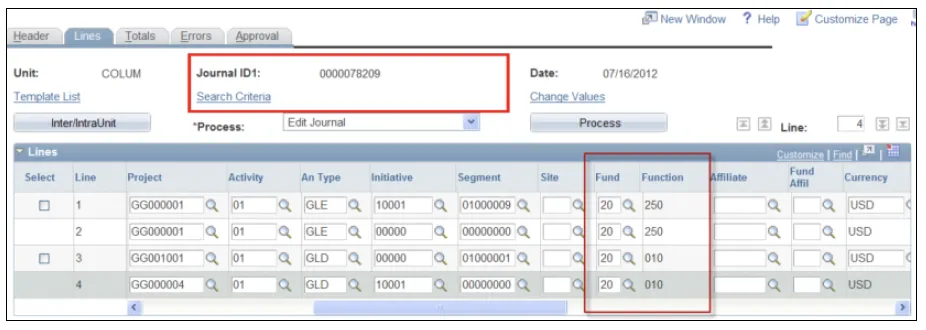
- Click the Save button. The journal will be saved and you will notice the following updates:
- Journal ID will be changed from NEXT to the next Journal ID number available. This number will be generated automatically by the system
- Journal Lines are updated with input data set
- Verify that total debits equals total credits
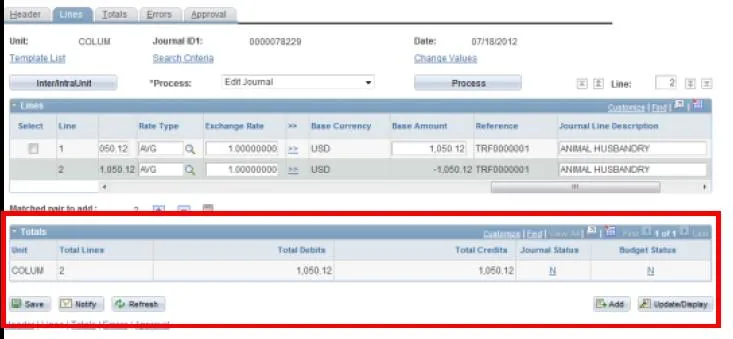
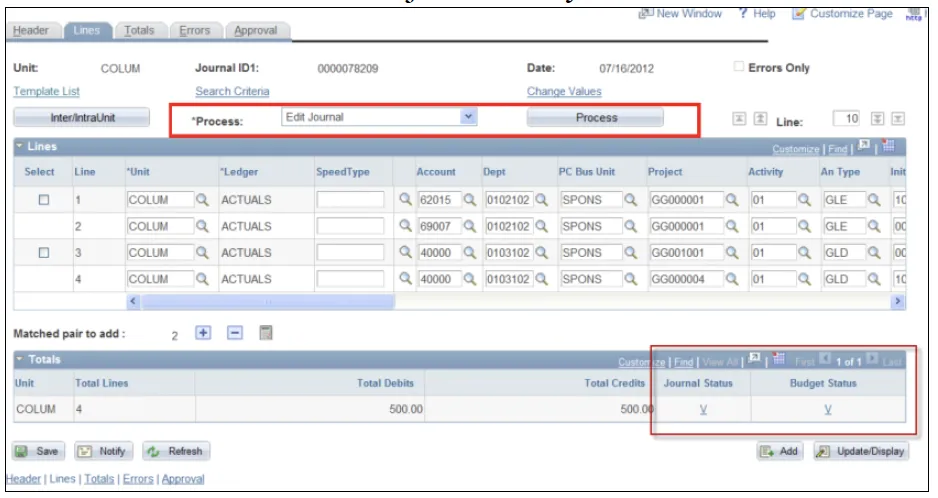
- Select Edit Journal in the process dropdown menu. Click the Process button. The Edit Journal process performs sets of data validations on the journal entry lines entered.
The option to wait for confirmation or proceed appears.
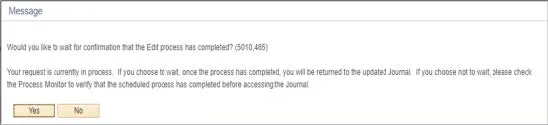
- Clicking No allows you to work on something else while the process completes in the background. See the section on Using the Process Monitor to view the Journal processing status. Click Yes to remain on this page to continue.
The Journal Status and Budget Status are changed from N to V. “V” stands for valid entry, meaning no journal header or no journal line is marked in error and for budget, no journal entry Budget Checking Exceptions.
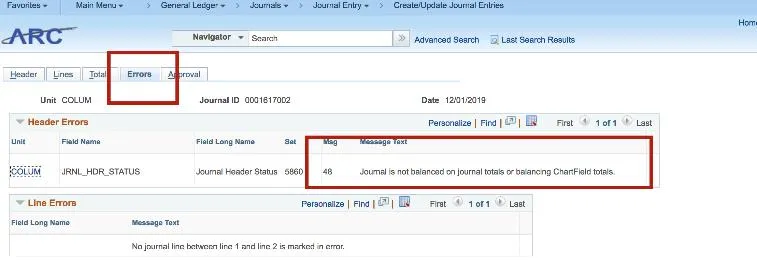
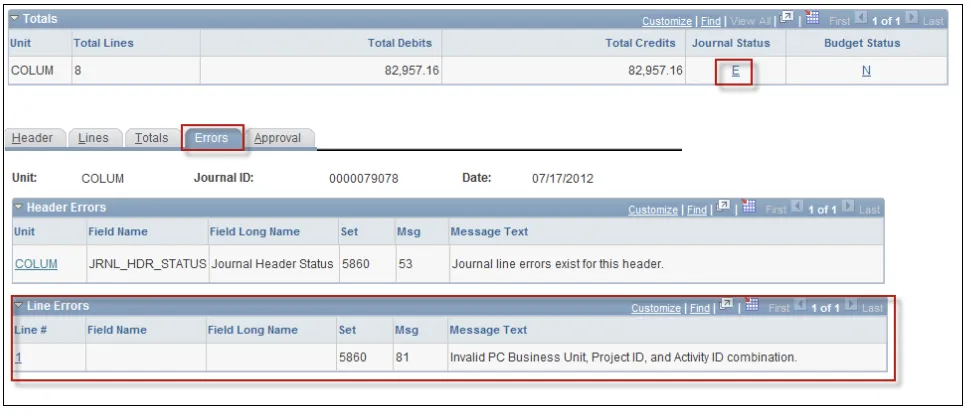
If the Journal Status or Budget Status displays an “E” it means that there is an error in the journal entry. Click on the Errors tab to find the detail on the error in order to correct the journal and then repeat step 8.
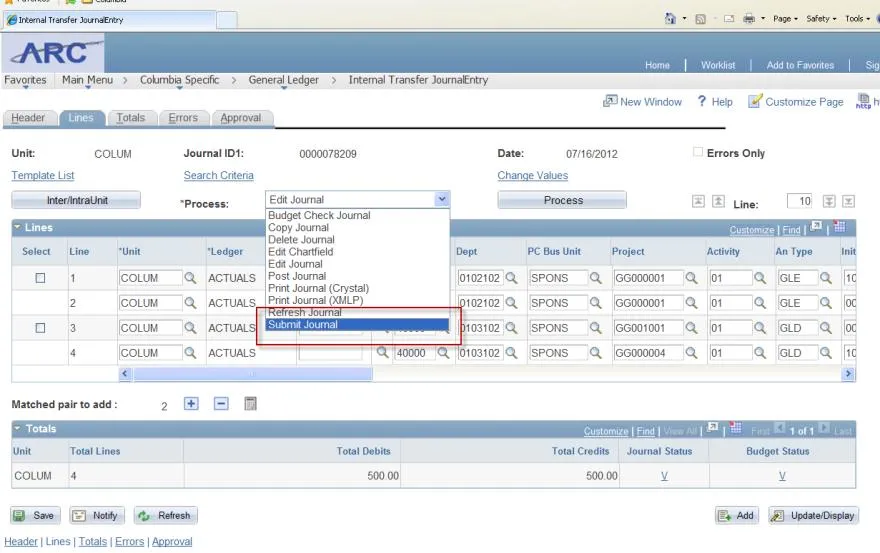
- From the Lines tab, go to the Process dropdown menu and select Submit Journal. Click the Process button.
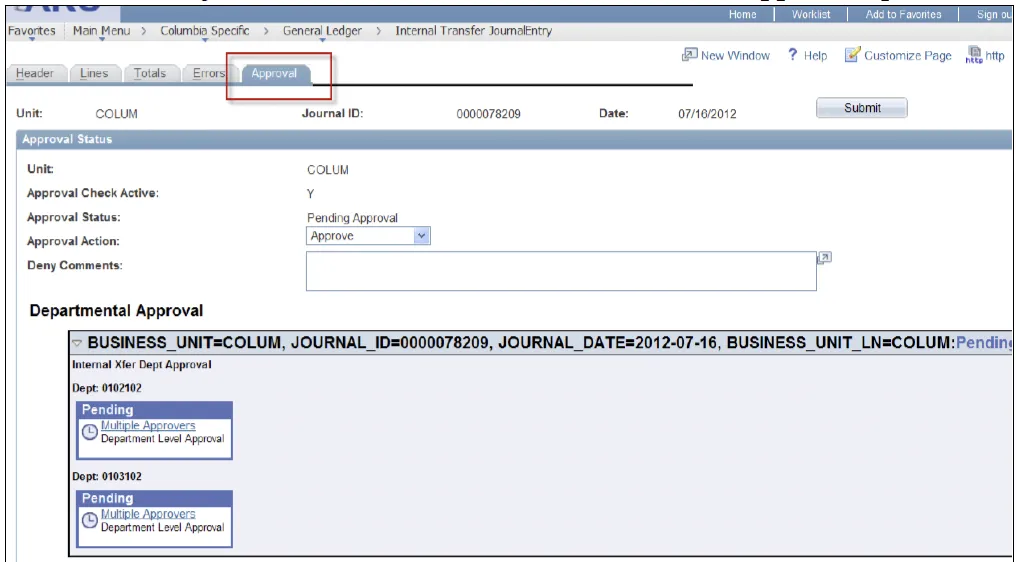
- Click the Approval tab. The Approval page appears on the screen. The Approval Action will say Approve which means that the journal has been submitted and is in the approval queue.
Note: There may be a number of Department Approvers for this transaction as well Central Approvers.
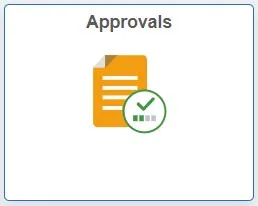
- Click the Approvals tile on the ARC home screen.
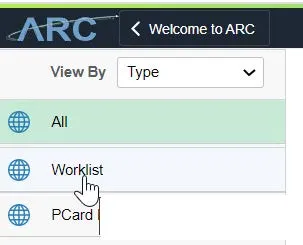
- Click the Worklist tab.
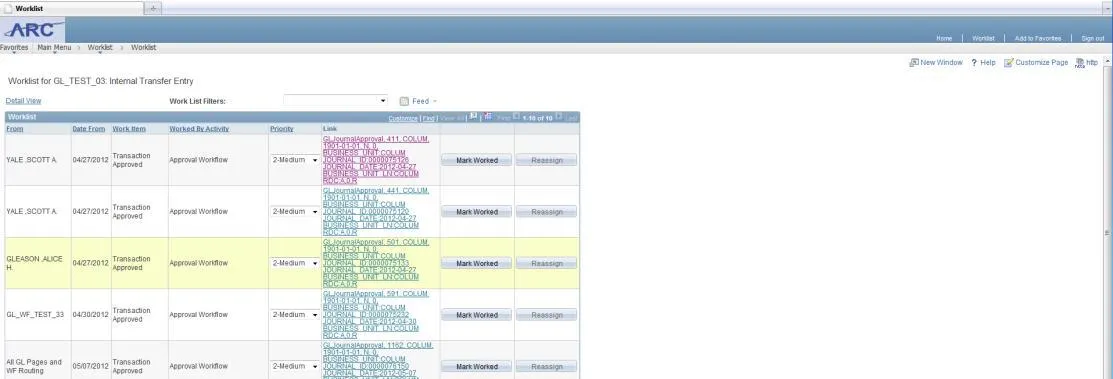
- In the Worklist, click the Link that displays the Journal ID to approve.
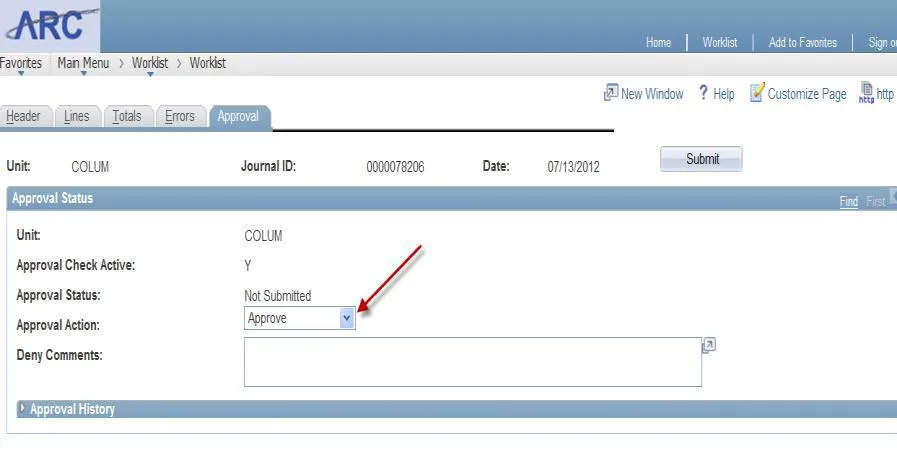
- Click the Approval tab. Make sure that the Approval Action dropdown menu is set to Approve. Click on the Submit button to approve the journal.
When the journal is approved, the section showing approvals appears green.
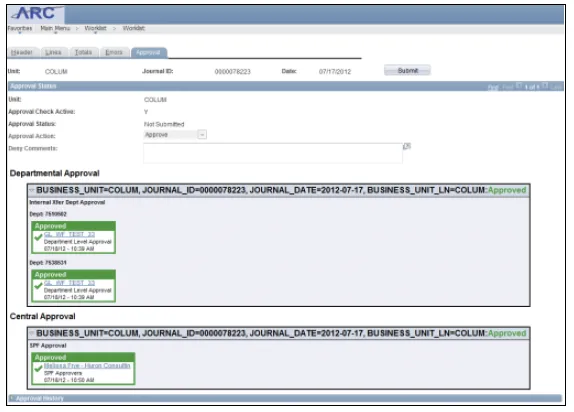
If there are additional approvals required, the entry will be routed to the appropriate Worklists.
If you are the final approver, see the Posting the Journal Entry section for instructions.
Note: You are the final approver if you are the listed last on the approval screen. In the screenshot above, the Central Approval is the final approver and will need to post this entry.
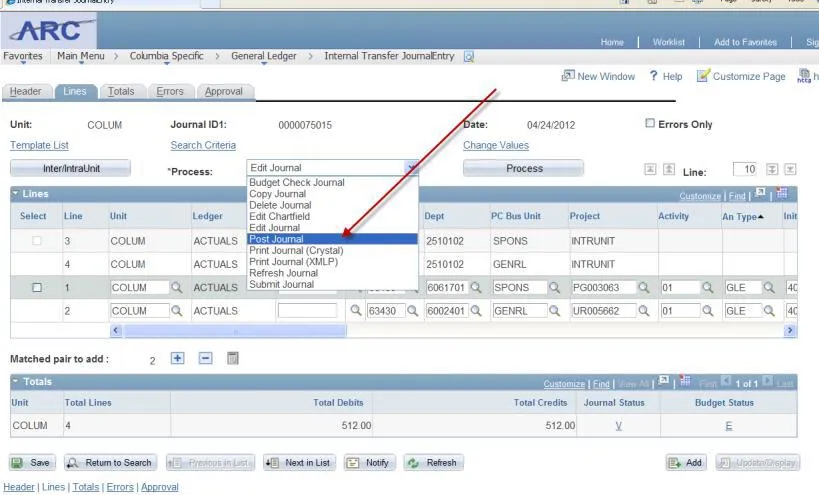
- After you approve the journal, click the Lines tab. Select the Post Journal option from the Process dropdown menu and click the Process button.
A confirmation message appears.
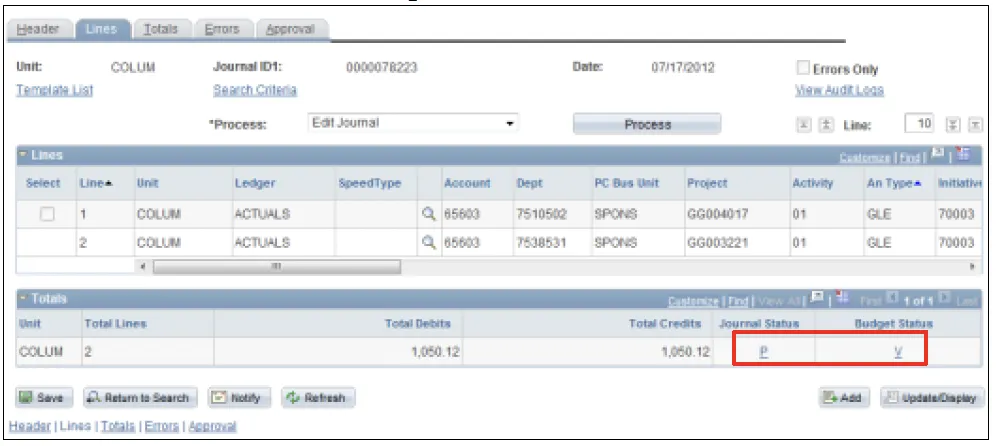
- Click OK. The Journal is now posted and the Journal Status is P and the Budget Status is V.
ARC verifies that Journals are balanced (i.e., debits equal credits) and ChartField values are valid.
Only successfully validated journals are eligible for posting. The Process Monitor allows you view the Run Status and Details of Journals.
- Click the NavBar > PeopleTools > Process Scheduler > Process Monitor.
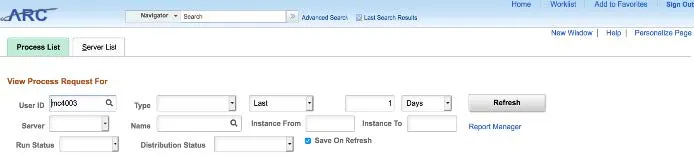
- Search by User ID or Process Instance ID referenced in the Process Confirmation message.
- Click Refresh. The Process List appears. If there are Journal errors, the Run Status displays ‘Warning’.


- To view errors, navigate back to General Ledger > Journals > Journal Entry > Create/Update Journal Entries, search for your Journal ID, and click the Errors tab.