Creating and Editing Forms and Documents Files on Columbia Sites
This training guide contains instructions for creating or editing Forms and Documents files on Columbia sites.
Last Revision: July 2023
What is the forms and docs library?
The forms and docs library is where documents are hosted on the site and accessed by users. The purpose of housing documents within their own content page type is for ease of updating. When you update the document on the document content page, any instance where the document page is linked throughout the site will be updated as well, minimizing the upkeep we must do to keep the content our site current and accurate. The section is titled “Forms and Documents” because some of the PDFs and Excel Sheets uploaded might be forms that users need to print or fill out.
Please don’t click on the Forms button on the top navigation bar when you’re logged into the site – this is something completely different.
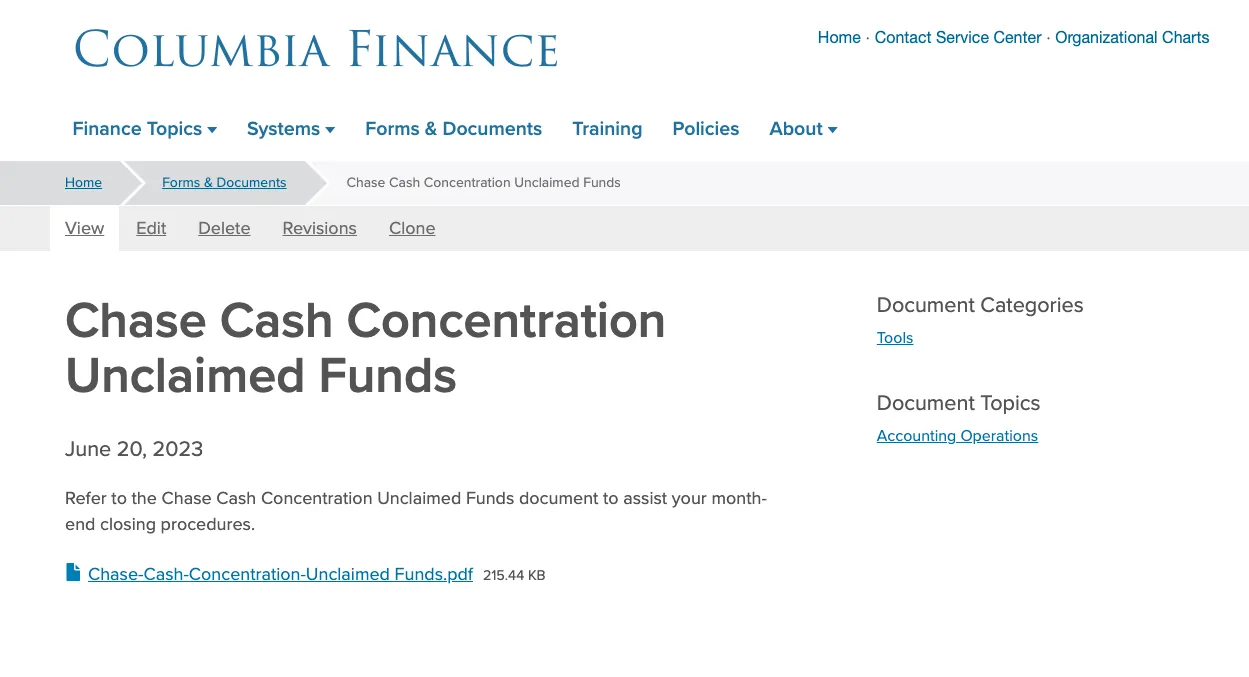
Example of a document content page:
Example of the forms and docs library:

This is for when you are adding a new document to the library that hasn’t previously existed on site. If a previous version of the document exists (example, Cost of Attendance Document from last year) please edit the existing document content type rather than create a new one.
- Log in to the site you’re trying to edit. To log in, go to the homepage URL and type “/user” at the end of the URL (do not include the quotation marks), then hit Return to navigate to that page. You will be asked to authenticate, which will log you into the site and return you to the homepage.
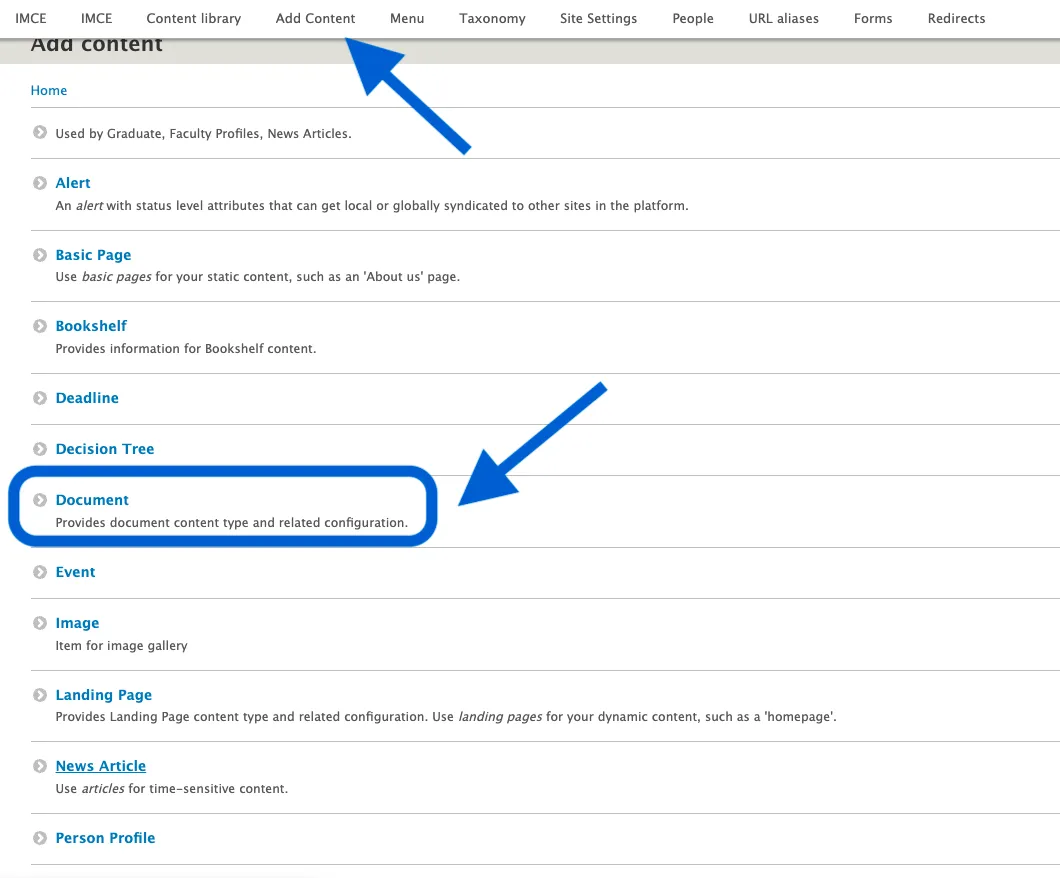
- On the editor toolbar at the top of the page, Click Add Content. You will be taken to a list of different content items you can add. Click Document.
- Fill in the Title Field with the title of your document. Add the current date to the Last Updated Field.
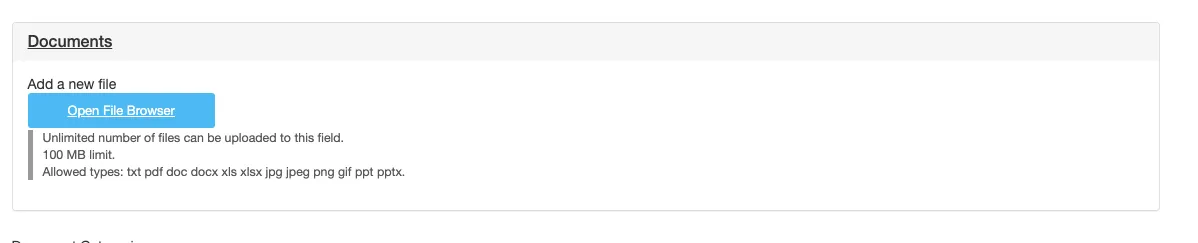
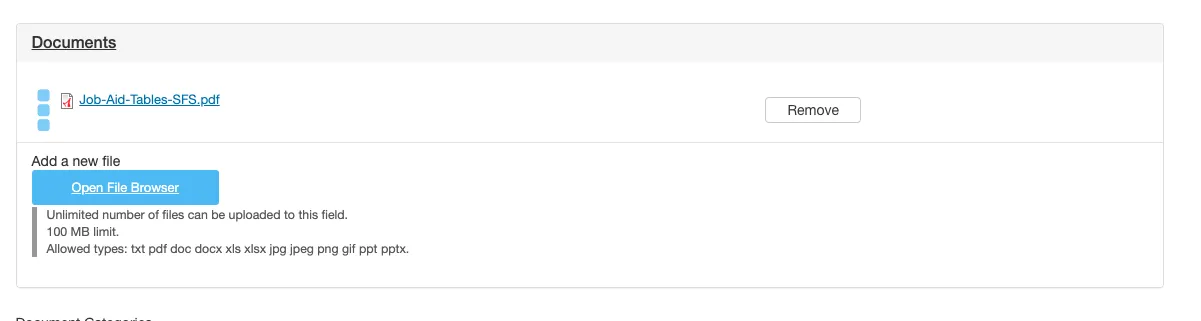
- Click Open File Browser to add your new document. This will take you to the IMCE.
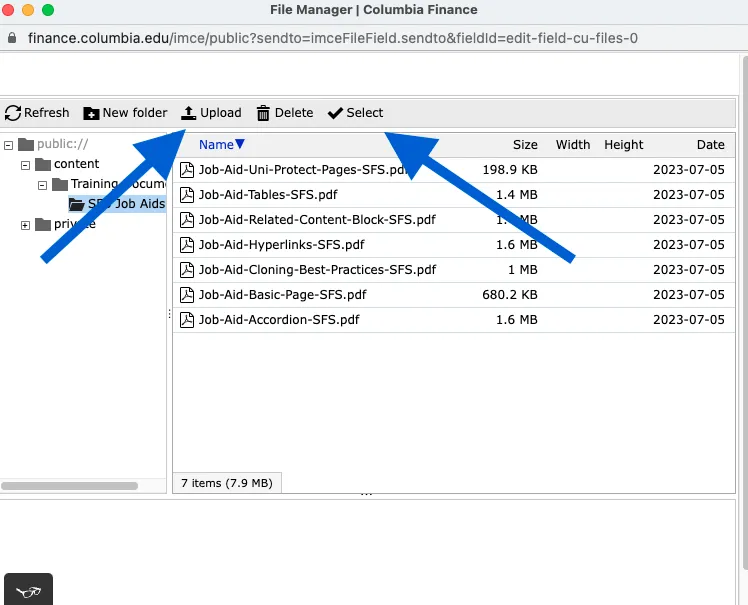
- Within the IMCE, find the folder where your content will be housed. It is important to keep the IMCE organized so other users can find what they are looking for. Once you find the correct folder for your new document, Click Upload. Once your file has been uploaded into the IMCE, Click Select.
After you click select, you will be brought back to the back end of the document page and your document will appear here.
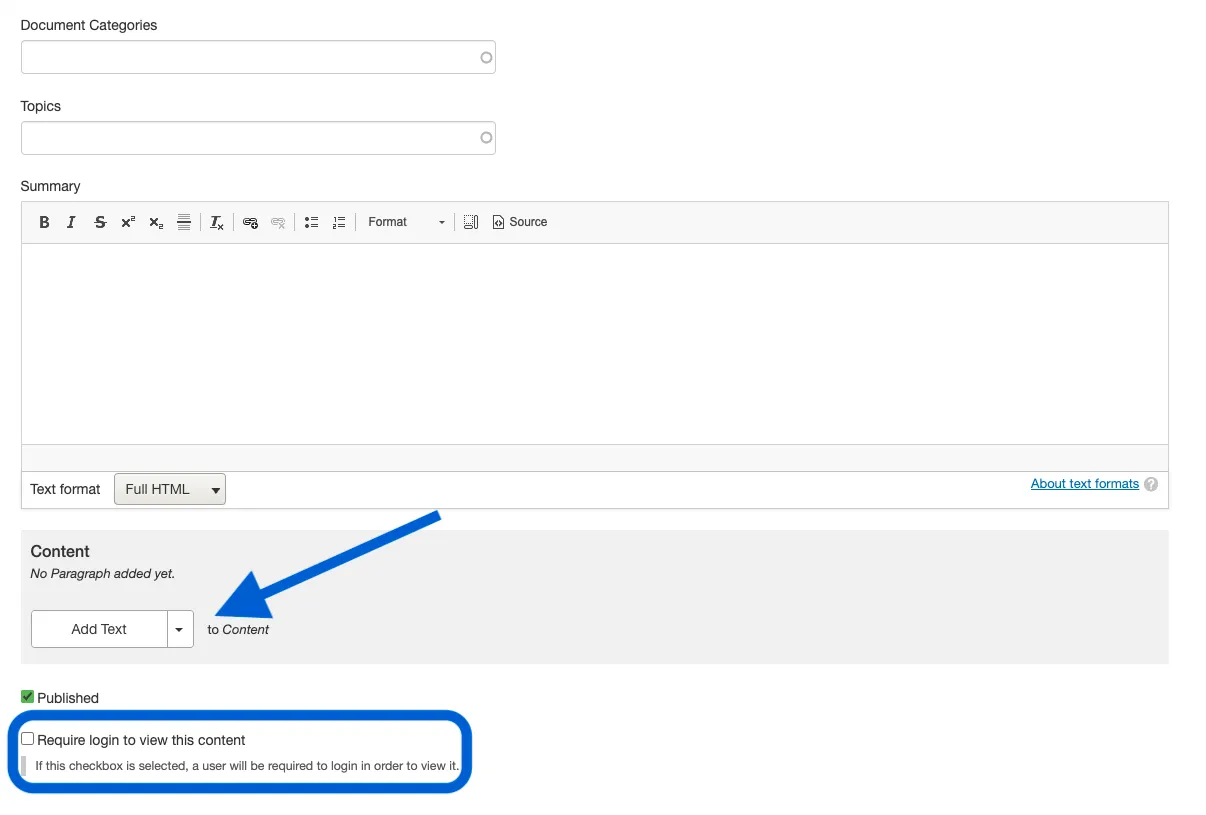
- Fill in the Document Categories and Topics fields with the corresponding content. The taxonomy will autofill as you type (ex. If the category is “Tools” and you type the letter T, the category “Tools” will appear).
- Add a brief description of your document to the Summary Field. This is what will appear in the larger forms and documents library menu to give users information about your document.
- Below the summary, Click Add Text and add the brief description of your document there too. This text will appear on the document page itself above where users will click on the link to your document.
- If you want to keep this document uni-protected Click Require Login to View This Content.
- Click Save to Create the Document Page
- After you select Save, you will be brought back to the user view of the document page you just created. There will be a green bar near the top navigation to alert you the document page has been created. Your new changes will appear immediately on the page.
This is when the document you want to add to the site already exists in a previous iteration. You must update the document on the document content page, rather than locally on the various basic pages it may be referenced, because updating here will update the content everywhere it is linked.
- Log in to the site you’re trying to edit. To log in, go to the homepage URL and type “/user” at the end of the URL (do not include the quotation marks), then hit Return to navigate to that page. You will be asked to authenticate, which will log you into the site and return you to the homepage.
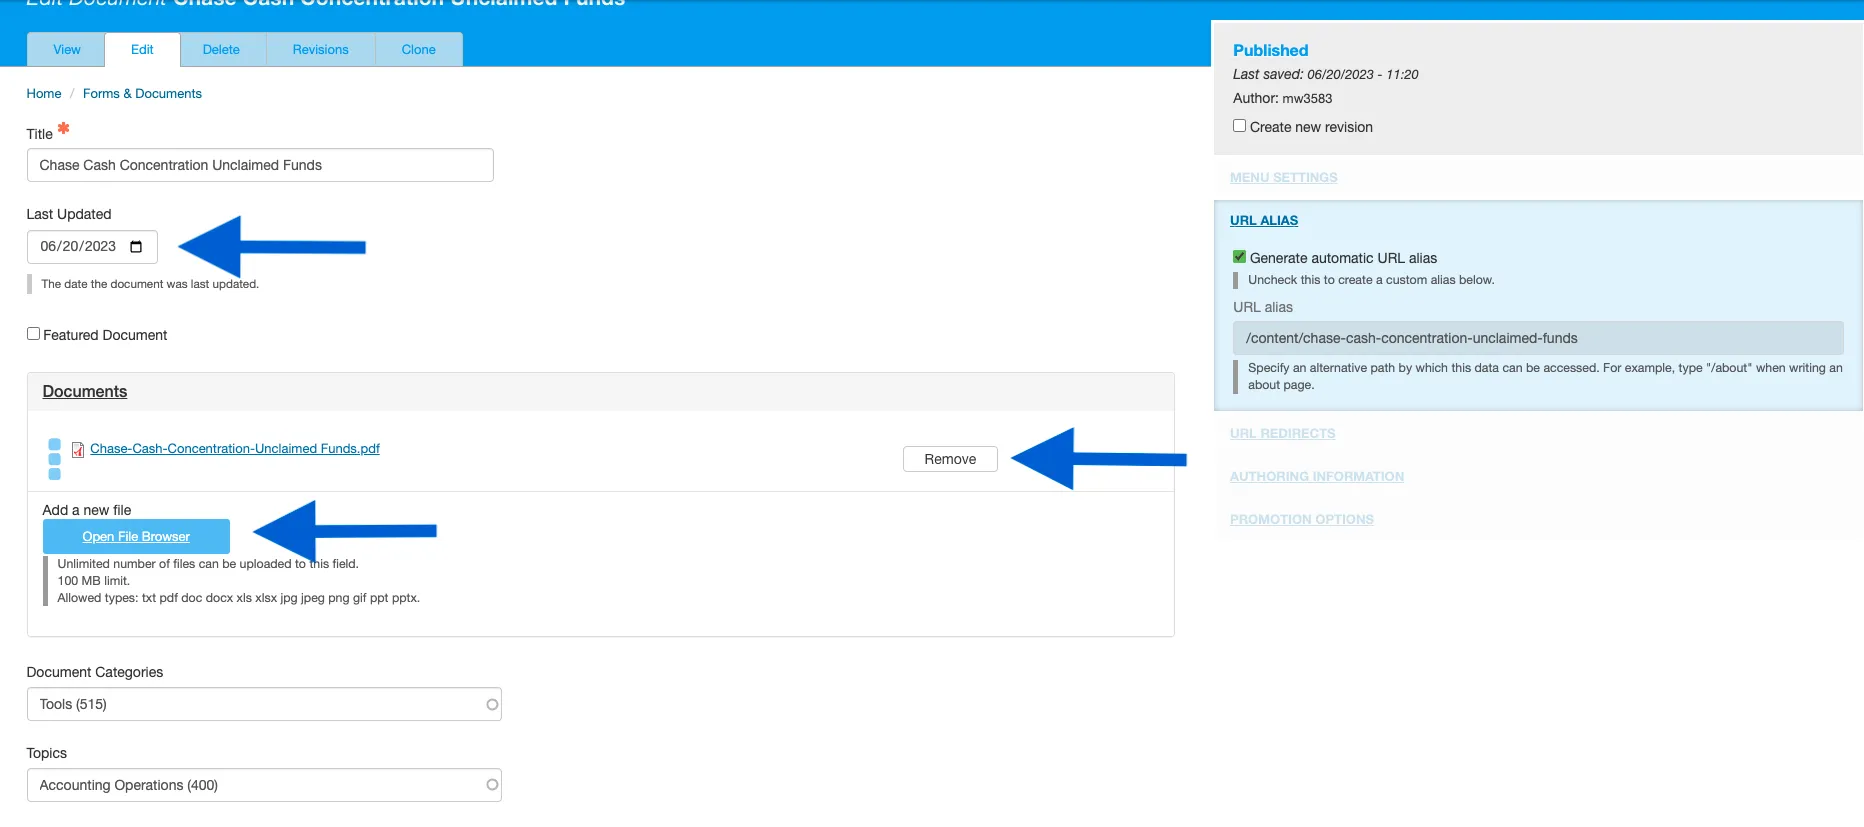
- Look for the editor ribbon on the page and select Edit. This ribbon is toward the top of the page underneath the main navigation menu. It will only appear if you are logged into the site. Once you click Edit, you will be taken to a backend editor’s view of the page.
- Click Remove on the document you want replace. Click Open File Browser to add the new document to the IMCE. This will take you to the IMCE.
- Within the IMCE, find the folder where your content will be housed. It is important to keep the IMCE organized so other users can find what they are looking for. Once you find the correct folder for your new document, Click Upload. Once your file has been uploaded into the IMCE, Click Select.
- Update the Last Updated Date Field to the date the new document was uploaded. If the document hasn’t significantly changed from the prior version, you should not need to update the summary and text box along with the date.
- Scroll down to the bottom of the back end of the page and select Save.
- After you select Save, you will be brought back to the user view of the document page you just edited. There will be a green bar near the top navigation to alert you the document page has been created. Your new changes will appear immediately on the page

While editing a page, if you accidentally delete the wrong content and need to start over, simply click the back arrow in the top left of your browser or close out of the browser tab or window completely.
As long as you do not save any mistakes you will not publish any mistakes.
If you need assistance creating, editing, removing, or recovering an accordion on your website, please contact the Finance Web Team at [email protected] with a summary of your needs.