Creating Expense Reports in Concur
Last Revision: March 2026
This job aid details how to create Business and Travel Expense Reports in Concur along with adding Expenses to your Report. This will cover the different three types of expense reports:
- Business Expense Report - For necessary and reasonable expenses that an employee incurs in the ordinary course of business where there is no overnight stay due to travel.
- Travel Expense Report – For necessary and reasonable expenses for which an individual may incur an overnight stay while traveling on behalf of the University. One day travel without an overnight stay is considered a business expense.
- Non-Profiled Payee Expense Report – An expenses report created and submitted on behalf of a student or guest of the University
For more details and examples, please refer to the Concur Travel and Expense Training.
Details
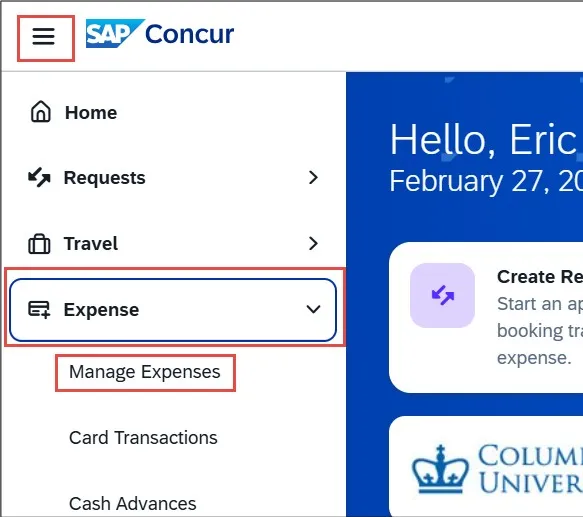
Navigate to https://travel-expense.finance.columbia.edu/, Log into Concur and use the Side Navigation to select Manage Expenses. The Manage Expense screen appears
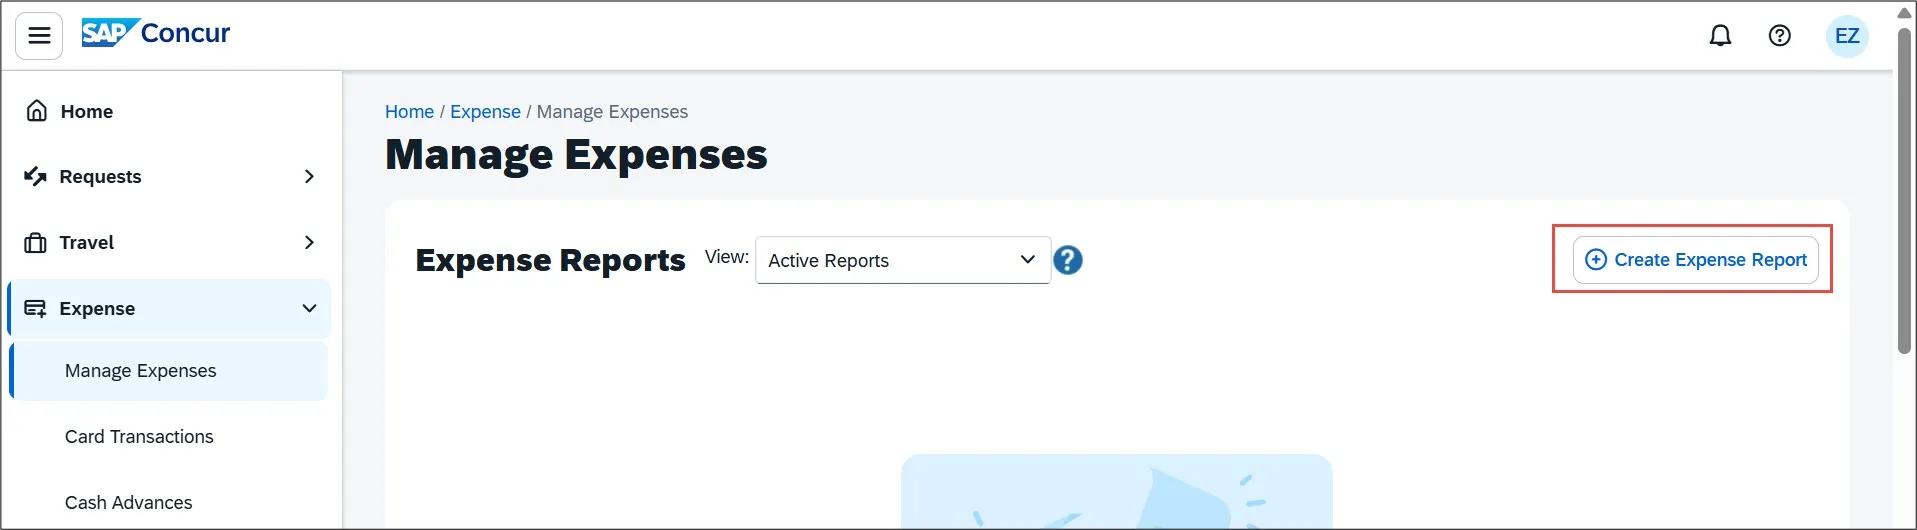
Click Create Expense Report. The Create Expense Report screen appears.
Creating a CU Business Expense Report
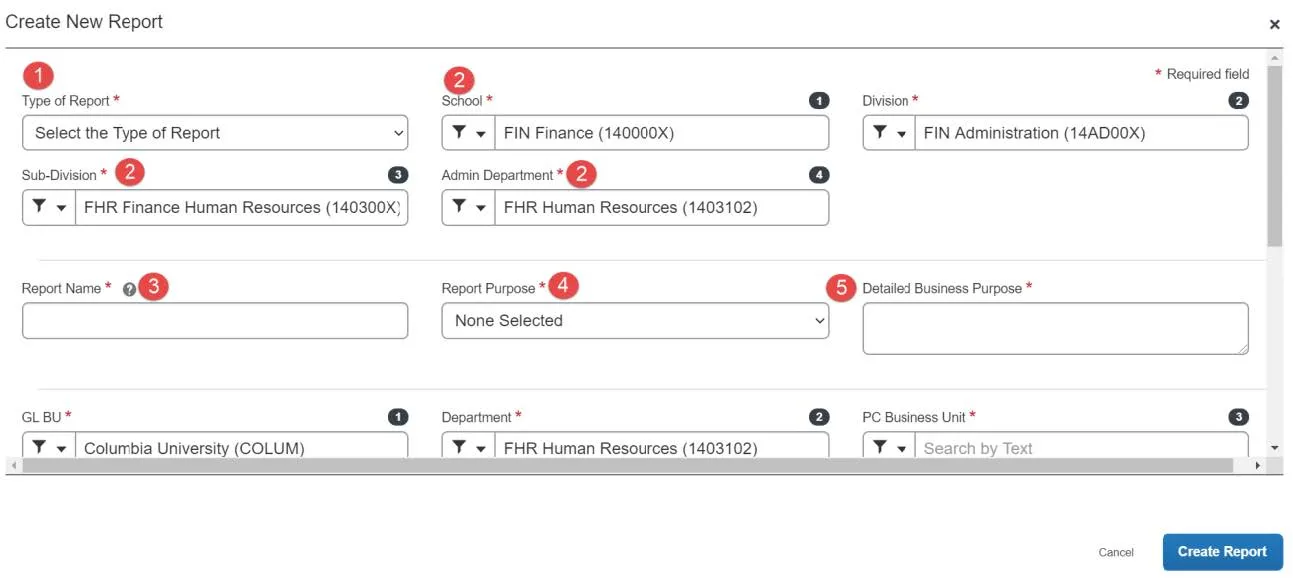
- Click the Type of Report dropdown and select CU Business Expenses.
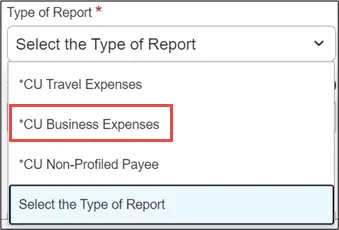
- The School, Division, Sub-Division and Admin Department default from your Concur Profile. You can edit them for this Report, if necessary. Note: The completed fields displayed in the graphic above are for example purposes only.
- Type a Report Name.
- Select a Report Purpose.
- Type a Detailed Business Purpose.
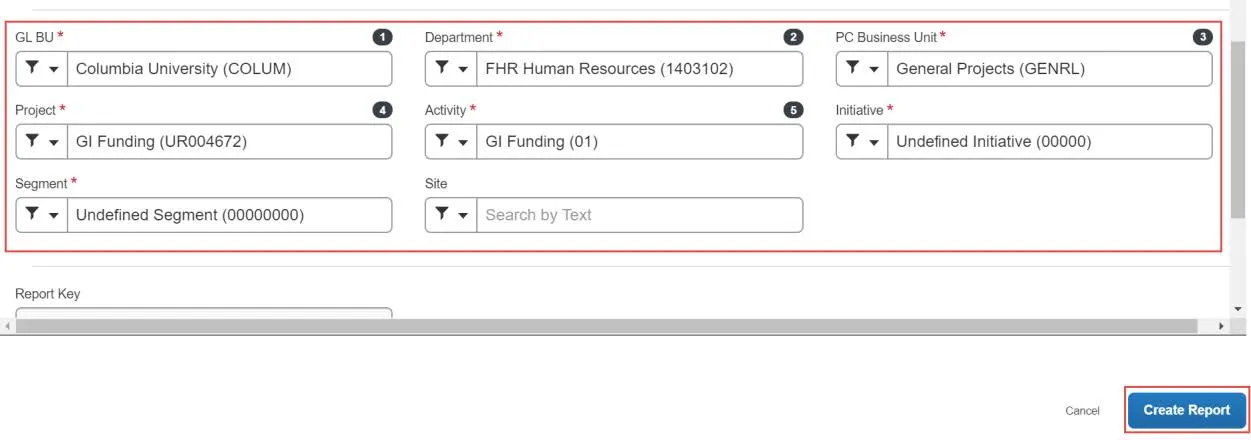
- The ChartFields default from your Concur Profile. You can edit them for this Report, if necessary.
-
Click Create Report. You can add Expense Items such as Meals, Ground Transportation, and Supplies.
Note: The ChartFields displayed below are for example purposes only. Please ensure that your ChartFields are relevant and correct for your Expense Report.
Creating a CU Travel Expense Report
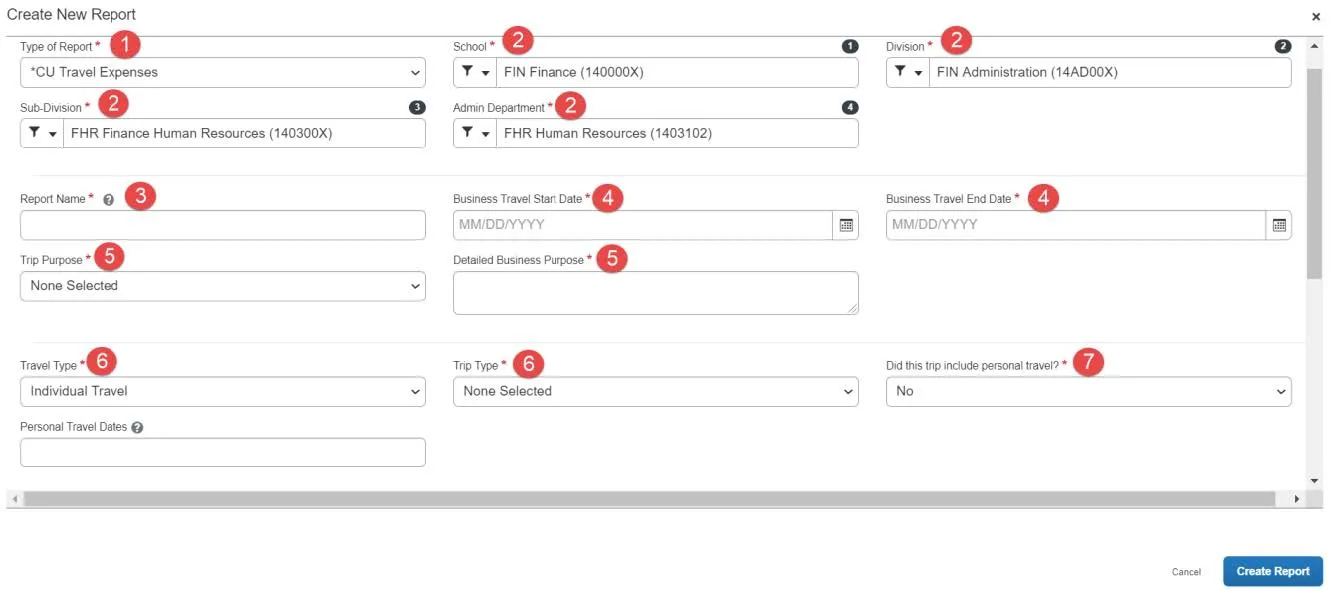
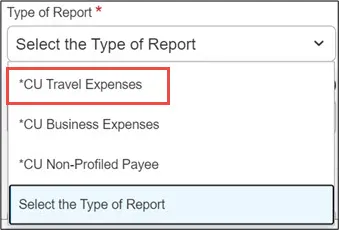
- Click the Type of Report dropdown and select CU Travel Expenses.
- The School, Division, Sub-Division and Admin Department default from your Concur Profile. You can edit, if necessary, Note: The completed fields displayed in the graphic above are for example purposes only.
- Type a Report Name.
- Enter the Business Travel Start Date and the Business Travel End Date.
- Select the Trip Purpose and type a Detailed Business Purpose.
- Select the Travel Type (Individual, Group, or Team) and Trip Type (Domestic or International).
- Select to answer Did this trip include personal travel? If Yes, enter the Personal Travel Dates.
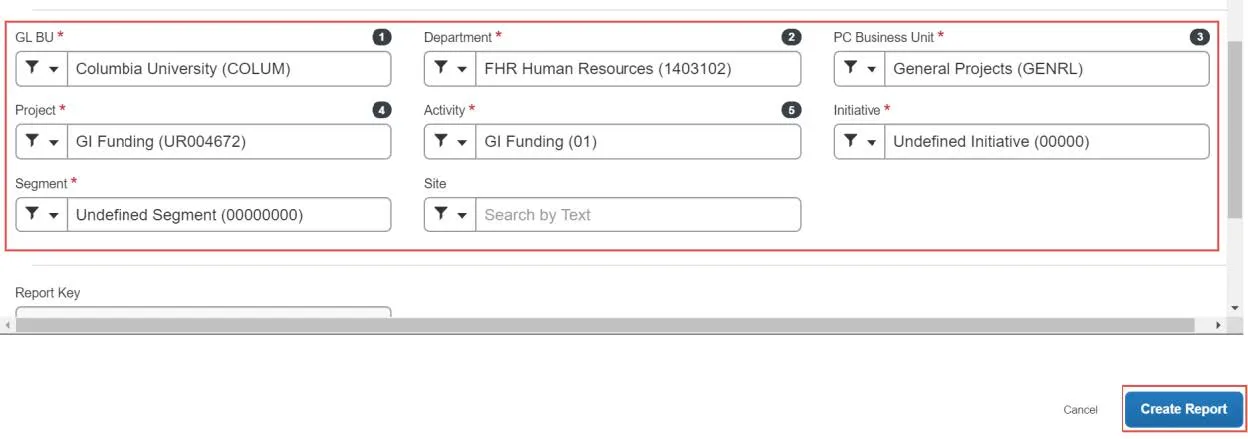
- The ChartFields default from your Concur Profile. You can edit them for this Report, if necessary.
Note: The ChartFields displayed below are for example purposes only. Please ensure that your ChartFields are relevant and correct for your Expense Report. - Click Create Report. You can then add Expense Items such as Airfare, Hotels, Ground Transportation and Meals. You can also add other CU Business Expense items to a Travel Expense Report.
Creating an Expense Report on behalf of a Guest or Student
You should check ARC to validate that the requester has an active vendor profile and take note of the vendor ID and vendor classification (Employee, Outside Party, Student Employee, or Student Non-Employee). You will not be able to reimburse non-profiled payees without an active ARC vendor profile. Employees and Students are set up automatically with vendor IDs with the prefix ‘CNR’. You must use the ARC vendor maintenance process to setup an ARC vendor profile for Outside Party vendors.
- Fill out or ask the non-profiled payee to fill out the Non-Profiled Payee Travel and Business Expense Worksheet. The worksheet can be sent electronically as an attachment or can be provided as a printed PDF to you for processing along with supporting documentation, including receipts.
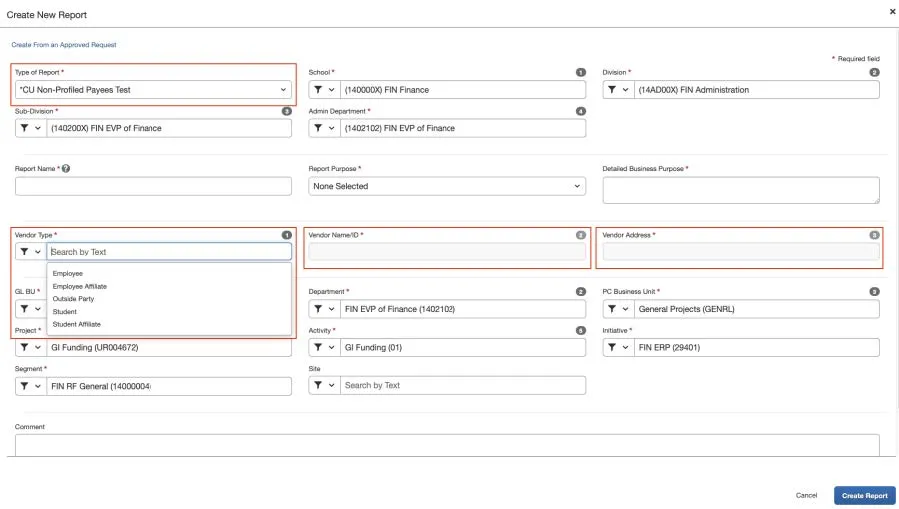
- After Creating A New Report in Concur, click the Type of Report dropdown and select CU Non-Profiled Payee.
- Select the Vendor Type (Employee, Employee Affiliate, Outside Party, Student, or Student Affiliate).
- Search and select the matching Vendor Name / ID.
- Click in the Vendor Address field to display the Vendor’s Address(es) (if paid by check) and/or ACH option (if paid by direct deposit) and select the desired match.
- Complete the remaining required fields. If necessary, edit the ChartFields.
- Click Create Report. Add the Expense Items submitted by the payee from the Non-Profiled Payee Travel and Business Expense Worksheet.
Adding Expense Items to Your Expense Report
View the Concur Travel and Expense Training for examples of how to add various Travel and Business Expense Items to your Expense Report.
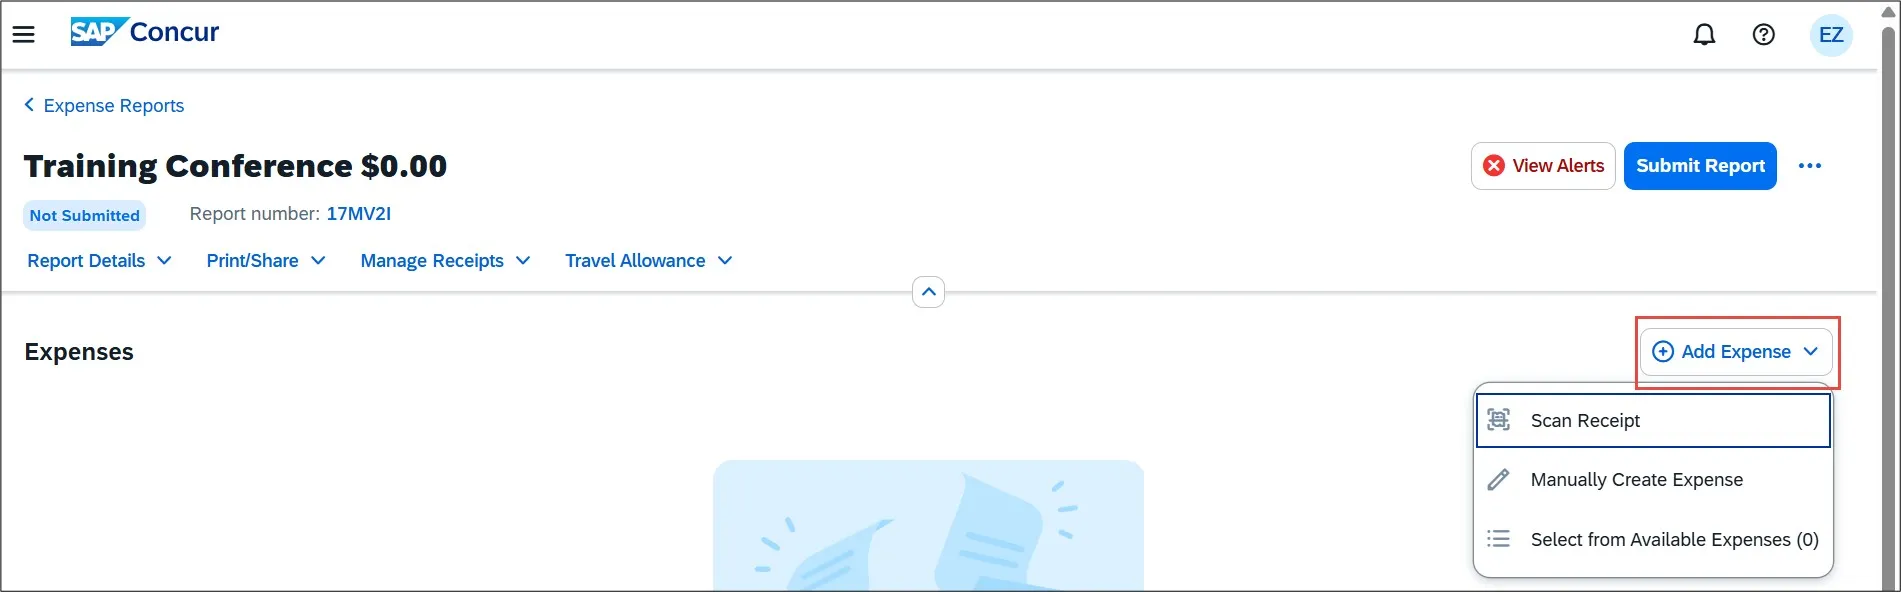
- Click the Add Expense dropdown.
- Select Available Expenses to add a Corporate Card or Concur Travel transaction to your Expense Report (refer to the Concur Tip on reconciling Corporate Card and Air/Rail Central Pay transactions) or Create New Expense to manually enter the Expense details.
- If you are manually creating a new expense, search and select the Expense Type. The Expense Details screen appears.
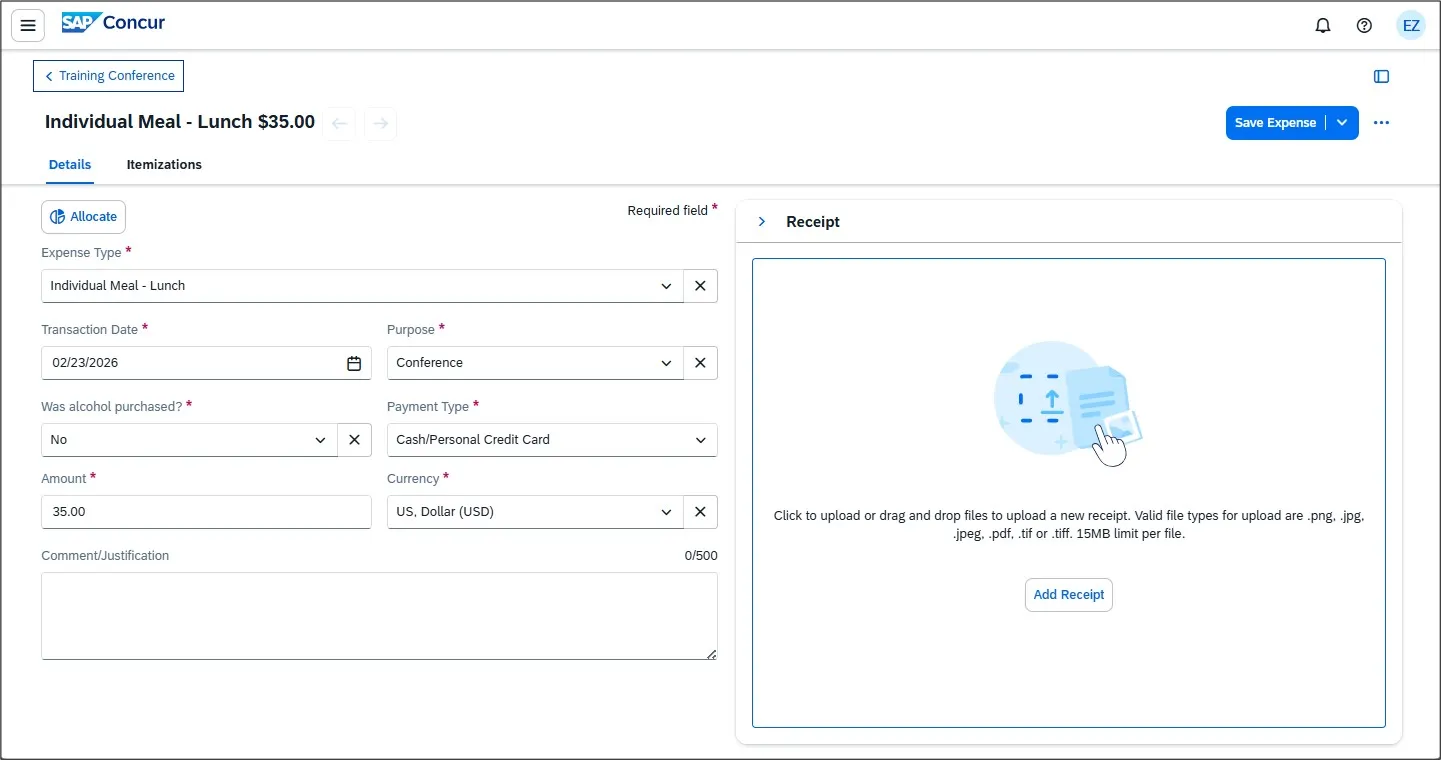
Note: Individual meal thresholds apply to Non-Profiled Payee Expense Reports. However, due to system limitations the calculation includes tip and tax. The amount over threshold must be segregated. SBO approval is required when meal expenses exceed individual meal thresholds.
- Complete all the required fields and, if necessary, add any required receipts or documentation. Note: If you are unable to change or detach an incorrect receipt you attached to your expense using the Concur Mobile app, delete the expense item and create a new one with the correct receipt.
- Click Save Expense to save and return to your Expenses Report list.
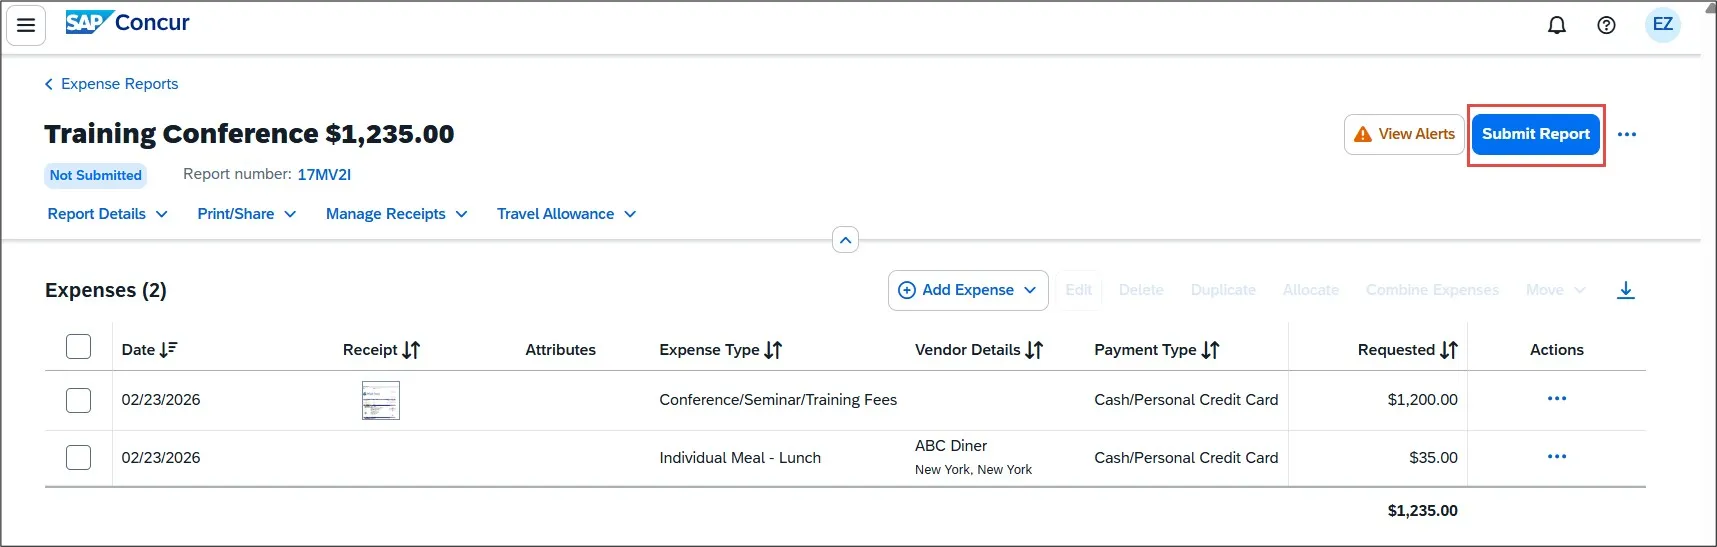
- After adding all the Expense Items to your Expense Report, click Submit Report. The User Electronic Agreement appears.
- Click Accept & Continue on the User Electronic Agreement and then Submit.