Creating Multi-Year Requisitions in the CU Marketplace
This job aid covers how to create a Multi-Year Requisition for Non-Catalog. Those with the Procurement Initiator role can create and submit Requisitions into approval workflow for goods or services (or both) not available from one our Catalog Vendors.
Last Revised: April 2026
Details
Before creating a Requisition, be sure that you do not have any Active Draft Carts. Process, submit, or delete any Draft Carts so that your new Requisition lines do not get added to the Active Draft Cart. Refer to the Shopping from Catalog Suppliers in the CU Marketplace for details on how to manage Carts.

- Navigate to the Finance Buying and Paying website, click the CU Marketplace logo, and log in using your Single Sign On. The JAGGAER application launches.

Note: The CU Marketplace will automatically time out after thirty minutes of inactivity, consistent with other University Enterprise Systems.
- Select the Shop tile. The Shop dashboard appears.

- Select any of the product category tiles.
- Select the Goods and Services Request Form tile.
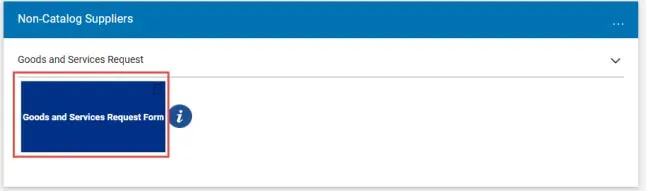
The Goods and Services Request Instructions page appears.
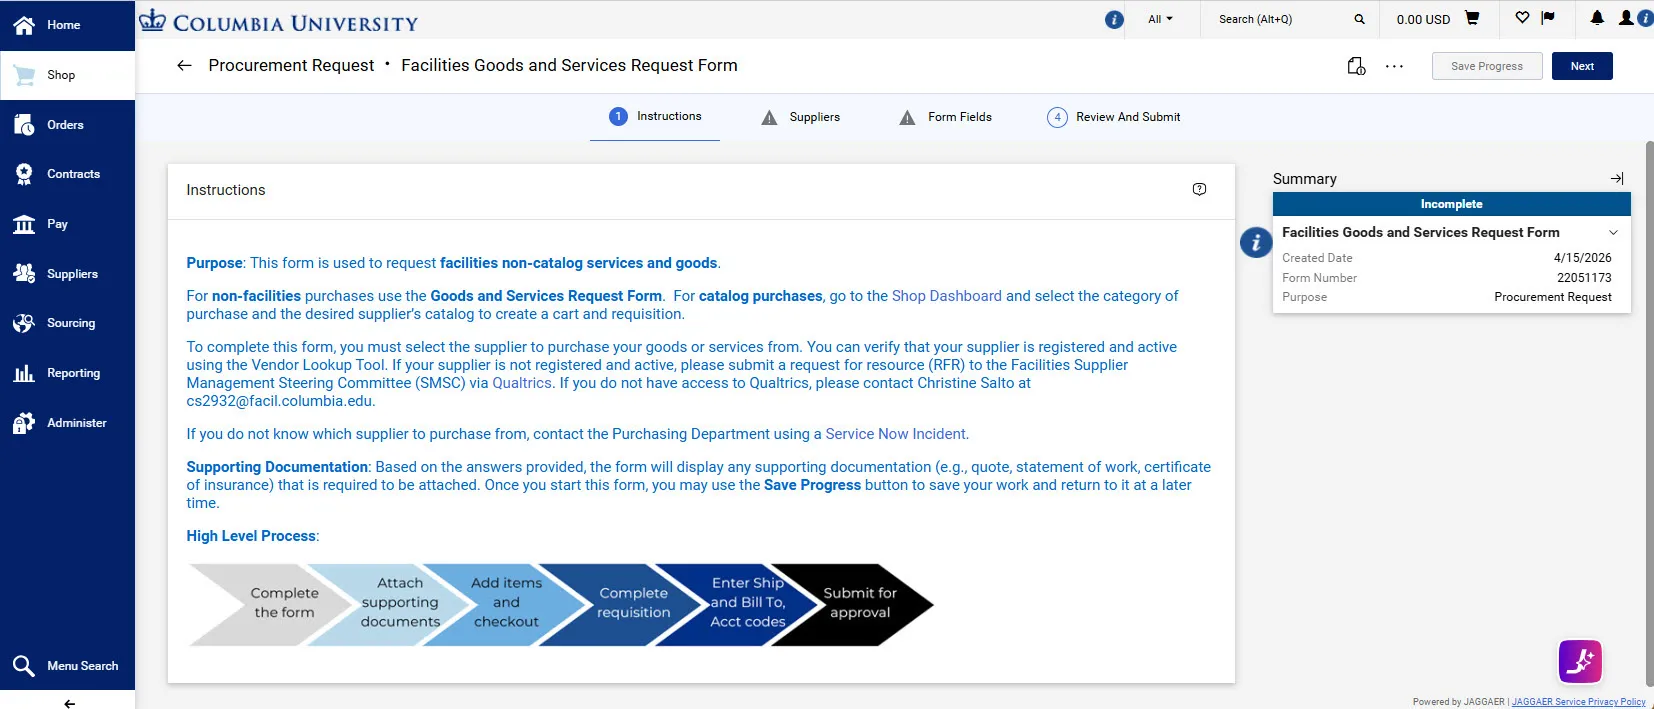
The left panel indicates the stages of the form with status indications as you complete the form. While completing the form, some fields have a Question Mark icon that you can click to get more information about that field.
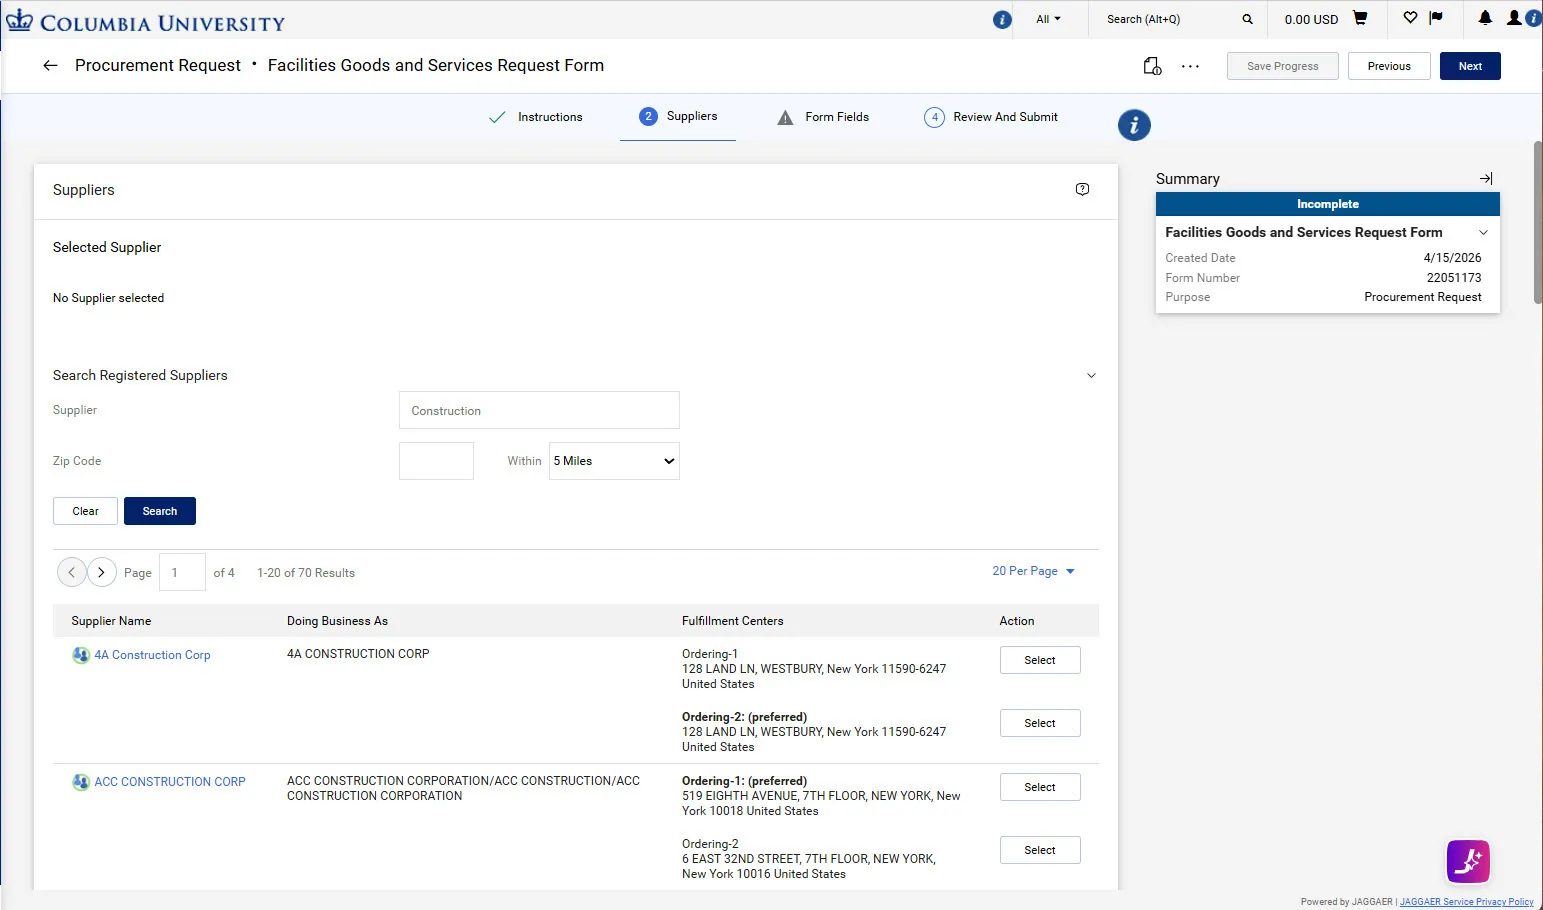
- After reading the Instructions, click the Next button. The Supplier Search screen appears.
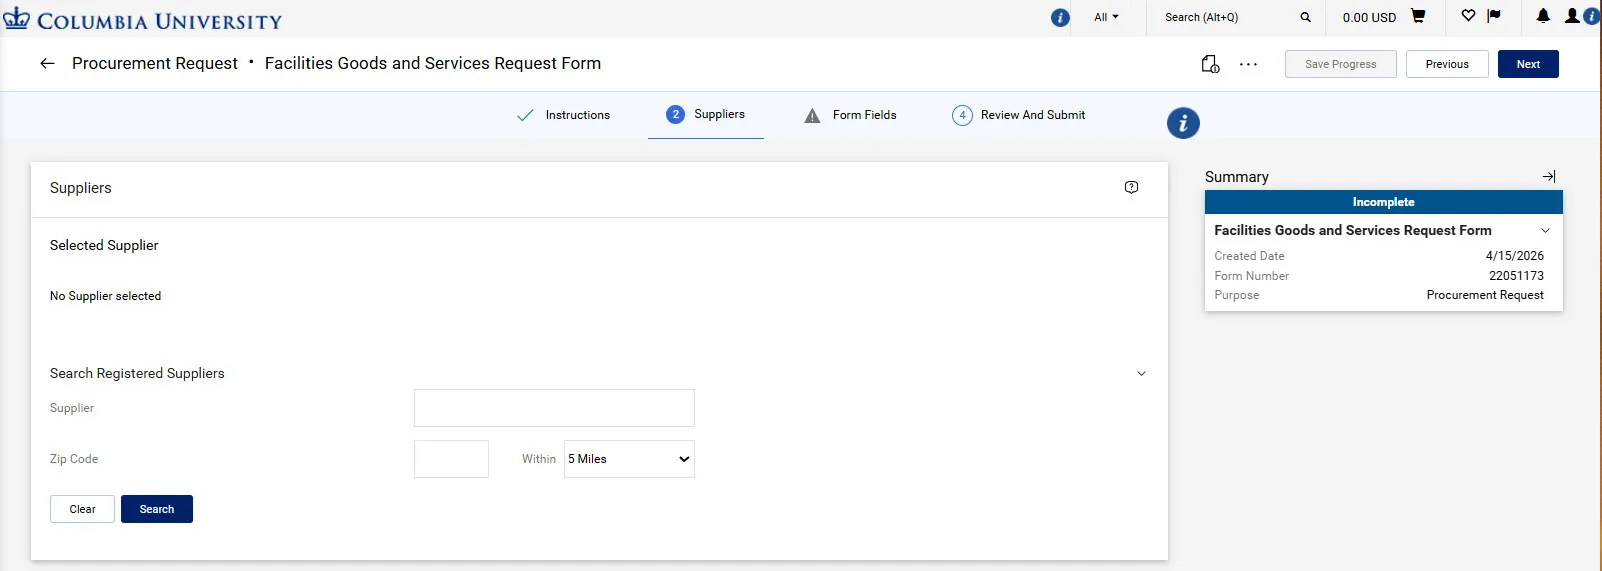
- Read the instructions for searching and selecting your Supplier, enter your Supplier, click the Search button and select the desired Supplier match from the results.
- Click the Next button and on the next page click the Next button again.
- Select Goods. Services, or Goods & Services.
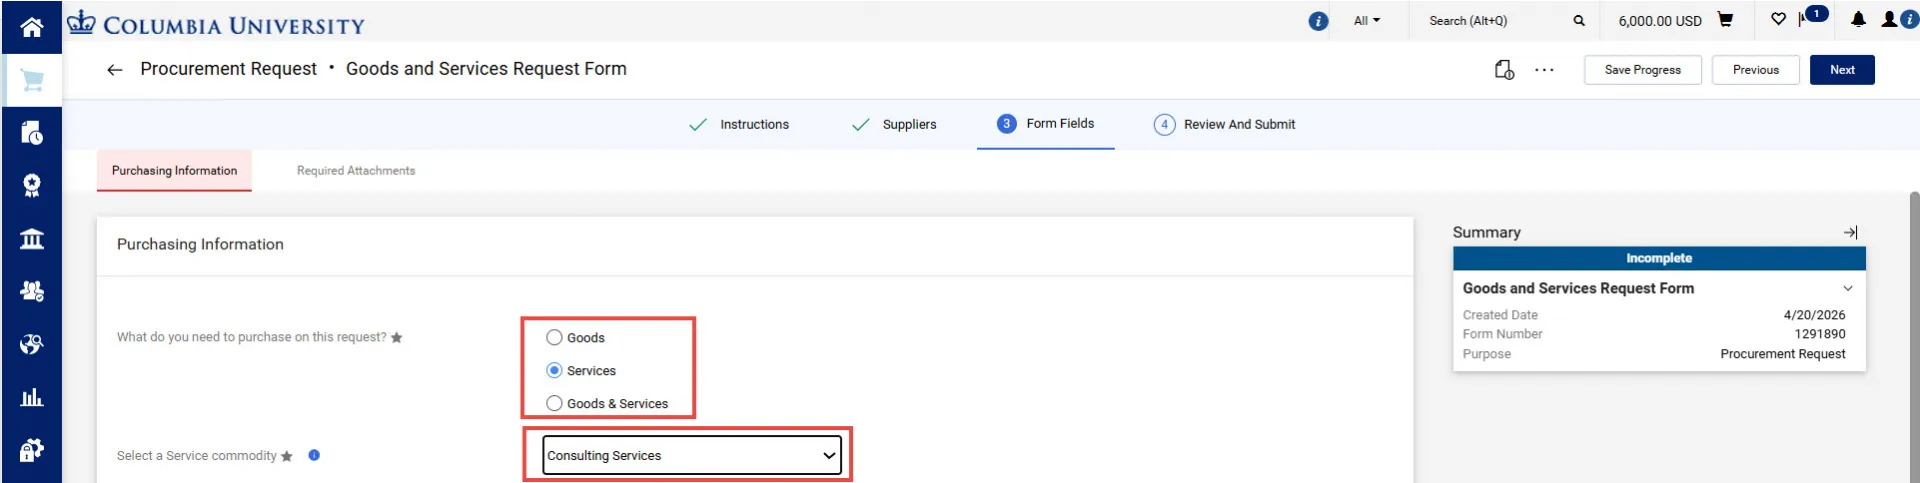
- Select a (Good or Service) Commodity from the dropdown. The selection of commodities depends on whether you selected Goods or Services above.
Additional questions may appear based on the specific commodity you selected.
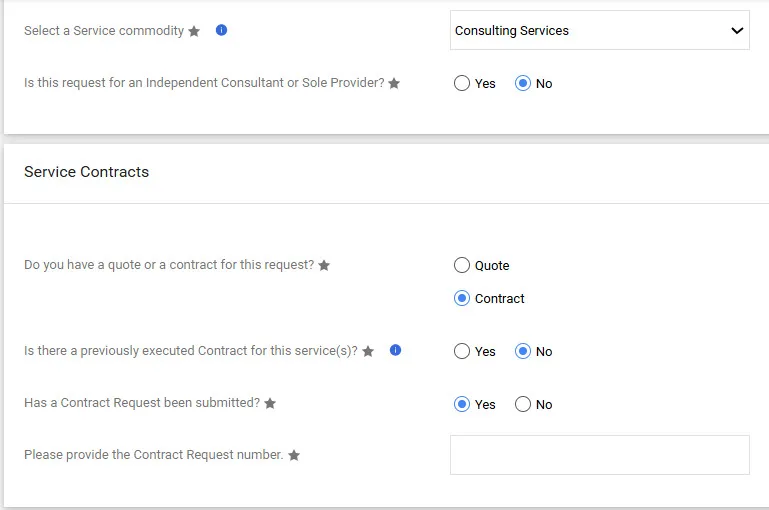
If your purchase includes a Service, an additional question: Is this request for an Independent Consultant or Sole Provider appears and the Service Contracts section appears. If you already have a contract, you can enter a Contract ID. If you are requesting a Contract, you can enter the Request Number. You can also enter Contract Request information on the Attachments page.
- Select the answers in each field, as needed.
Select Yes or No for Is the supplier you selected a UwPA supplier? Your selection determines additional questions that appear on the form. To learn more about UwPAs or to lookup your supplier is a UwPA supplier, click the Question Mark icon.
- If you select Yes: The following questions appear: Is this UwPA purchase over $250,000? and Is this UwPA purchase funded with Sponsored Funds?
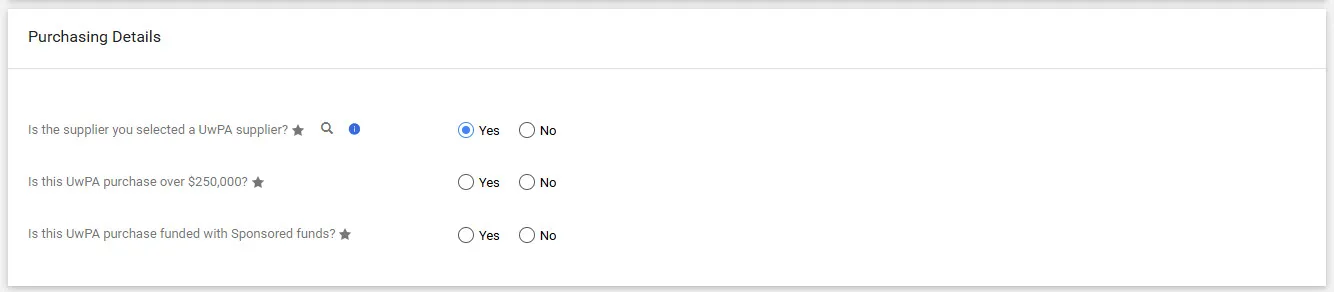
Select the appropriate answers and click the Next button.
- If you select No: Questions regarding using sponsored funds, if this is a sole source request, and, if it’s not a sole source request, a dropdown to select a range for the amount of the purchase appear.
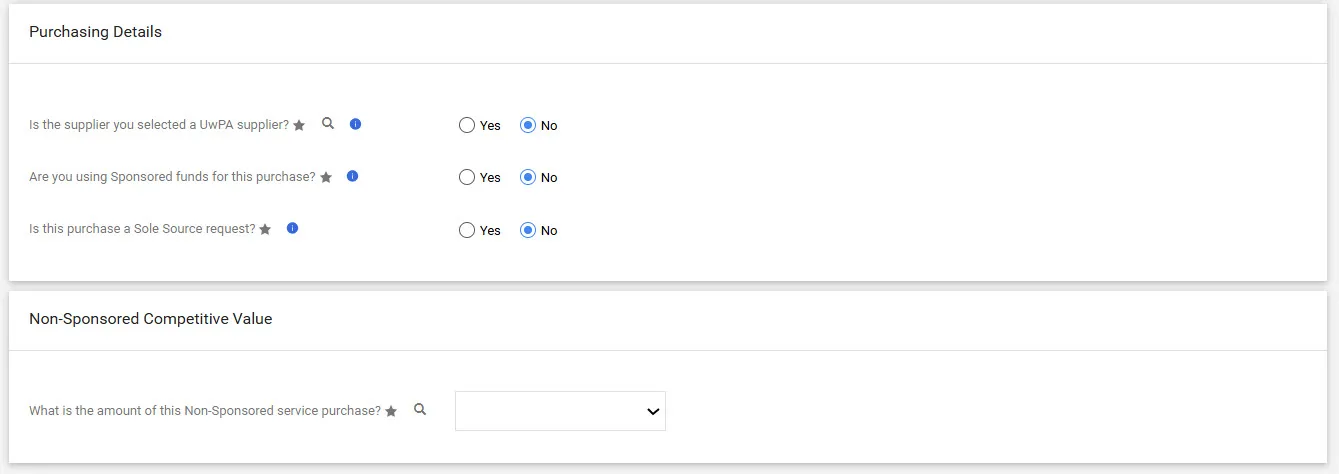
Answer the relevant questions related to the non-UwPA request.
You can select the Save Progress button and return to the form later or can can progress by clicking Next.
The page and fields that appear are based on whether you initially selected a Goods or Services, or Goods and Services request. If you selected a Goods and Services request, the Goods page appears for adding your Goods items. The Services page will appear next for adding your Services.
You will add a Line for each year of your Multi-Year Requisition.
Adding Goods Lines
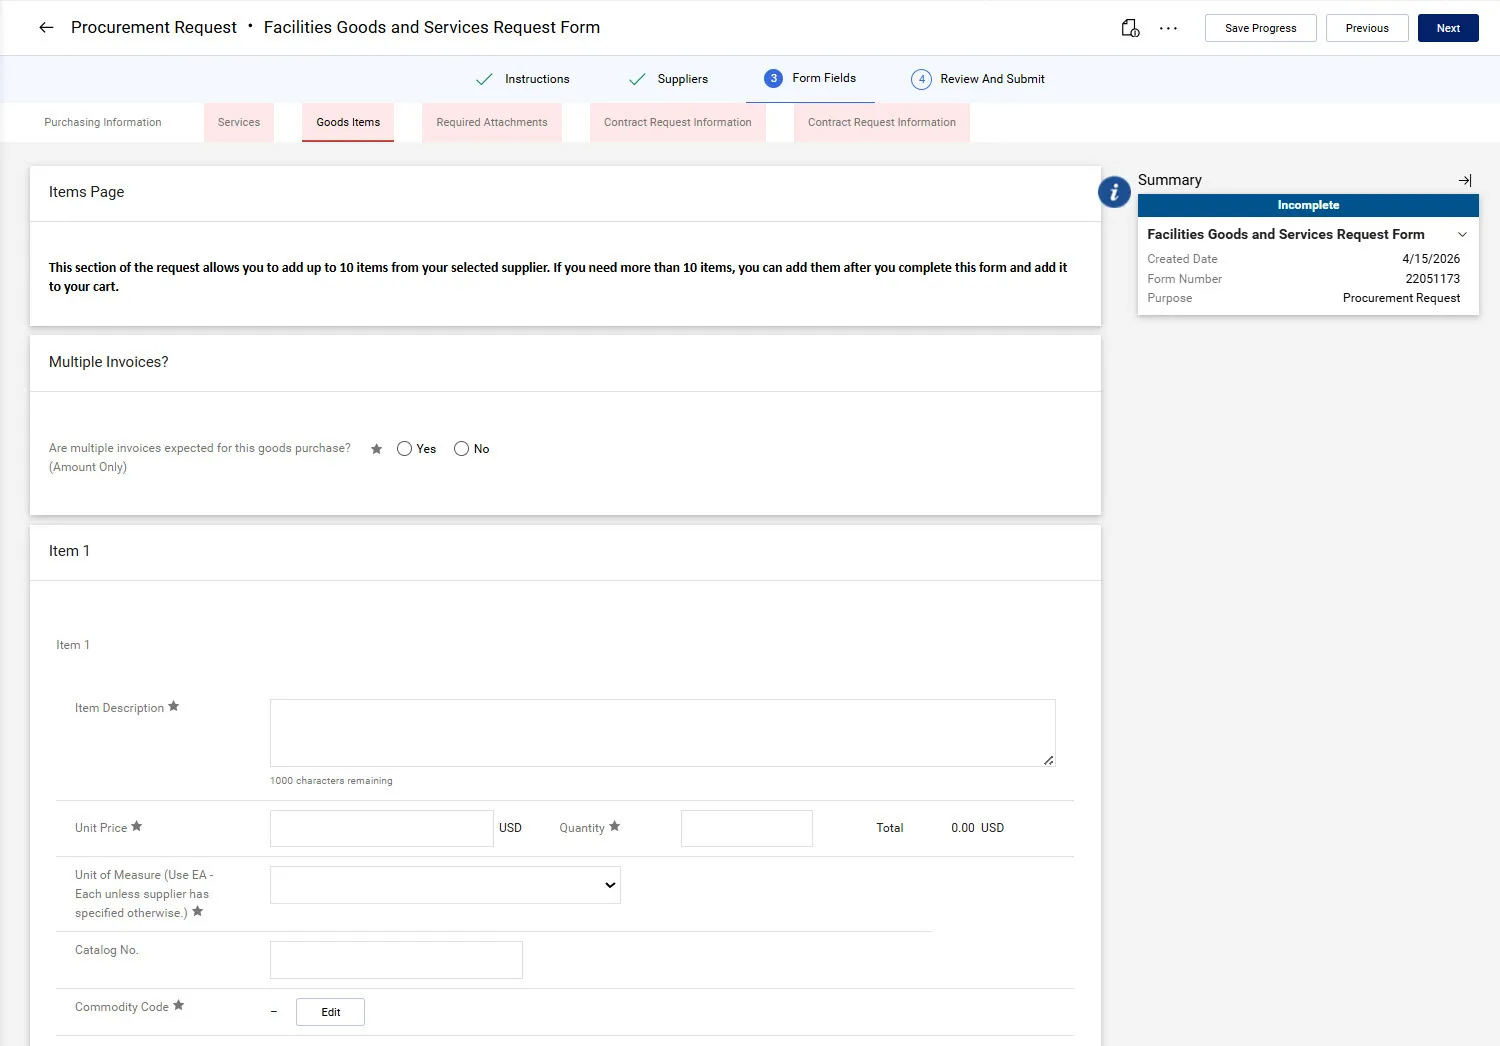
- Indicate Yes for Are multiple invoices expected for this goods purchase? (Amount Only).
- Type the Item Description with the number of total fiscal years and this current fiscal. For example, “3 years of equipment leasing – FY25.”
- Enter the Unit Price, Quantity and select the Unit of Measure. If you know the Catalog No. of the item you are purchasing, you can enter it.
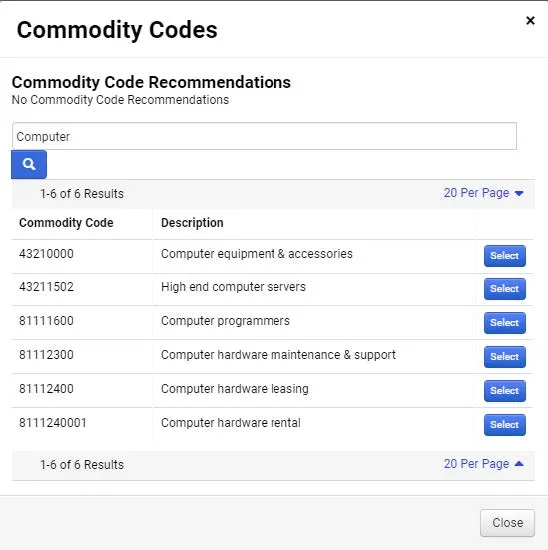
- To find the Commodity Code for your item, click the Edit button. The Commodity Codes search window appears.
- Type your Search criteria, press Enter and click the Select button for the matching Commodity Code. The Commodity window will suggest Commodity Codes based on what you typed in the Item Description Box.
- Click Yes for Would you like to add another item?.
- Repeat the steps above for each fiscal. For each Item Description enter the fiscal year for the corresponding Line. For example, “FY26 - year 2 of equipment leasing”, “FY 27 - year 3 of equipment leasing”, etc.
- After entering your final fiscal year, Click No for Would you like to add another item? and click the Next button.

Adding a Services Line
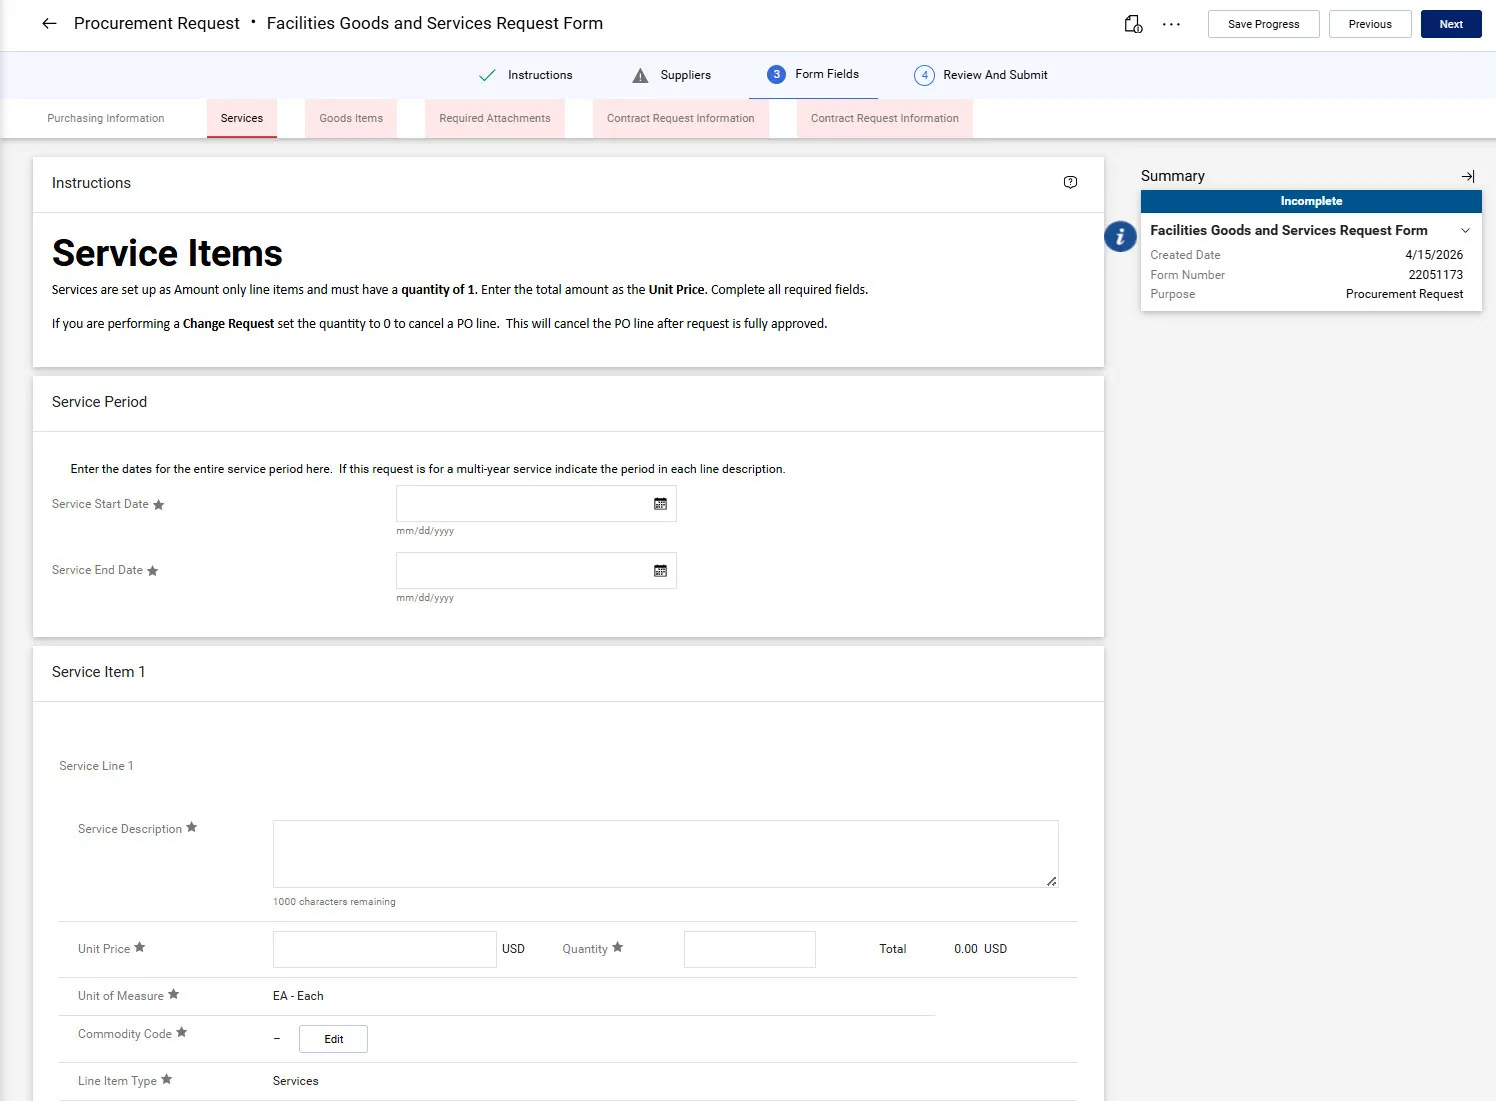
- Type the Item Description with the number of total fiscal years and this current fiscal. For example, “3 years of consulting services – FY25.”
- Enter a Unit Price, and Quantity (usually 1). The Service Start Date and Service End Date fields are optional. Leave them blank for multi-year requisitions.
- To find the Commodity Code for your service, click the Edit button. The Commodity Codes search window appears.
- Type your Search criteria, press Enter and click the Select button for the matching Commodity Code. The Commodity window will suggest Commodity Codes based on what you typed in the Item Description Box.
- Click Yes for Would you like to add another item?.
- Repeat the steps above for each fiscal. For each Item Description enter the fiscal year for the corresponding Line. For example, “FY26 - year 2 of consulting service”, “FY 27 - year 3 of consulting service”, etc.
- After enter your final fiscal year, Click No for Would you like to add another item? and click the Next button.
Based on your Purchasing Information details and the Goods and or Services lines that you added, the Required Attachments page will display the required attachments (indicated with an asterisk *) that you must upload for your purchase.
If necessary, you can click the Save Progress button in order to acquire any documentation you still need to acquire and return to the form later.
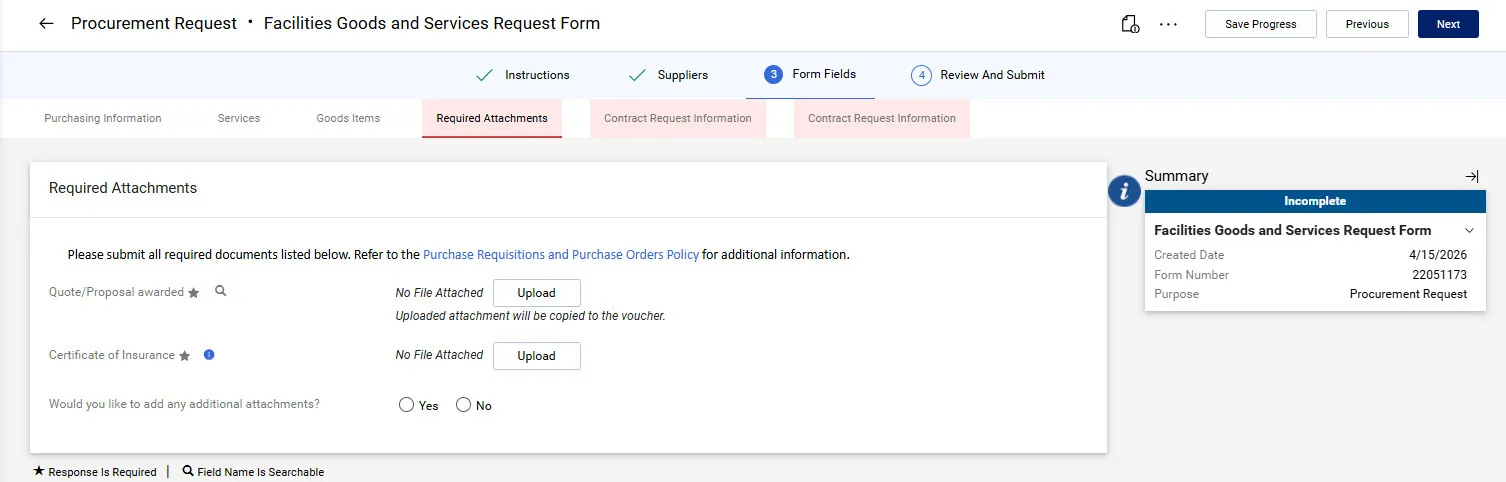
- Click the Upload button for each required document indicated to upload the file that satisfies the requirement. The Upload window appears.

- In the Title field, enter the type of the document you are uploading (i.e., SOW, COI, Quote), click the Choose File button to search and select your document file, and click the Save Changes button.
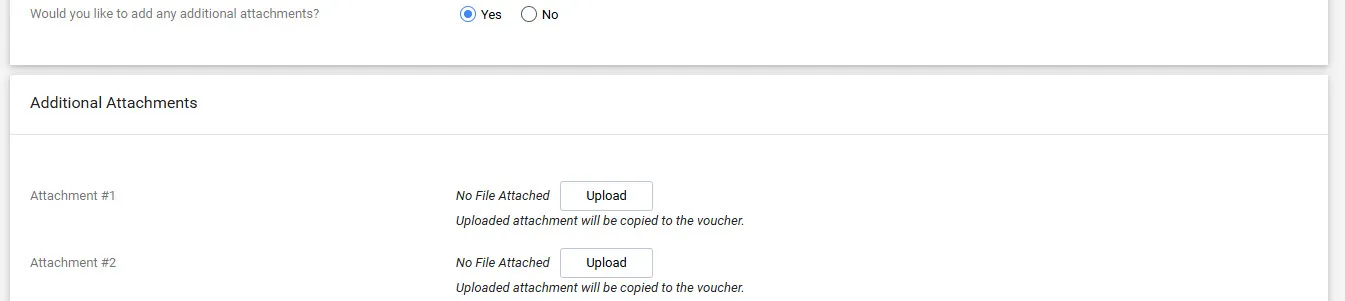
Additional Attachments
You have the option to upload additional documentation that you may be need to explain the transaction. Do not attach addtional documentation unless requested by the Purchasing team.
Select Yes for Would you like to add any additional attachments. Additional Attachment fields for you to upload up to ten documents.
Be sure to scroll down to view if you are required to provide a Contract Request Number in the Attachments for Contracts section.
Attachments for Contracts
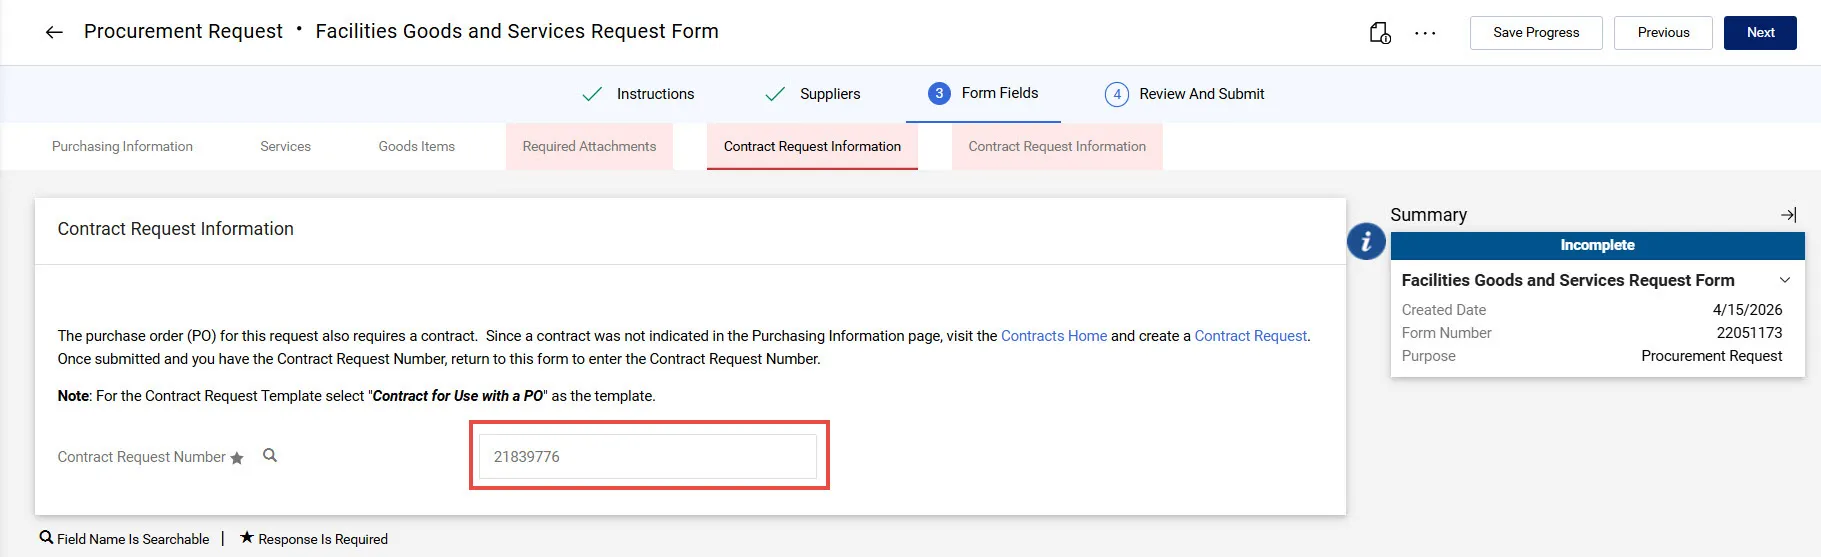
If you selected a Service that requires a Contract and indicated in the Purchasing Information page that you did not have a Contract ID, you must submit a Contract Request and copy/paste the Contract Request Number.
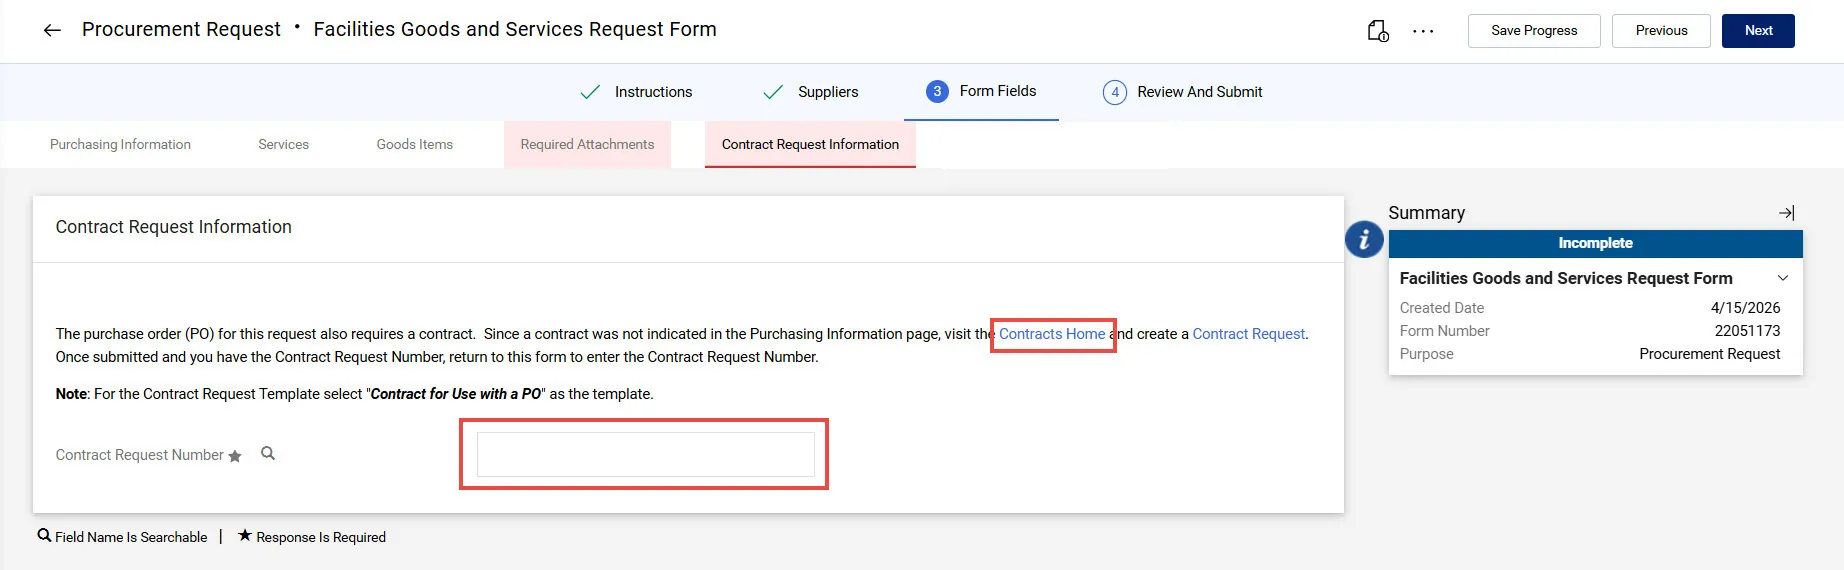
- Click the Contracts Home link to initiate a Contract Request. A new tab in your browser will open to Contracts dashboard.
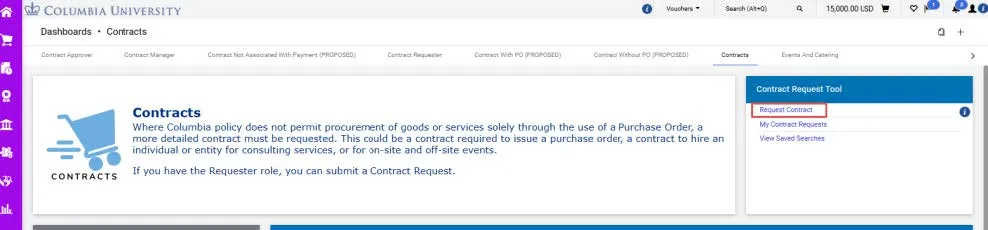
- Click the Request Contract link to initiate a Contract Request. Click through to launch the appropriate Contract Request page.

- Copy the Form Number from you Contract Request.
- Return to the tab with your Goods and Services Request to paste your Contract Request Number in the field.
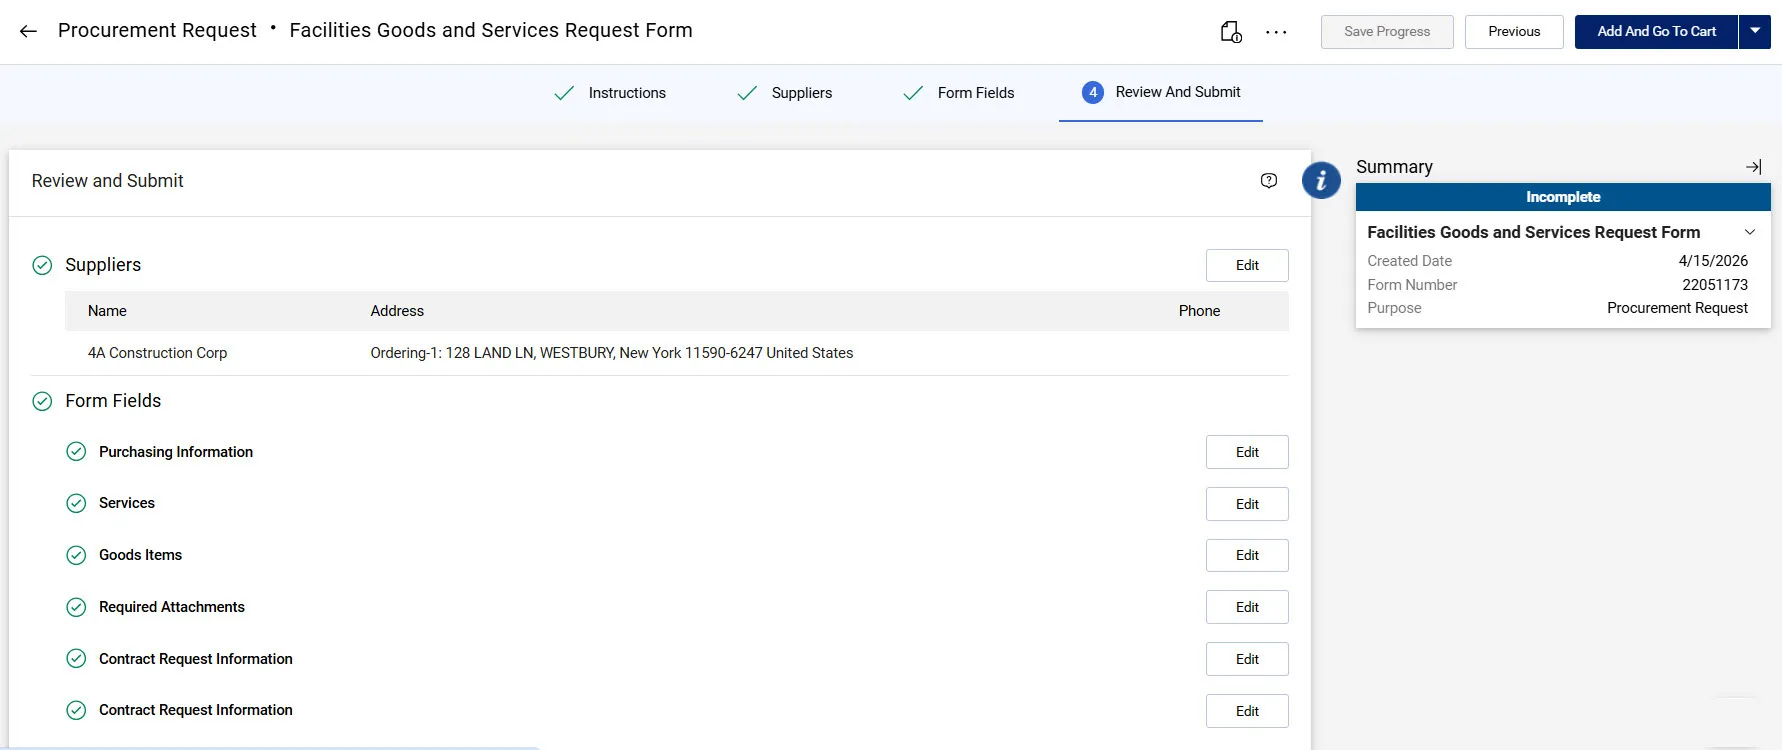
- From the Attachments page, click the Next button. The Review and Submit page appears. Green checks appear to indicate that all required fields are complete.
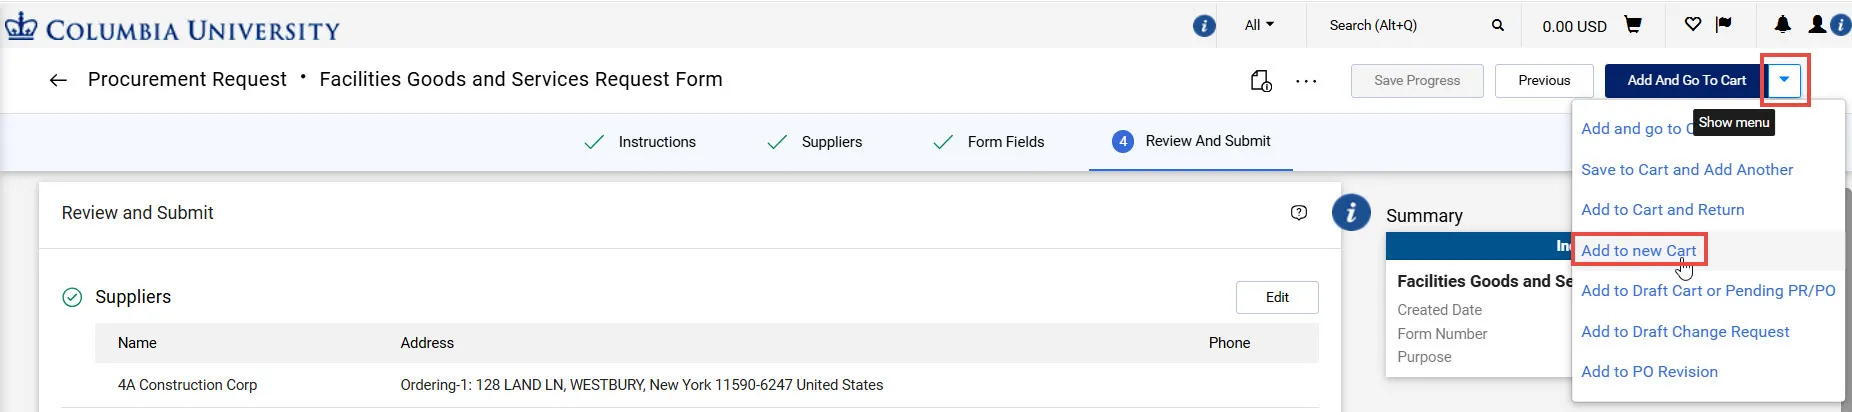
- Click the Add and go to Cart button. The Shopping Cart screen appears. You can now Proceed to Checkout to submit your Request as a Requisition for approval. For details refer to the CU Marketplace Requisition Checkout Quick Guide.
You can select the option to Add to new Cart so items in this Request are not added to an Active Cart.
In addition to ensuring that you have you populated your Billing/Shipping Addresses and your Accounting Codes (ChartString) information (refer to the Requisition Checkout Quick Guide), you must select the Multi-Year PO flag for the Requisition and set the Budget Year for each Line Item.
Selecting the Multi-Year PO Flag
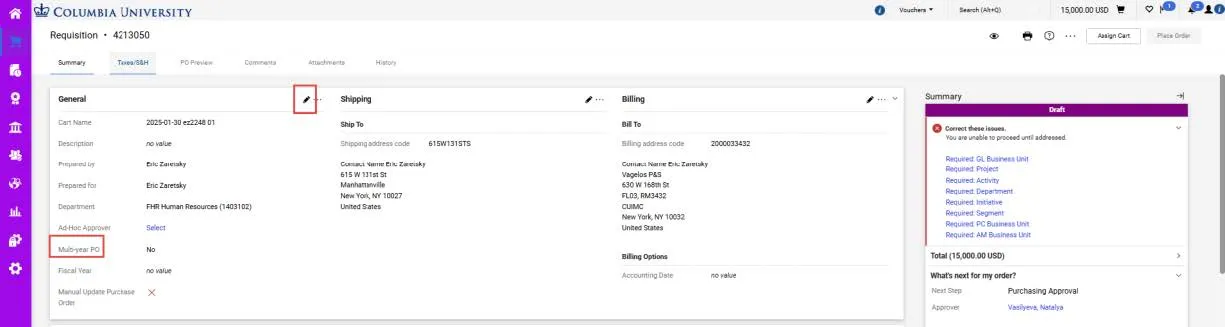
- Click the Edit General Section icon. The Edit General window appears.
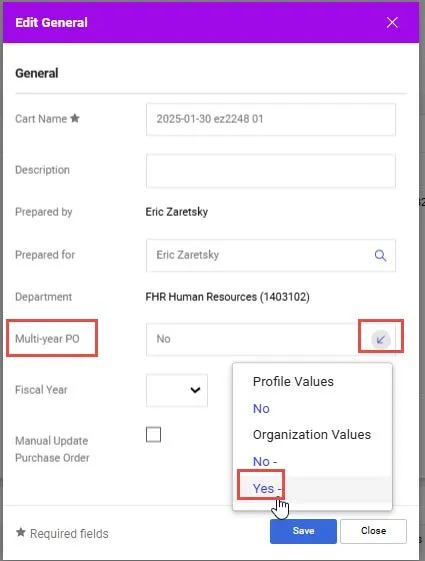
- Click the Multi-year PO dropdown and select Yes.
- Click Save.
Setting the Budget Year for Each Line
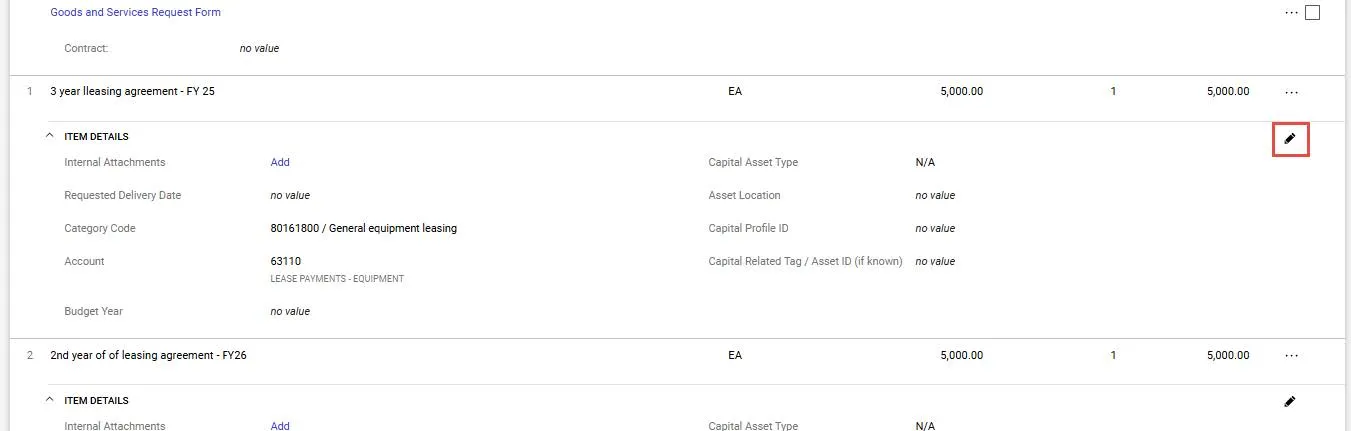
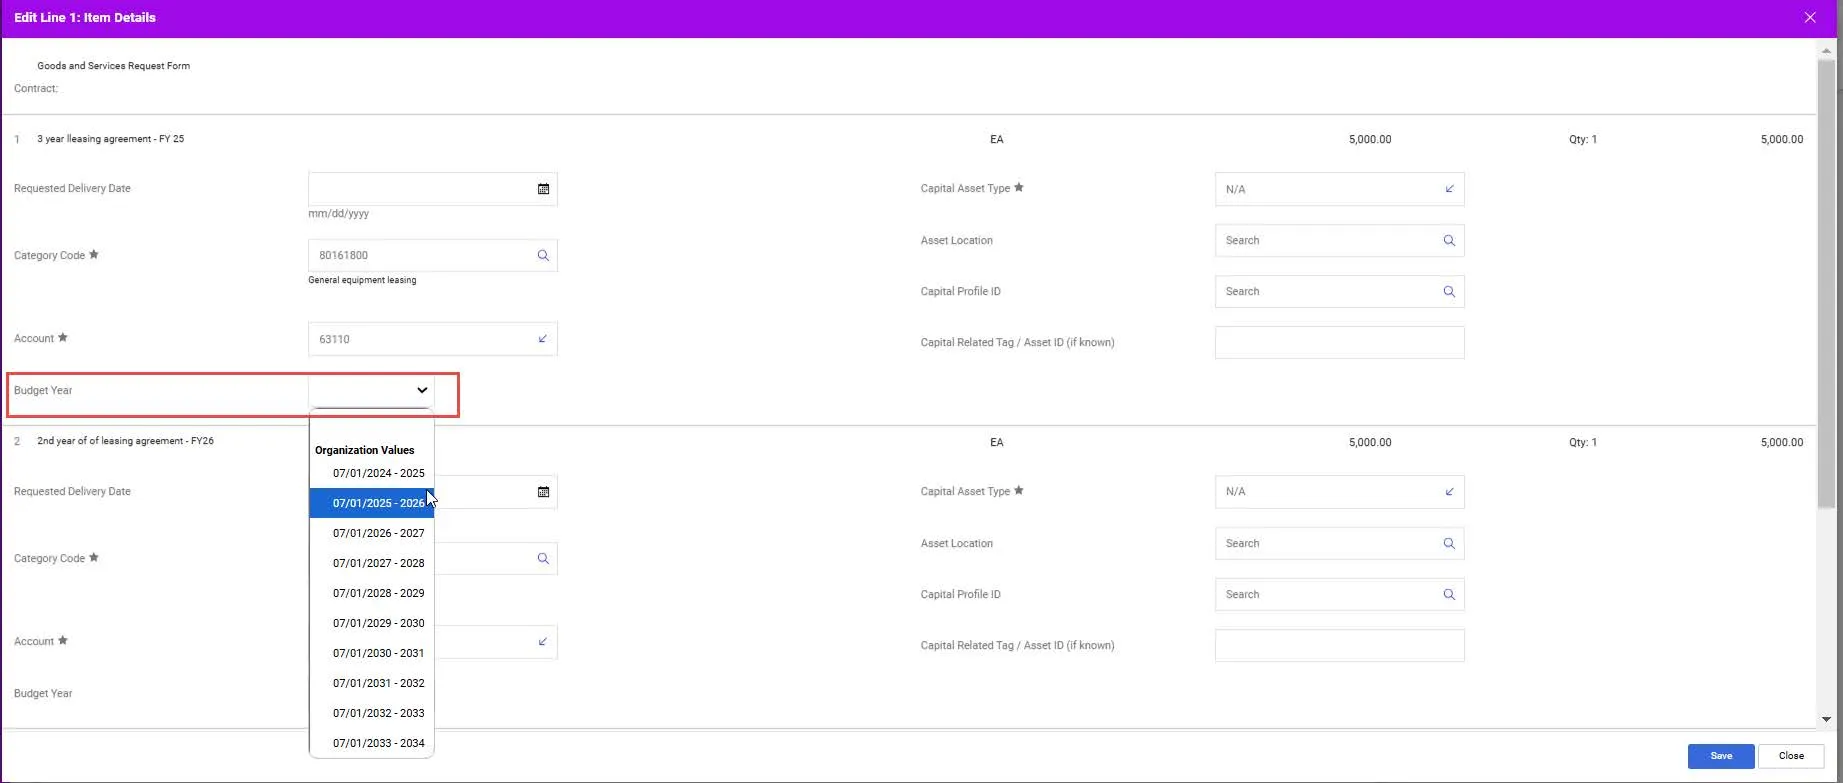
- Navigate to Line 1 of your Requisition and click the Edit Line Item Details icon. The Edit Line Item Details window appears so that you can scroll to all other Lines on the Requisition.
- Click the Budget Year dropdown for the first Line and select the date range that corresponds with the fiscal year of that Line (for example, “07/01/24 – 2025” is fiscal year 25).
- In the same Edit Line Item Details window, scroll to the Budget Year fields for the subsequent Lines and select the date ranges that correspond with the fiscal year of those Lines.
- After updating the Budget Year for all Lines, click Save. Double check to make sure the Budget Year is correctly populated for each line.
Ensure that all other required fields are complete for the Requisition and click Place Order.