CU Marketplace Approvers Training Guide
This Training Guide details the process of how those with an Approver role in the CU Marketplace approve Requisitions.
Last Revision: September 2026
Need help approving Requistions or Vouchers in the CU Marketplace, click the JAI chat icon in the lower right corner of the CU Marketplace window.

Accessing the CU Marketplace
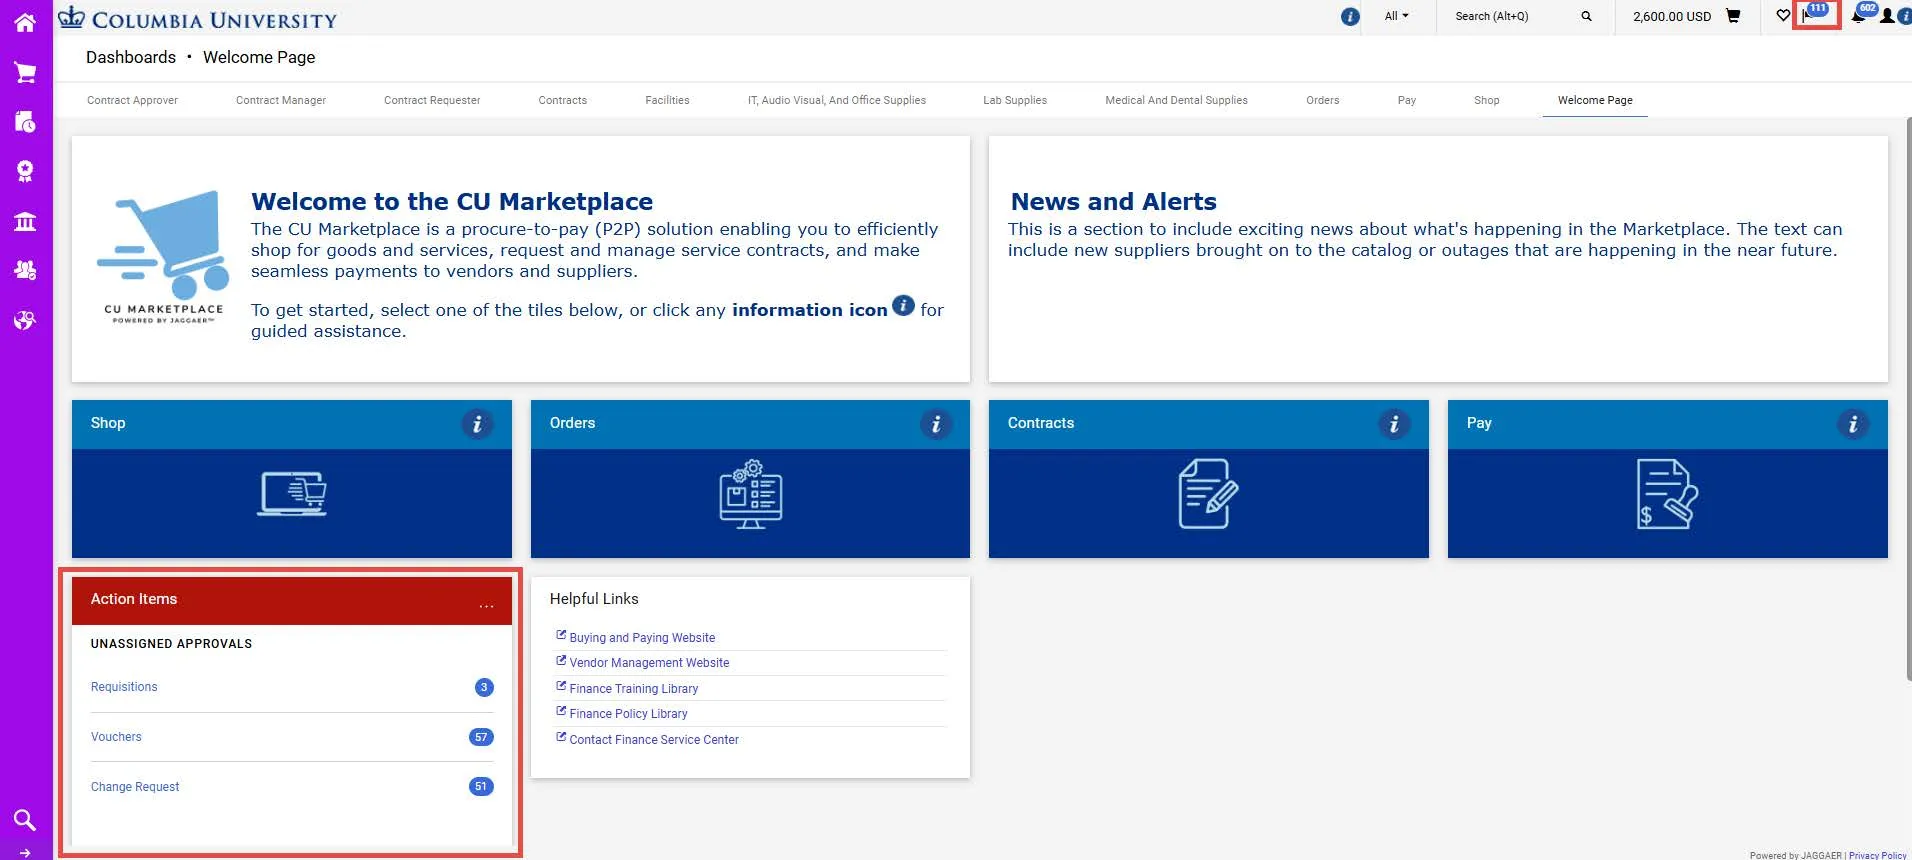
Navigate to the Procurement Buying website, click the CU Marketplace logo, and login using your Single Sign On. CU Marketplace Homepage appears.

Note: The CU Marketplace will automatically timeout after thirty minutes of inactivity, consistent with other University Enterprise Systems.
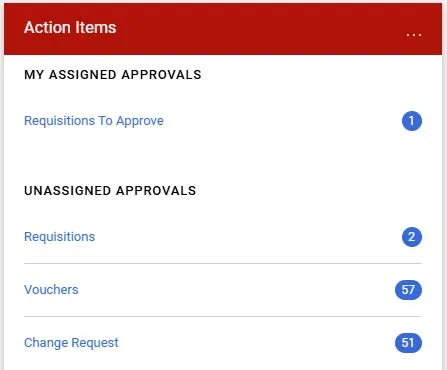
The Action Items section displays the number of each document type awaiting approval
The Action Items Alert icon the top right corner also lists the number of each document type to be approved.
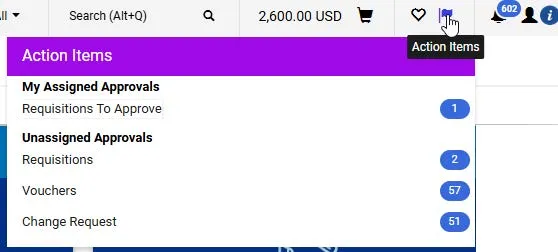
- Unassigned Approvals displays the number of each document type awaiting approval not yet being reviewed by an Approver.
- My Assigned Approvals indicates the number of each document type you are currently reviewing.
Details
From Action Items list., click the Document Type for the documents you want to review for approval.
OR Click the Actions Items icon and click document type under Unassigned Approvals.
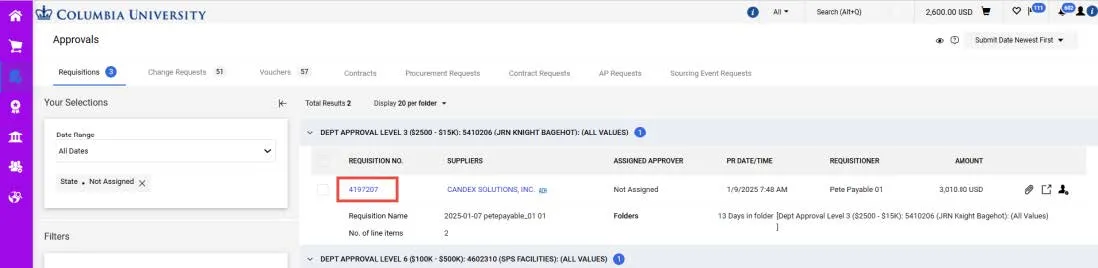
The Approvals screen appears displaying the list of documents based on what you selected and organized into accordion sections. Expand the accordions to view the documents.
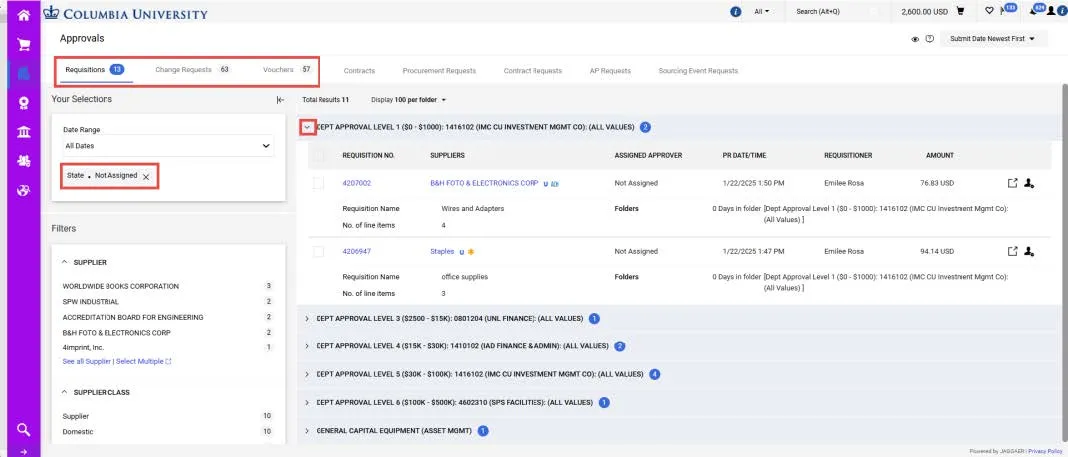
- You can navigate to the other tabs at the top of the screen to view other document types awaiting approval.
- You can remove the filter setting from Your Selections on the left side to view all the documents of that type.
Click the document No. (Requisition No., Voucher No., etc.) for the document you want to view.
Accessing a Document for Approval from an Email Alert (Ad Hoc Approvers)
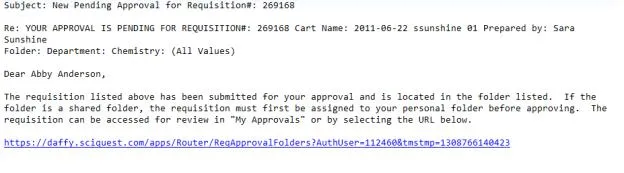
If you were inserted into the approval workflow as an ad hoc approver, you will receive email alerts informing you of procurement transaction requiring your attention. Click the link in the email to take you directly to the document screen.
Viewing Requisitions
Catalog Requestions
Catalog Requisitions are Requisitions for goods from one or more of the CU Marketplace Catalog Vendor. They do not require any attached documentation. The Items list for each Catalog Vendor will appear as link you can click on for more details.
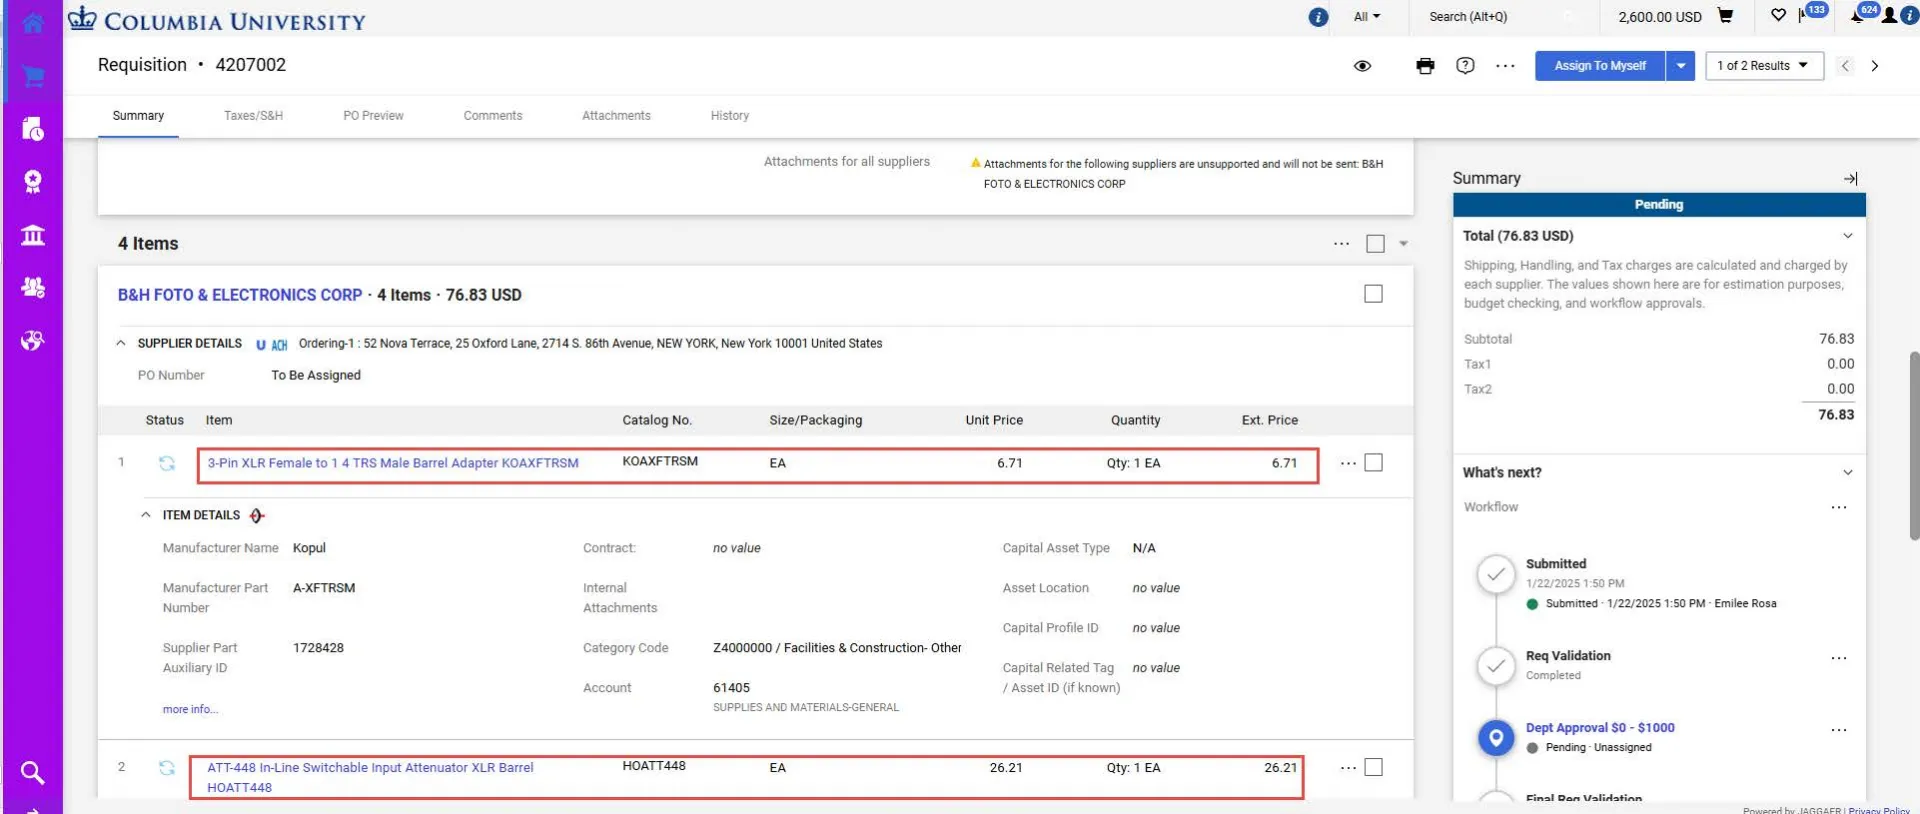
Scroll to view Item Details for the items being purchase. Information includes the Unit Price, Quantity and Ext. Price (total price).
Approvers who are also Requesters for Catalog Requisitions
If you have both the CU Marketplace Requisition Initiator and a Level 1 ($0 - $1,000) Department Requisition Approver roles, you do not need departmental approval for purchases of $1,000 or less if your purchase is from a Catalog Vendor is being shipped to a campus address.
If you have the Department Requisition Approver role for higher Levels (2 and up), but not Level 1, your Requisition will require departmental approval even if you have an approval role.
If your purchase is greater than $1,000 and/or you are shipping to an Ad-Hoc Ship-To address, your Requisition will require departmental approval even if you have a Level 1 approval role.
Non-Catalog Requisitions
Non-Catalog Requisitions are Requisitions for goods or services not available from a CU Marketplace Catalog Supplier. They require supporting documentation based on the type of purchase being made. You can view the Required Attachments on the Goods and Services Request Form submitted by the Requester.
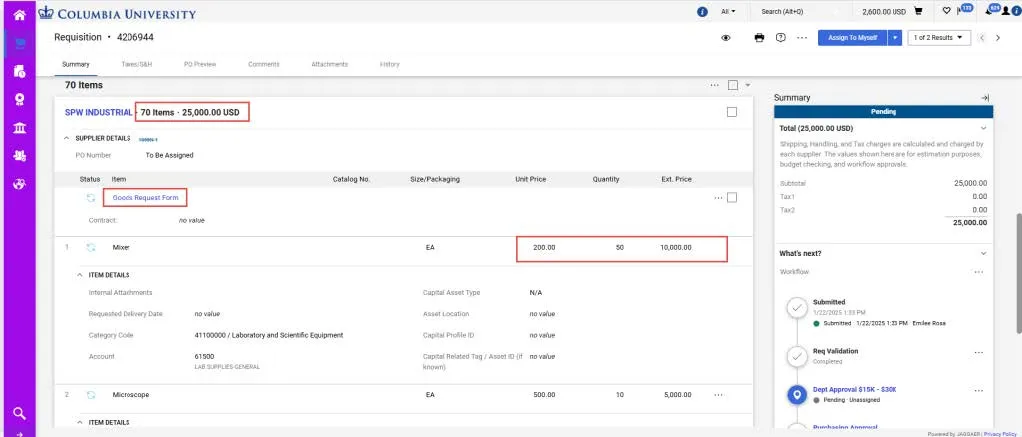
Scroll down to the Items section of the Requisition to view the Total Number of Items and Total Price being paid to the Vendor. View Item Details for the items being purchase. Information includes the Unit Price, Quantity and Ext. Price (total price).
The Attachment tab does not display the required attachments for the Non-Catalog Requisitions. To view the Required Attachments:
1. Click the Goods and Services Request Form link. The related Goods and Service Request Form appears.
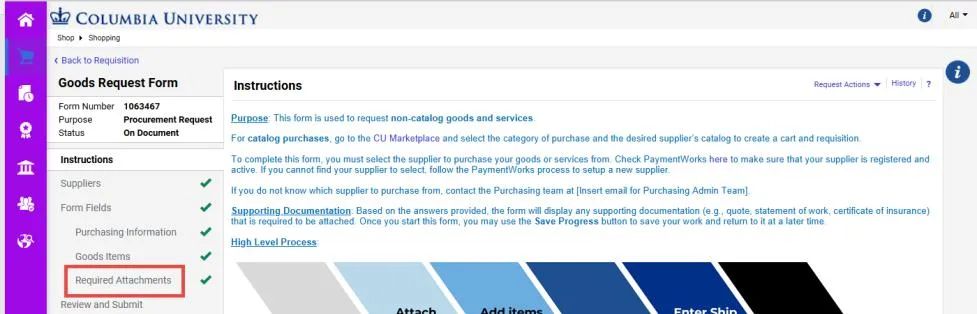
2. Navigate to Required Attachments by clicking the link in the left pane. The Required Attachments page appears.
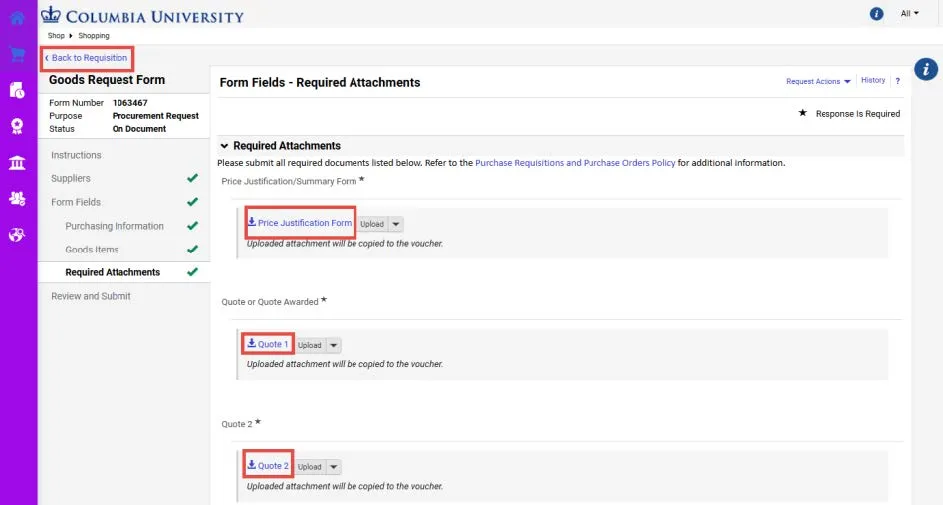
3. Click the link for each attachment displayed on the page to download and view the documentation.
4. After downloading the attachments, you can click the Back to Requisition link in the upper left corner to go back to the Requisition you are reviewing.
Viewing Change Requests
If a Change Request has been initiated to modify a Purchase Order to increase the price above the allowable thresholds or change the terms of service has changed as specified in the Change Request Policy, the Change Request will be submitted into approval workflow. Documentation must be submitted to justify the change.
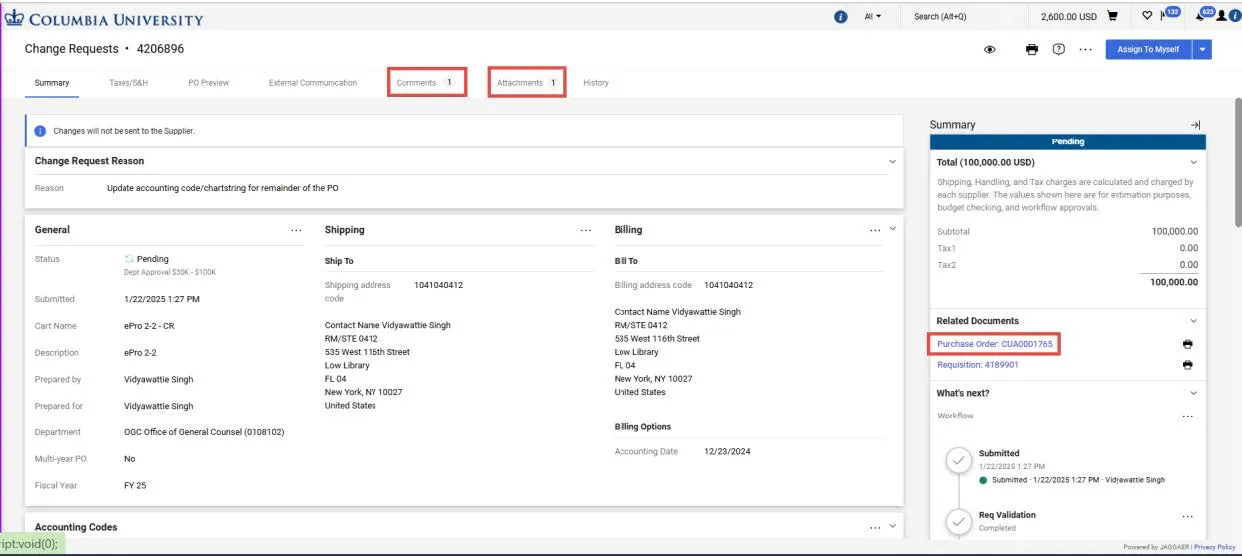
- Click the Comments tab to view the reason why the Change Request was submitted by the Requester.
- Click the Attachments tab to view and download the attached documentation.
- Click the Purchase Order link from the Summary pane to view the original Purchase Order, any related Vouchers, or previous Change Requests.
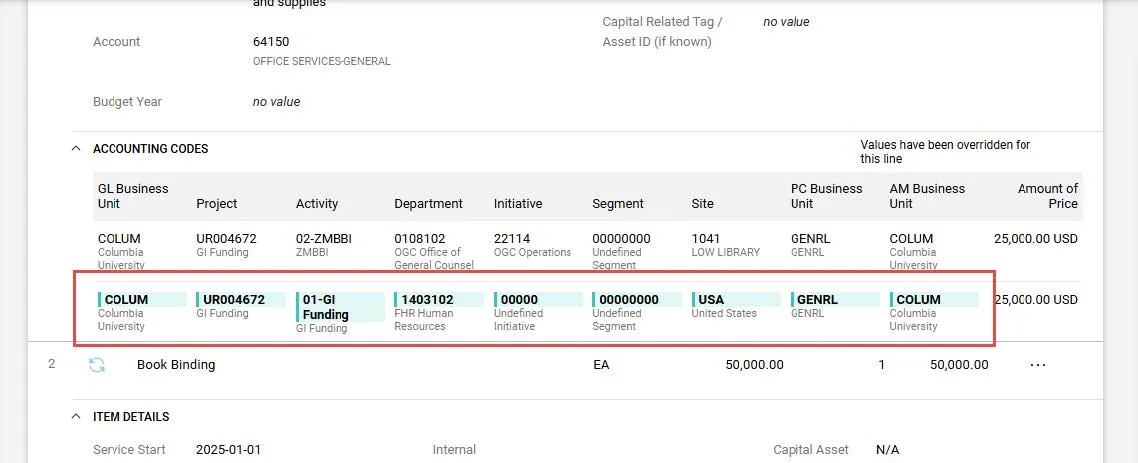
Any changes requested to the Purchase Order will be highlighted in blue.
Viewing Vouchers
PO Vouchers
Vouchers submitted in order to pay an invoice associated with a Purchase Order must have the invoice attached.
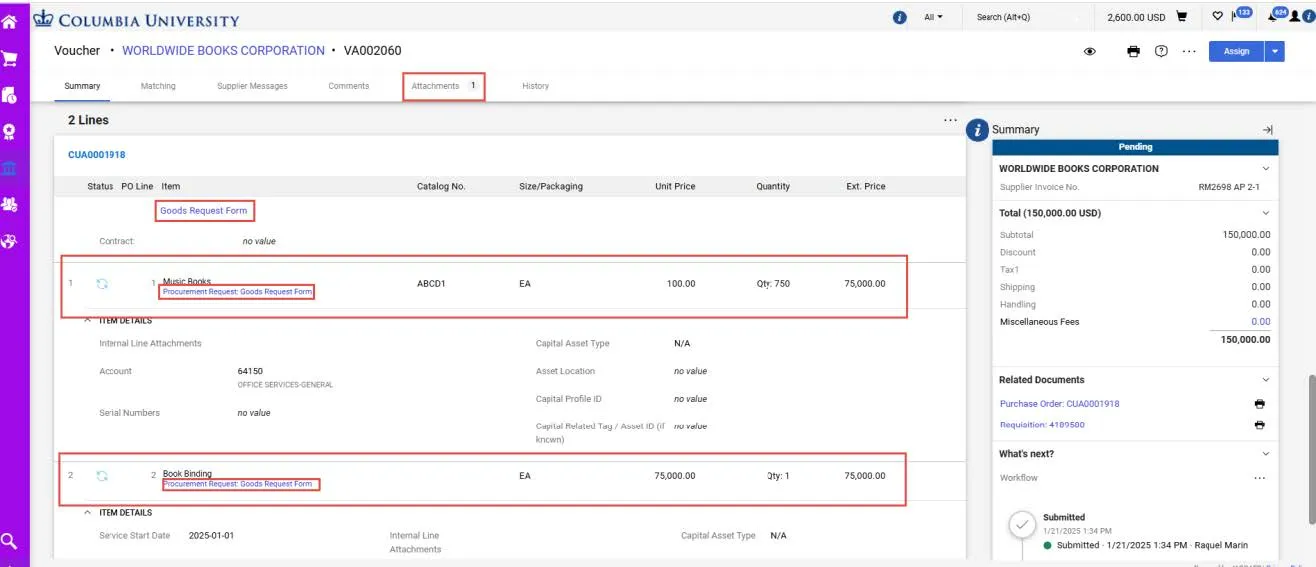
- Click the Attachments tab to view and download the invoice and any other attached documentation.
- Click the Purchase Order link from the Summary pane to view the original Purchase Order, any related Vouchers, or previous Change Requests.
Scroll down to the Line section of the Voucher to view the Item and Unit Price, Quantity, and Ext. Price (total price of the item. The Lines will indicate that it is associated with a Purchase Order with a link to the Goods and Service Request Form submitted by the original Requisition Requester.
Non-PO Vouchers
Vouchers submitted for payments not related to a Purchase Order must include an invoice, if applicable, and/or other documentation that explains the business purpose of the payment.
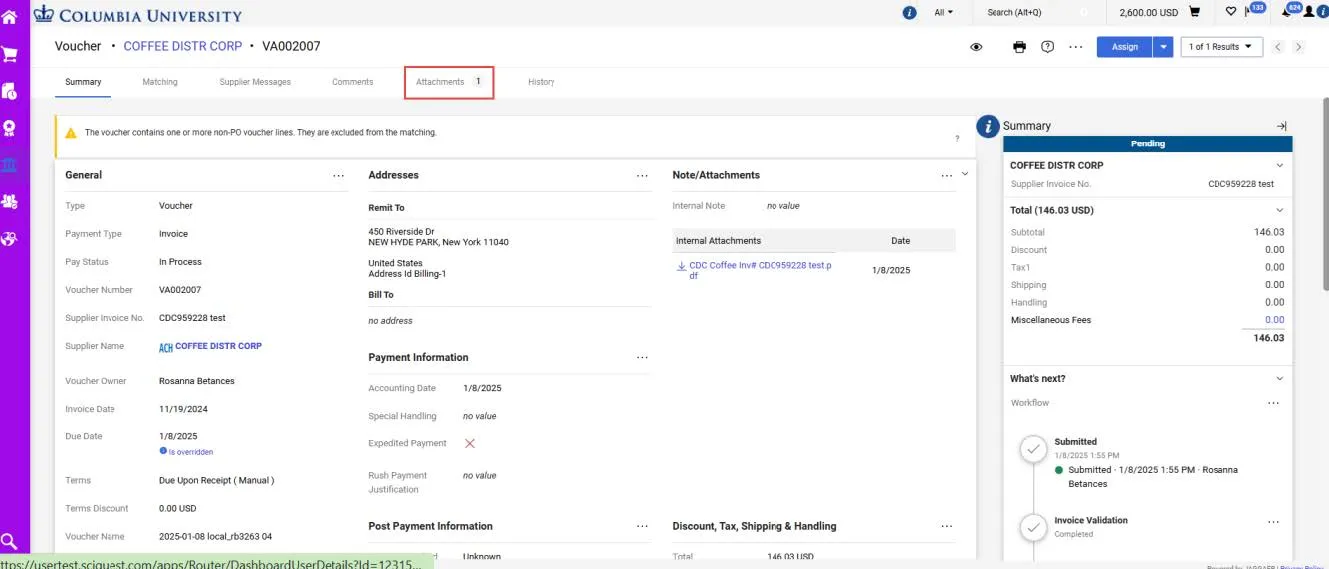
Click the Attachments tab to view and download the invoice, if required, or and any other attached documentation that explains the business purpose of the Voucher.
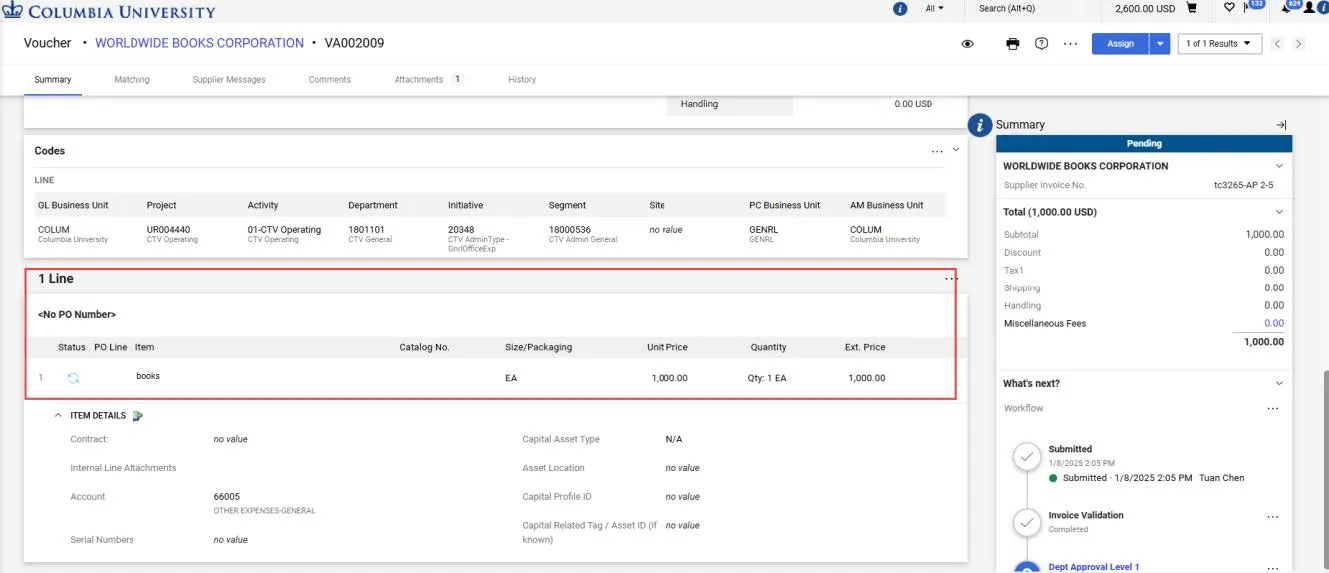
Scroll down to the Lines section of the Voucher to view the Item and Unit Price, Quantity, and Ext. Price (total price of the item). The Line will indicate that it is not associated with a Purchase Order and there are no related documents indicated in the Summary pane.
After viewing the document page, attachments, and any relevant related documents, you can approve it without assigning it to yourself. However, if you do need to take other actions, such as inserting an Ad-Hoc Approver, returning the it to the Requester/Initiator, or rejecting it, you must assign it to yourself before taking action. This action is the same for Requisitions, Vouchers, and Change Requests.
Click the dropdown arrow next to the Assign to Myself button and click Approve.
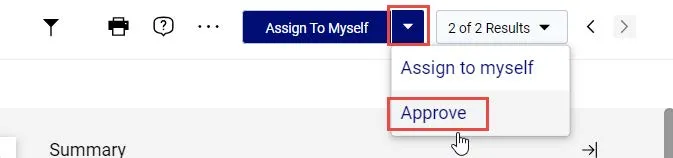
In order to take other actions, such as inserting an Ad-Hoc Approver, returning the document to the Initiator, or rejecting it, you must first assign it to yourself. All the actions detailed below are the same for Requisitions, Vouchers, and Change Requests.
Assigning to Yourself
When viewing a document awaiting approval, click the Assign to Myself button.
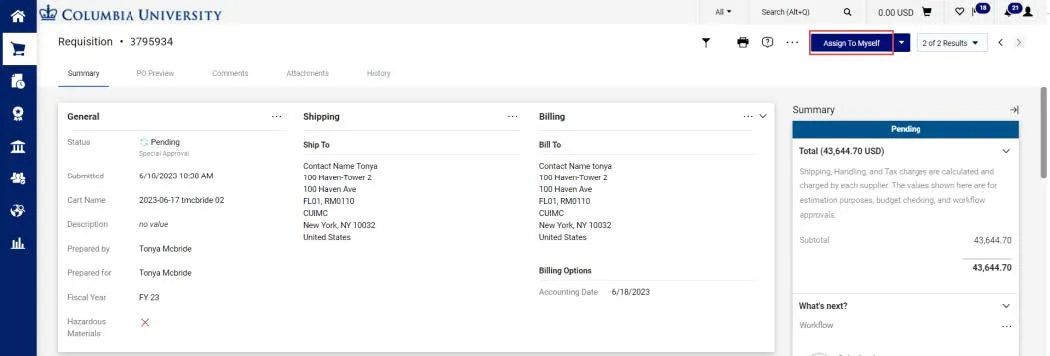
The document will be ready for you take action and lock it so that other Approvers cannot work with it.
Assigning to Yourself from the Approvals Screen
From the Approvals List screen, click the Assign icon for the document that you want to assign to yourself.
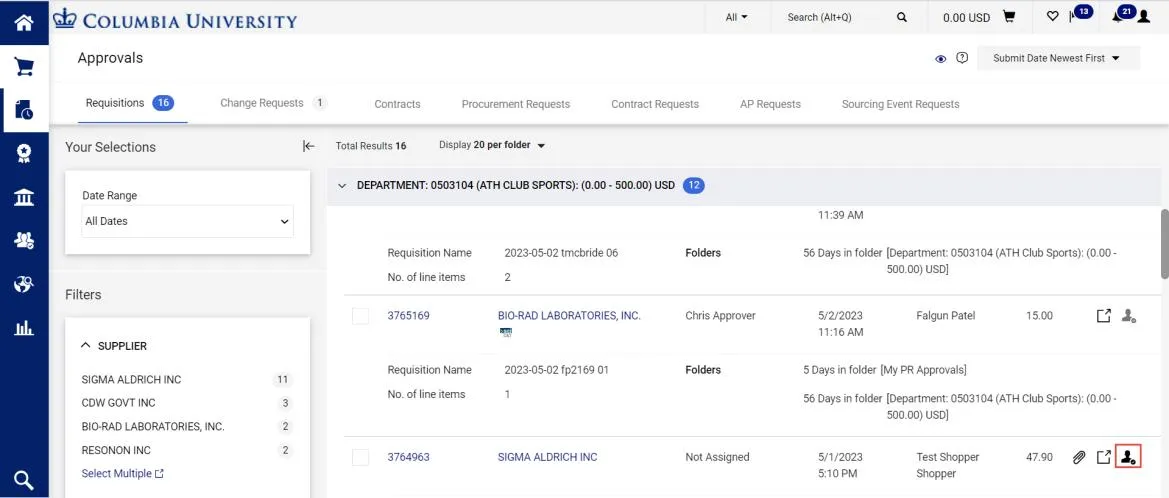
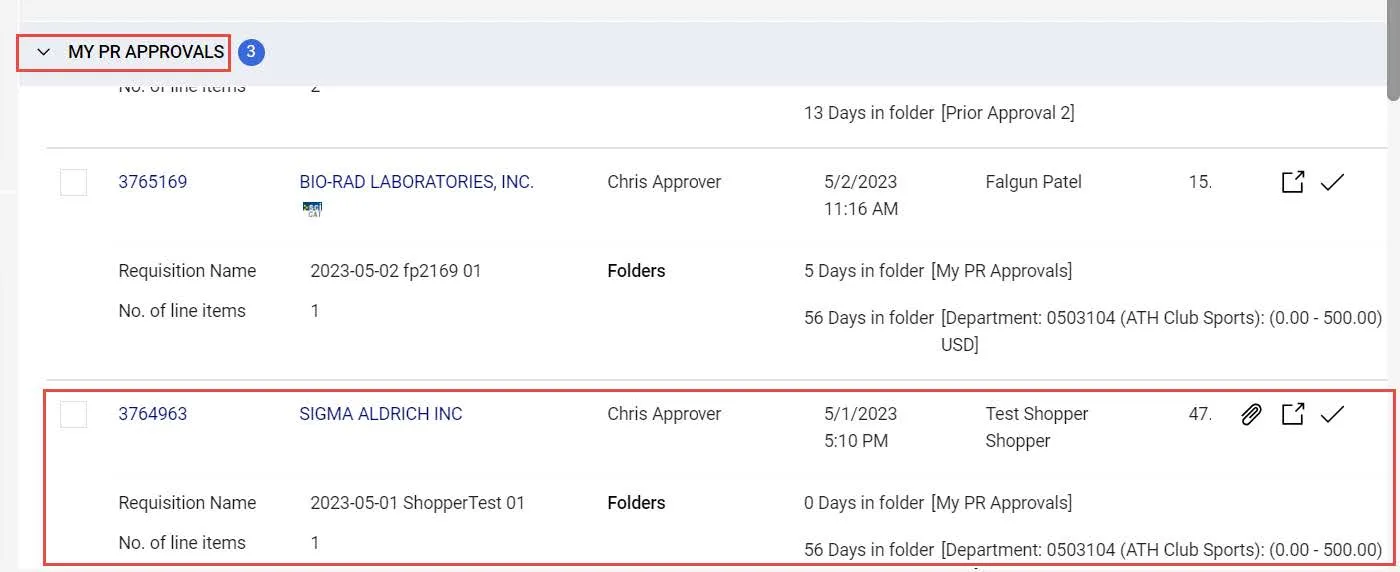
The document will be moved to My Approvals folder and other approvers will not be able work with it.
Returning the Document to the Shared Folder
If you are not able to continue reviewing and working with the document after assigning it to yourself, you can return it to the shared approval folder so that another Approver can process it.
From the document screen, click the dropdown arrow next to the Approve/Complete & Show Next button and click Return to Shared Folder.
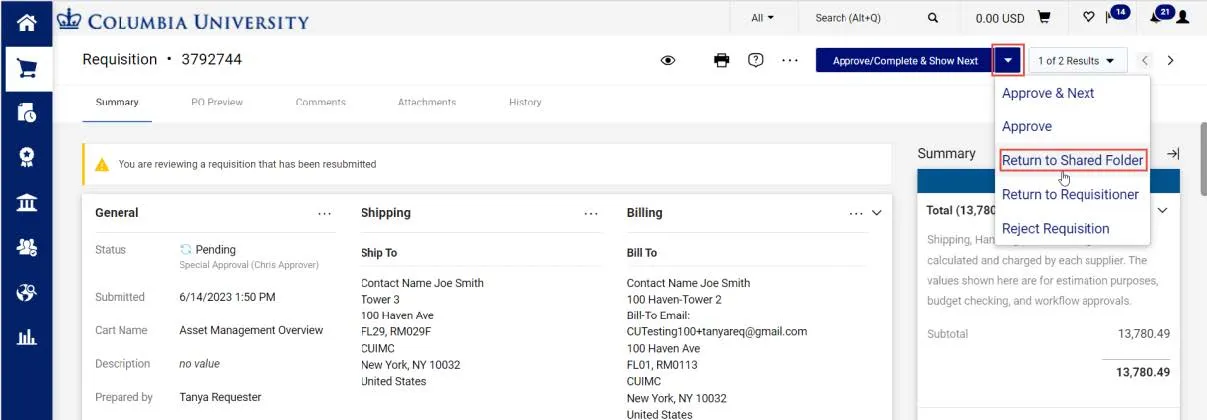
The document will no longer be assigned to you and will be available for other Approvers to process.
Inserting an Ad-Hoc Approver into Workflow
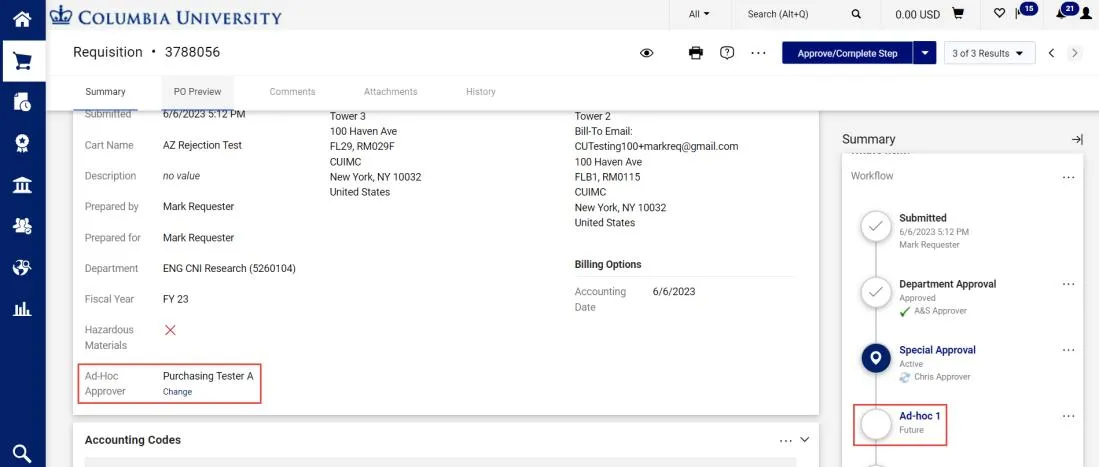
If you need to insert an additional approver into the workflow to review the transaction, you can select one after assigning the document to yourself. The Ad-Hoc Approver you insert will review the document after you approve it. Note: An Ad-Hoc Approver must have a CU Marketplace Approver role. You can only add one Ad-Hoc Approver. Other Approvers in the approval workflow can also add an Ad-Hoc Approver.
1. Click the Ad-Hoc Approver Select link at the bottom of the General section.
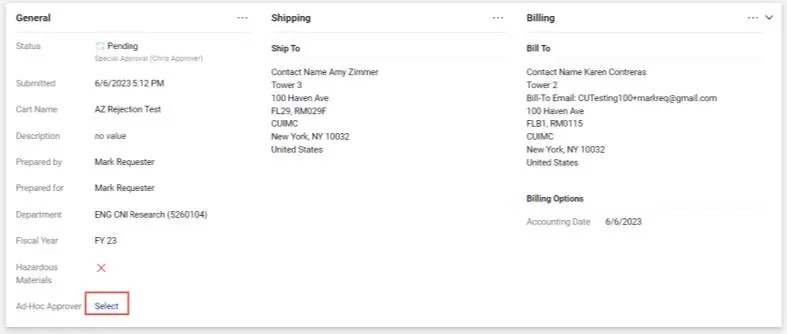
The Ad Hoc Approver window appears.
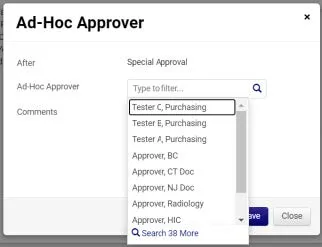
2. Click into the Ad-Hoc Approver field and select the Approver from the list. You can type to filter the list of names.
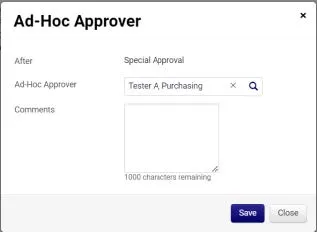
3. Click Save. The General section will indicate the Ad-Hoc Approver, which can be changed, if necessary, and the Summary pane will indicate the extra approval workflow step.
Approving
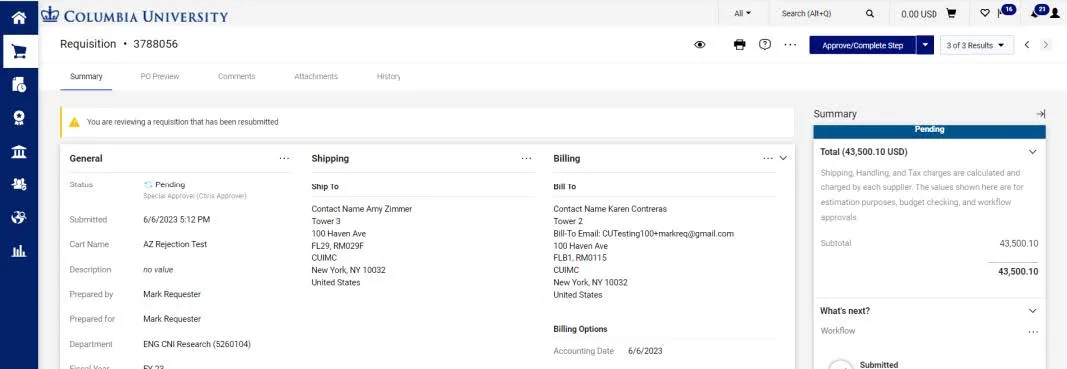
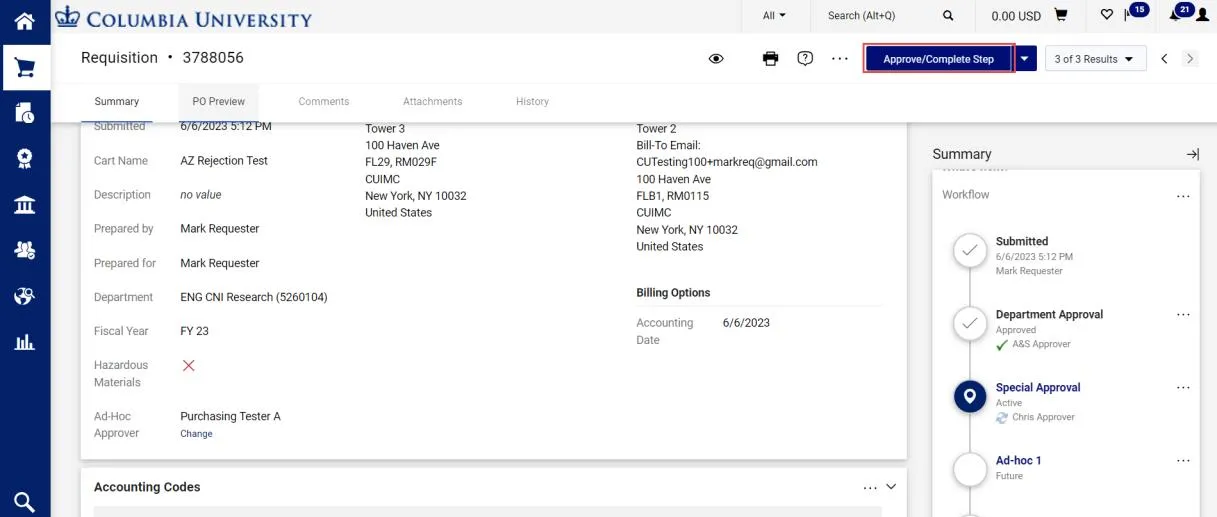
After assigning the document to yourself and reviewing it, click the Approve/Complete Step button.
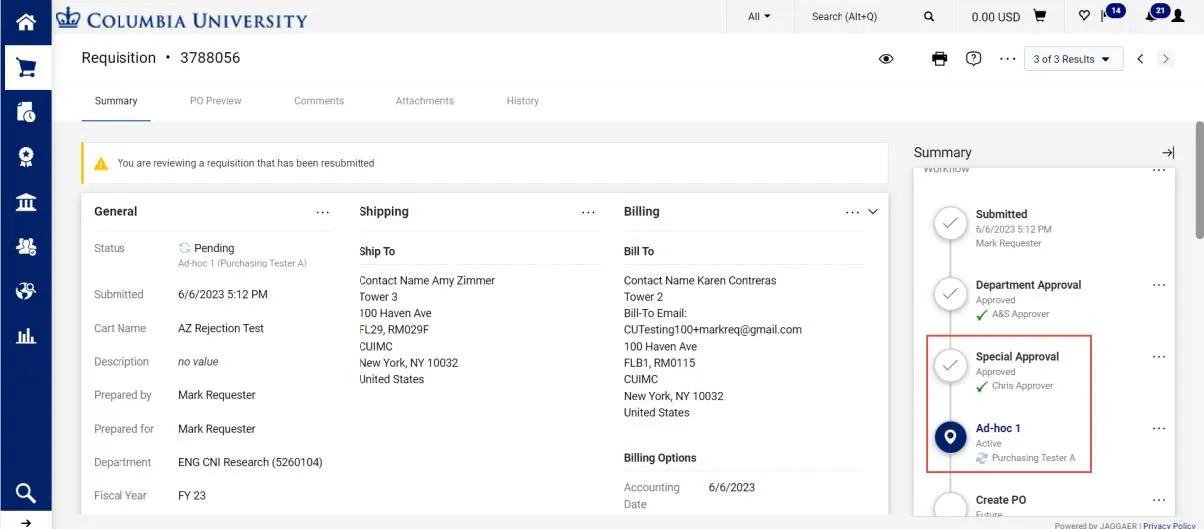
The Summary panel will indicate that you have approved the document and will show the next Active step in the approval workflow.
Returning to the Procurement Initiator
If the transaction does not meet your approval requirements, you can return it to the Initiator so they can make any necessary changes. After making the necessary changes or providing additional information, the /Initiator will resubmit the document back into workflow.
1. Click the dropdown arrow next to the Approve/Complete & Show Next button and click Return to Requisitioner.
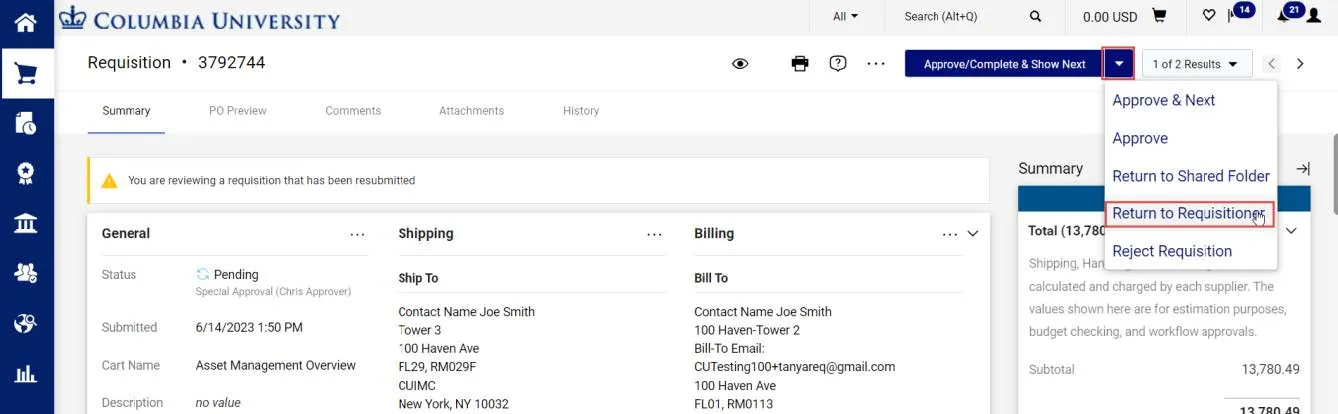
The Return window appears.
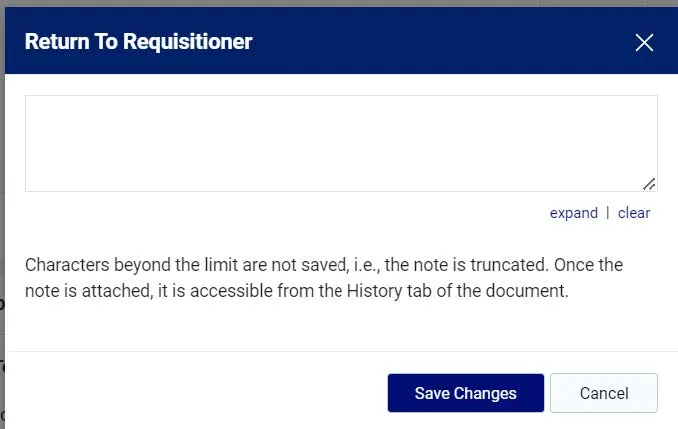
2. Type a Note informing the Initiator why you are returning the document to them so the Requester can address the issue. Click Save Changes.
Returning an Invoice Voucher
If you need to return an Invoice Voucher, you should make sure that the Voucher goes back to the Procurement Initiator and not the Voucher Owner. When the Return window appears, it will list both the Procurement Initiator (Invoiced by) and the Voucher Owner. The Invoice by individual is the Procurement Initiator who submitted the Voucher and should address any issues.
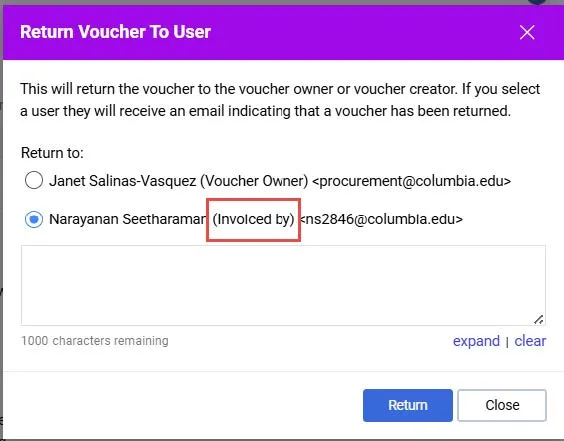
Select to Return to: Invoiced by so that the Voucher Initiator can make the necessary changes.
Reverting to a Previous Workflow Step
If necessary, you can return a Document to any previous step in the workflow process.
1. In the Summary panel, click the Workflow Actions icon and select Revert workflow to a previous step.
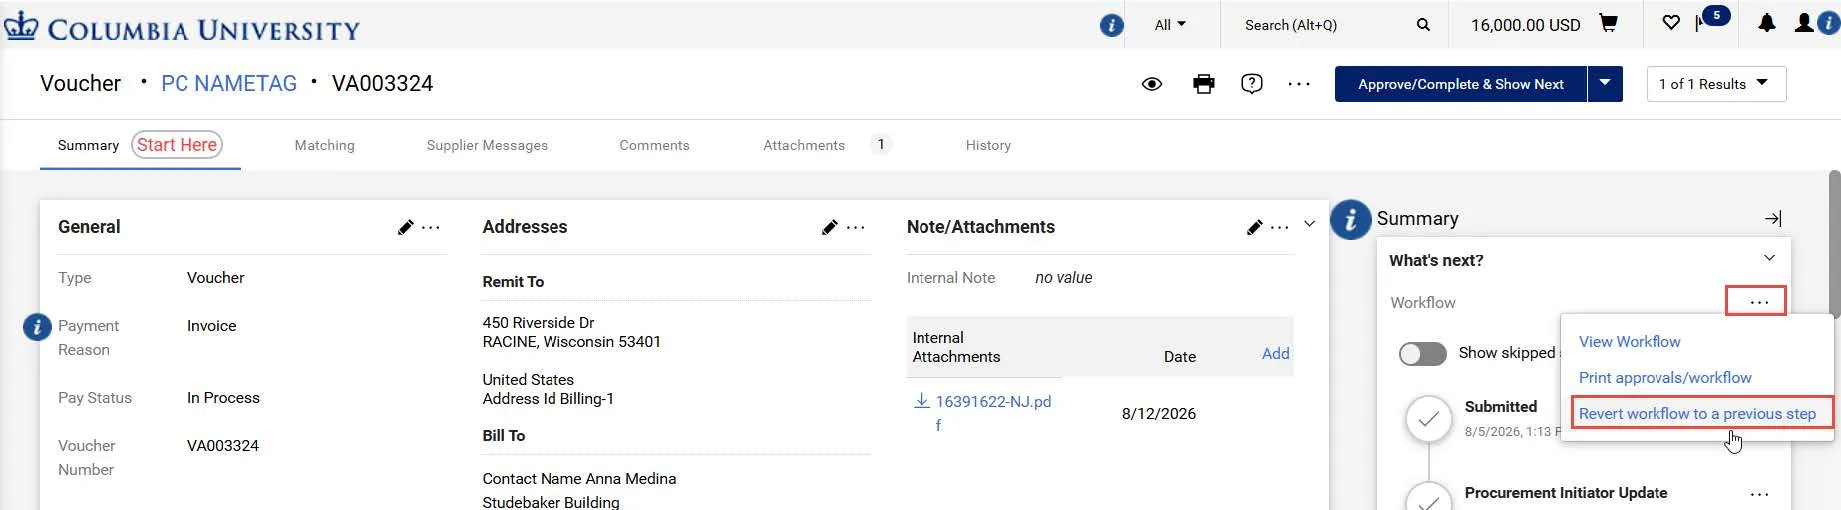
The Revert Workflow window appears.
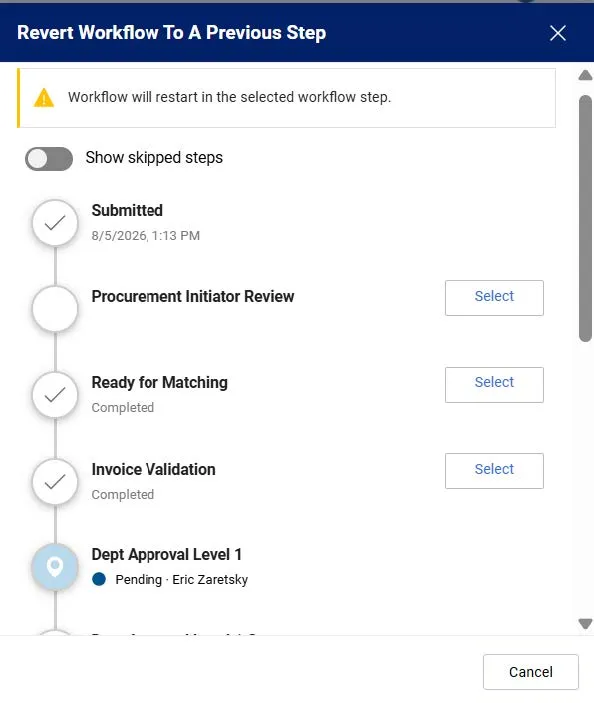
2. Click the Select button for the workflow step to revert.
Rejecting
Reject only when you want to terminate it and prevent the Requisition from being processed. The Requester/Initiator will not be able to make changes and resubmit it into workflow.
1. Click the dropdown arrow next to the Approve/Complete & Show Next button and click Reject.
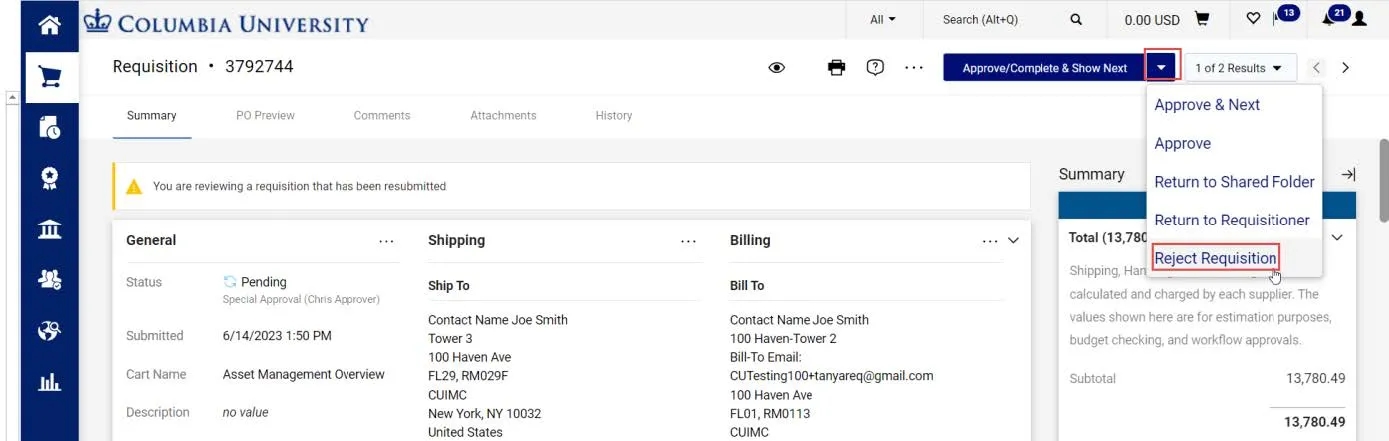
The Reject window appears.
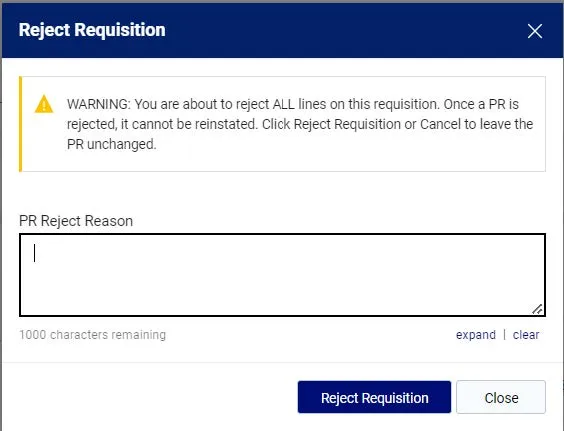
2. Type a Reject Reason informing the Requester/Initiator of why you are rejecting. Click Reject.
Please contact the Finance Service Center.
You can log an incident or request a service via Service Now.