FDS Scheduled Reporting
This job aid contains instructions on how to schedule a report in Financial Data Store (FDS).
The FDS scheduling functionality enables users to schedule reports to run automatically at specified times. When a scheduled report runs successfully, an instance of the report is created and the report is delivered to a destination specified by you (e.g. deliver by email).
Last Revision: January 2023
Accessing FDS
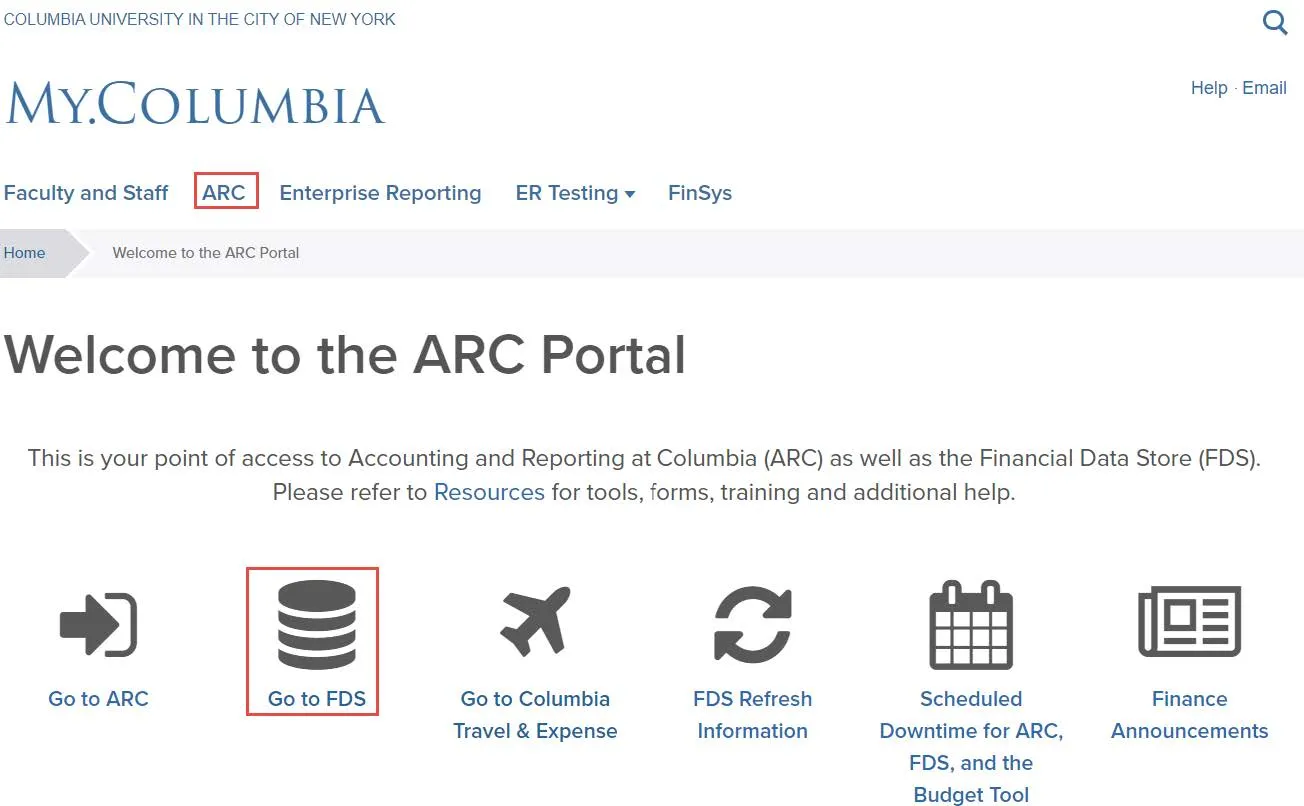
From the My Columbia page, click on the ARC link, then click on the Go to FDS icon:
Details
- Click the Folders tile. The Folders screen appears.
- Navigate by expanding Public Folders and the ARC folder. Select the subfolder containing your desired report.
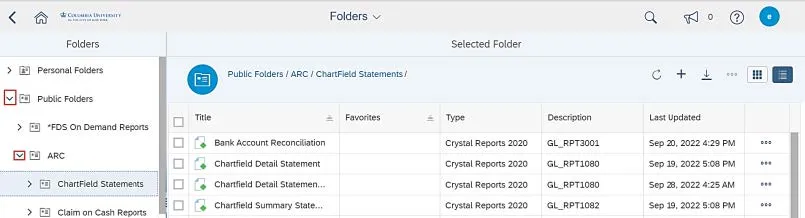
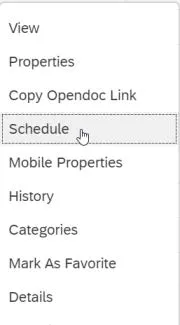
- Click the Actions button for the report you want to schedule and click Schedule. The Schedule page appears.
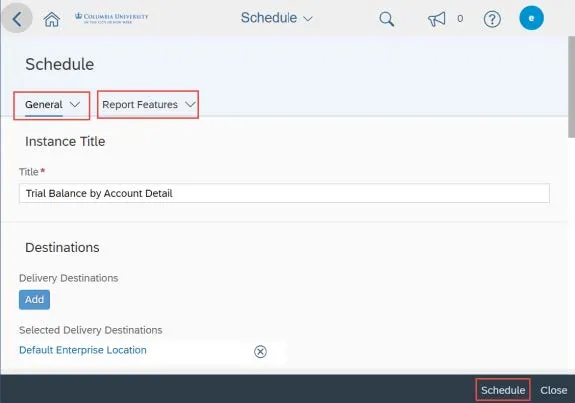
The General tab contains sections that define a schedule, like the schedule’s Destinations, Recurrence, Events, and Notifications.
The Report Features tab contains sections for the report values Prompts, Formats, and Print Settings.
- Complete the sections on General the tab.
- Instance Title (Defaults to name of report)
- Destinations (Specifying a report output destination, e.g., Business Objects Inbox)
- Recurrence (Specifying a report recurrence)
- Events (Not in use)
- Scheduling Server Groups (Not in use)
- Notification
- Complete the sections on the Report Features tab.
- Prompts (Parameters)
- Formats (Specifying a report format - Excel, Crystal, PDF. etc)
- Filters (Not in use)
- Print Settings (Do not change default settings))
- Languages (Not in use)
Note: For some scheduling options, the settings cannot be altered as they have been specified by the Business Objects Administrator.
Setting an Instance Title
The Instance Title will default to the name of the report you are scheduling. You can rename the title or choose to leave it as the default. If you choose to rename, type the name in the Instance Title field. The title will appear when viewing instance schedules and retrieving report output.

Note: Renaming the Instance does NOT rename the report found in the Public ARC or HR folder.
Specifying Destinations
You can schedule a report to be sent to a specific destination like a default file location or email.
- Click the Add button. The Select Destinations window appears.
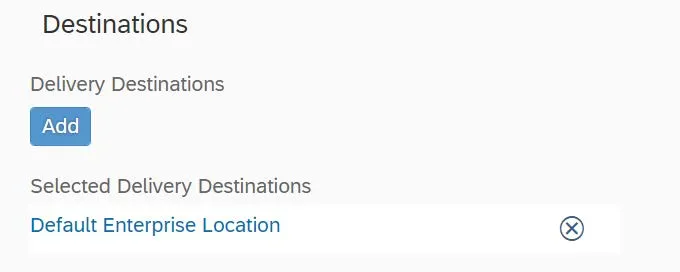
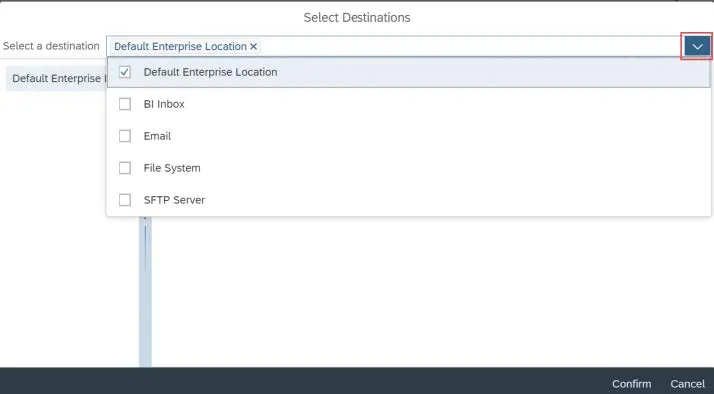
- Click the Select a destination dropdown.
- Select the checkbox(es) for the destination(s) you want to include. Each selection appears in the left panel.
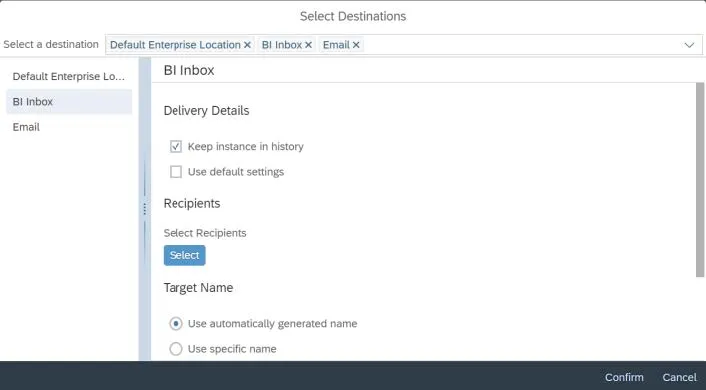
- Select the option from the left panel to set parameters for that destination.
- Click Confirm.
Note: For the Default Enterprise Location option, the report is accessed by right clicking the report name and selecting History. For the BI Inbox option, new/unread reports will be displayed in the BI Inbox tile on the Home page.
Specifying a Scheduling Recurrence
Click the Run Report dropdown to select when the report is to be run and the frequency. The Allow Retries option allows you to specify how many times to retry running the report and the retry interval if the report fails to run for any reason.
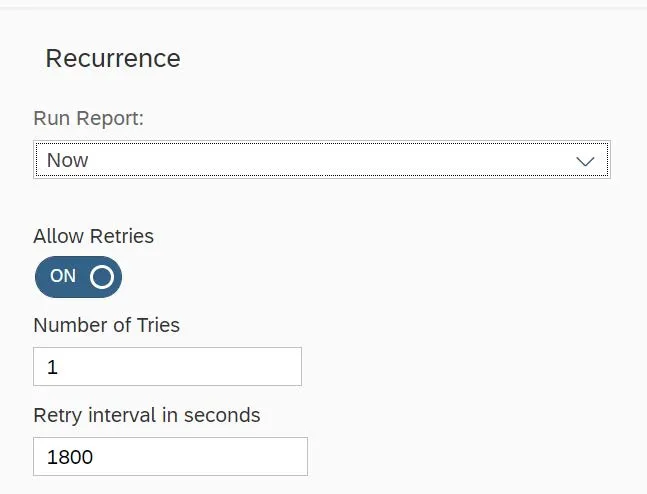
The following Run Report options are available:
Now: When you click Schedule, the report runs immediately. You may want to use this option to run report with large data sets.
Once: The report runs once at the time specified. This option requires a start and end time parameter. Use the ‘Start Date/Time’ parameter to specify when the report should run. The ‘End Date/Time’ parameter should be after the ‘Start Date/Time’ parameter. This option requires a start and end time parameter.
Recurring:
- Hourly: This option requires information in hours and/or minutes for how frequently the report is run. Reports are created regularly to match the parameters that you enter. The first instance of the report is created at the start time that you specify, and the object will cease to run on its hourly schedule at the end time that you specify. This option requires a start and end time parameter.
- Daily: The report runs once every day at the time specified. The report will not run after the end time that you specify. This option requires a start and end time parameter.
- Business Hours: You can specify specific hour intervals during a specified business day period within specified dates to run the report.
- Weekly: Each week, the report runs on the selected days at the time specified. The report will not run after the end time that you specify. This option requires a start and end time parameter.
- Monthly: The report runs on the specified date and time every month. The report will not run after the end time that you specify. This option requires a start/end date and time, along with a recurrence interval in months.
- Specific day of Month: Report are created regularly each month on the day that you enter at the start time that you specify. The report will not run after the end time that you specify. This option requires a start/end date and time, along with a day of the month on which the object is run.
Calendar: This option is not used at this time. This option allows you to select a calendar of dates. (Calendars are customized lists of schedule dates that are created by the Business Objects Enterprise administrator.) A report is created on each day that is indicated in the calendar, beginning at the start time that you specify and continuing until the end time that you specify.
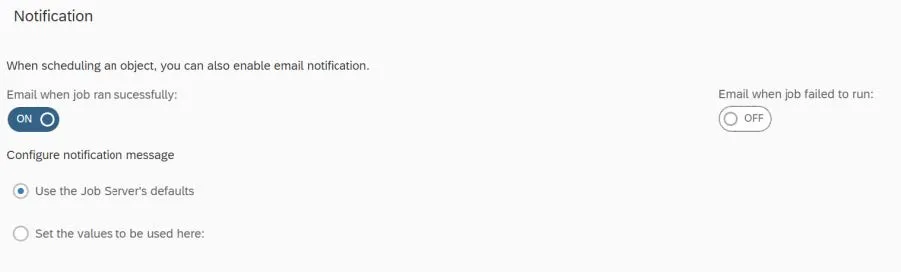
Setting Notifications
You can turn on and set up email notifications if the report has run successfully or if the report failed to run. You can set values to send to any email address to inform interested stakeholders.
Specifying Prompts
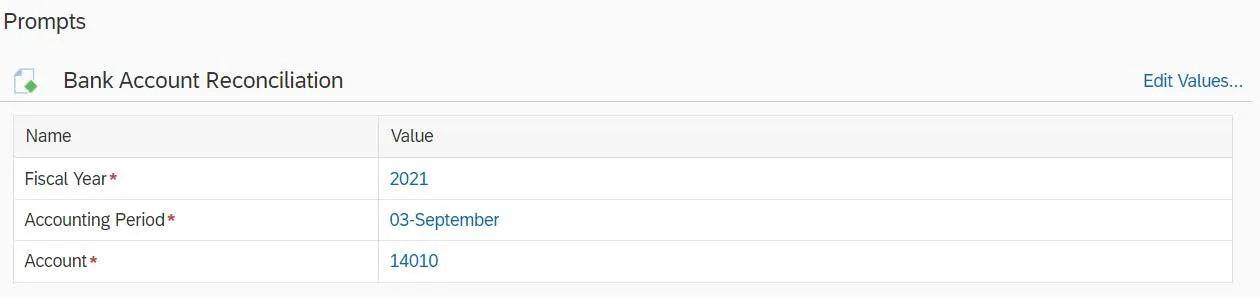
If the scheduled report requires parameter input, then these must be provided via the Prompts option. All required values are marked by an asterisk (*).
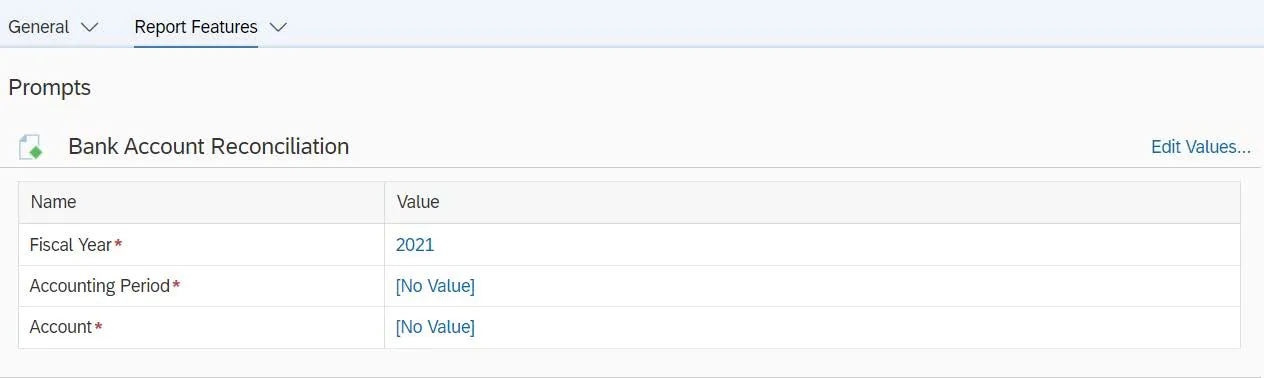
- Click the Value to enter or edit the value in the field. The field will indicate “No Value” if the value has not yet been selected. The Prompts window appears.
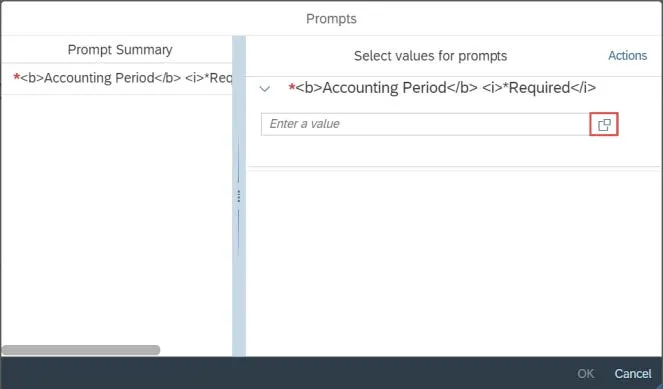
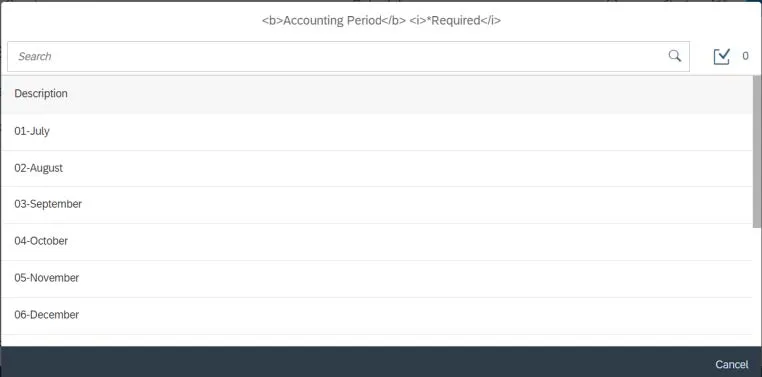
- Enter a value or click the Selection icon, if available, to select from a list of values.
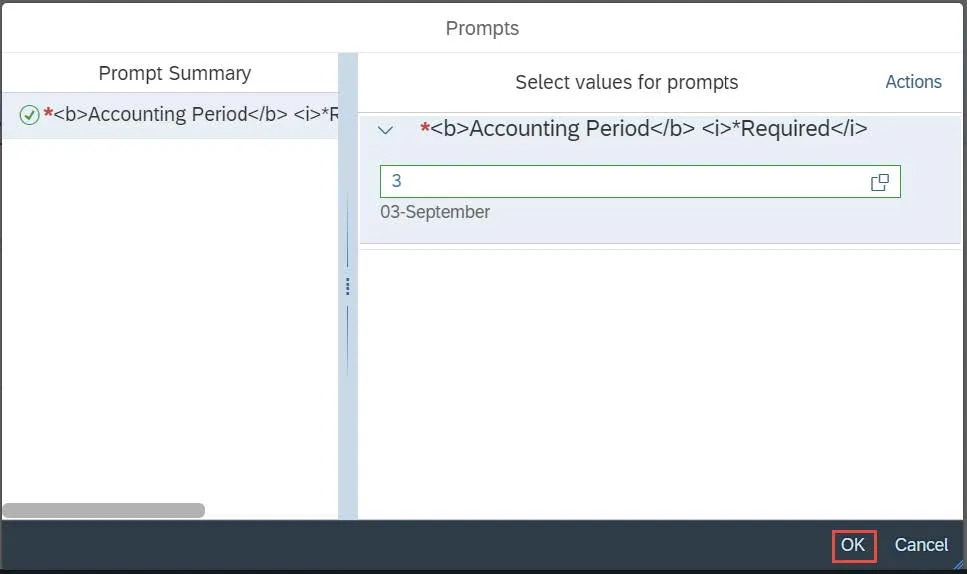
- Click OK. Repeat the steps until all required values are populated.
Selecting a Format
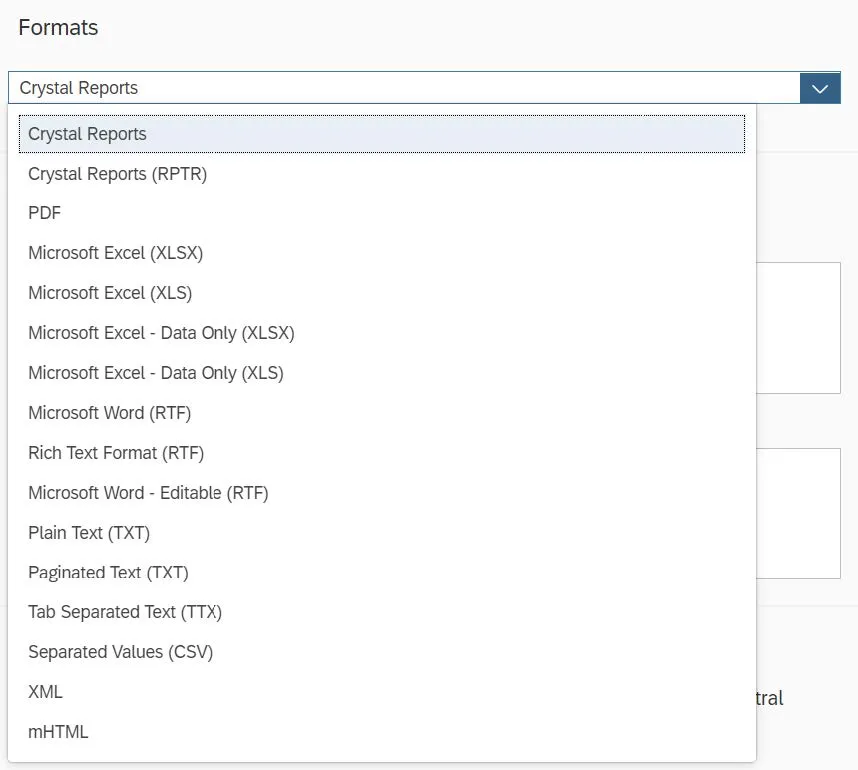
The report can be run using a number of file formats. The most commonly used formats are Crystal Reports, PDF, and Microsoft Excel. Click the dropdown to select the desired Format.
Note: The Microsoft Excel (XLS) format supports a maximum of 65,536 rows on a single worksheet. If your report contains more than 65,536 rows of data, it will be spread out over multiple worksheets. The Microsoft Excel (XLSX) supports up to 1 million rows of data per worksheet, however, the report will not be formatted and may be missing header information.
Scheduling the Report
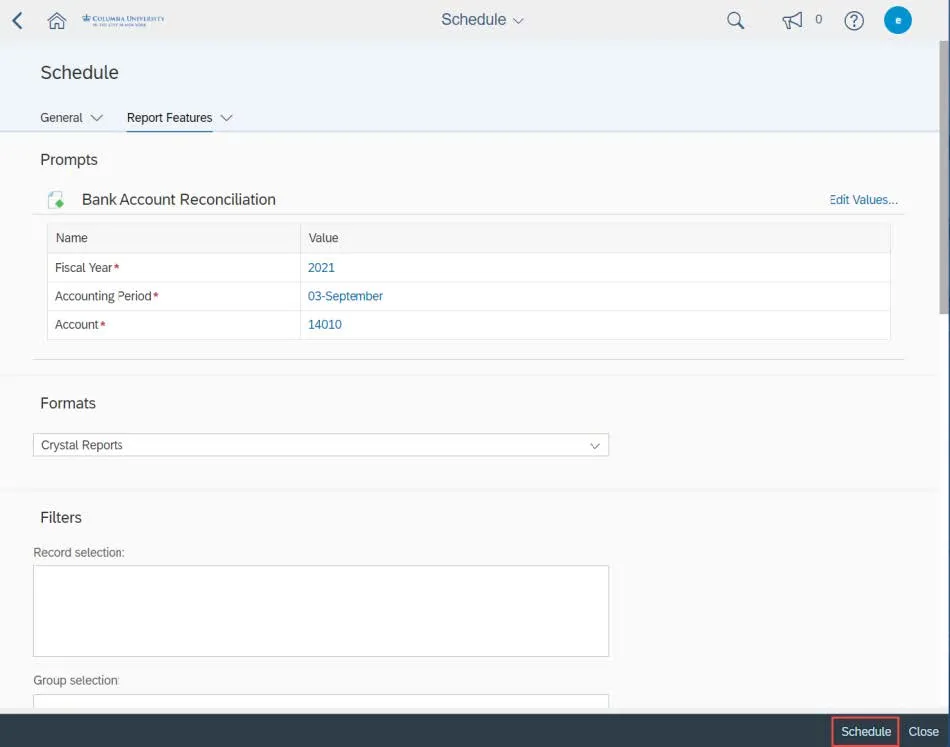
After you have entered the Report Features fields, click the Schedule button.
Viewing the Scheduled Report via History
Navigate to the Folder and the Report you scheduled. Click the Actions button on the scheduled report and select History.
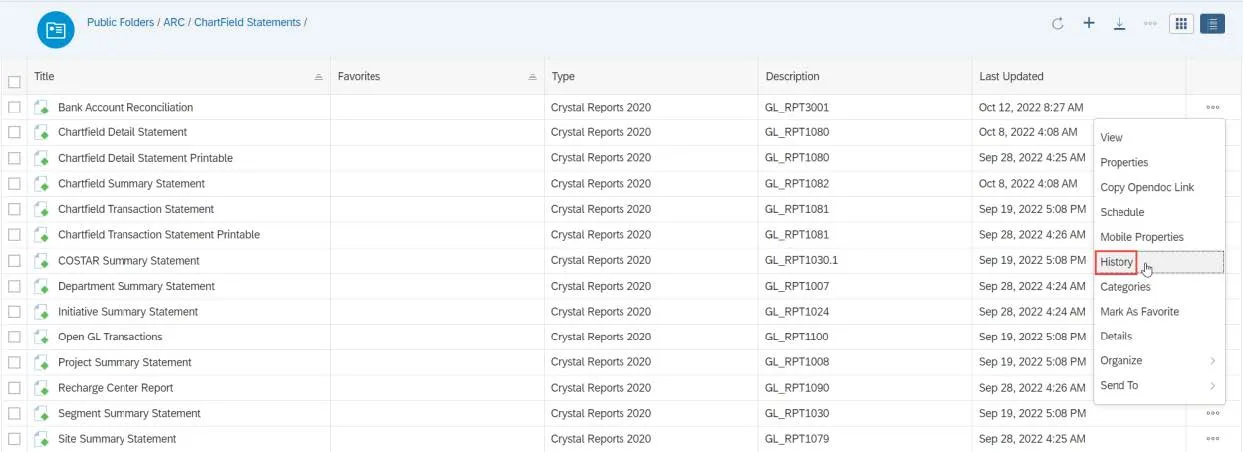
The selected report’s History screen is displayed with all the previously run reports as well as reports scheduled for the future.

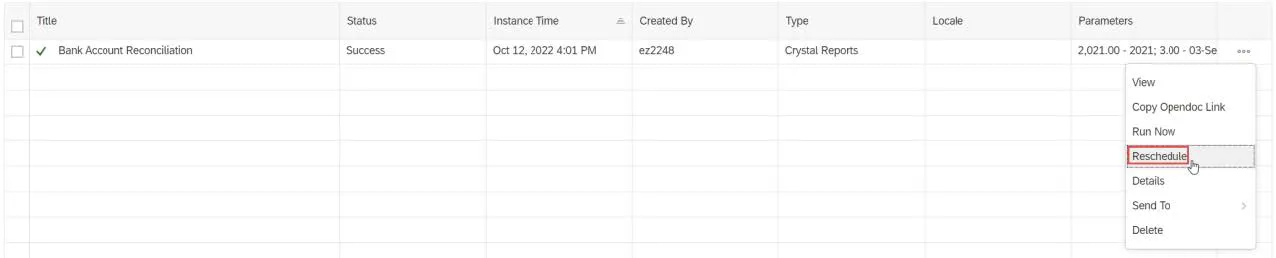
You can click the Actions button and select the Reschedule option for rerunning the selected report. All scheduling values are inherited from the original report schedule, which can then be modified, if needed.
Viewing the Scheduled Report via BI Inbox
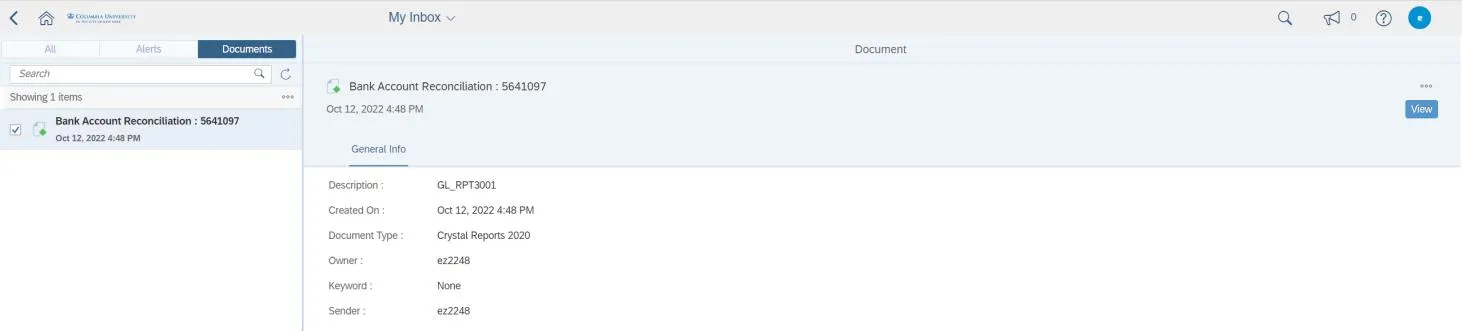
From the Home page, click the BI Inbox tile. In order for the report to appear in the BI Inbox, it must be specified as the Destination on the General tab when setting up the Schedule. The My Inbox screen appears with scheduled documents.