Making a Deposit Using Your RDC Scanner
The following job-aid details the steps to make a check deposit using your RDC scanner. After making the deposit using your RDC machine, enter the deposit details in the FinSys/FFE Cash Deposit module.
Last Revision: May 2024
Preparing Checks for Deposit
- Gather all check to be scanned.
- Count the checks for “Number of items” and compute the expected total amount of your deposit. This amount is the “declared amount.” This count should be verified and approved by the approver of the deposit.
- Perform a quality check of all deposit items to ensure that the bottom of the checks are aligned and are facing the same direction, remove all staples, paper clips etc. and straighten any bent corners.
Details
- Go to the Bank of America homepage, and the Businesses and Institutions tab, and log on to Bank of America CashPro Online.

- Click the Receipts tab and Remote Deposit.
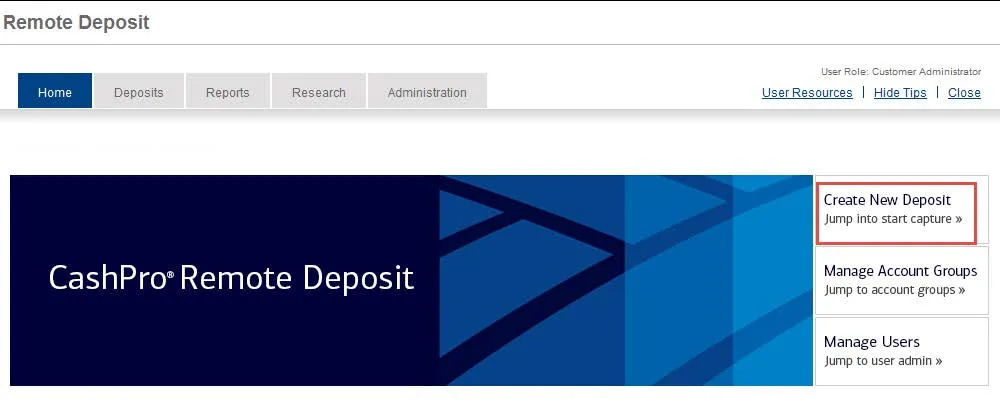
- Click the Create New Deposit link. The New Deposit screen appears.
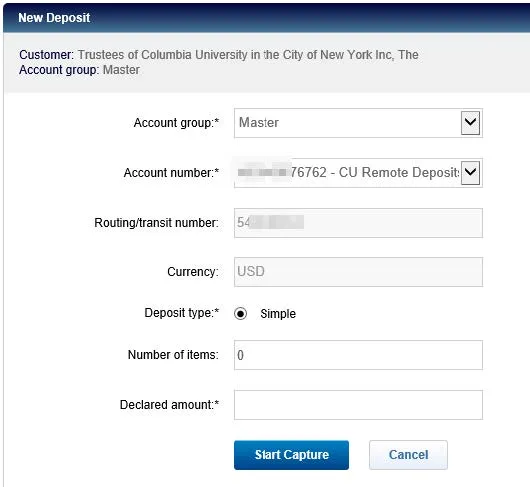
- Confirm that the Account number is correct. Check deposits should be routed to the account ending with 6762 only.
- Select the appropriate account group description from the Account Group drop down.
- Important: In the Number of Items field, enter the number of checks plus 1. For example, if you have 20 checks, enter the number 21.
- Enter the total amount of the deposit in the Declared Amount field.
- Load items in the entry tray right side up and facing out, as pictured below. Place as many items as will comfortably fit into the scanner entry tray.
- Click Start Capture. The checks are scanned and a virtual endorsement is printed on the back on each check. The Deposit Item List screen appears.
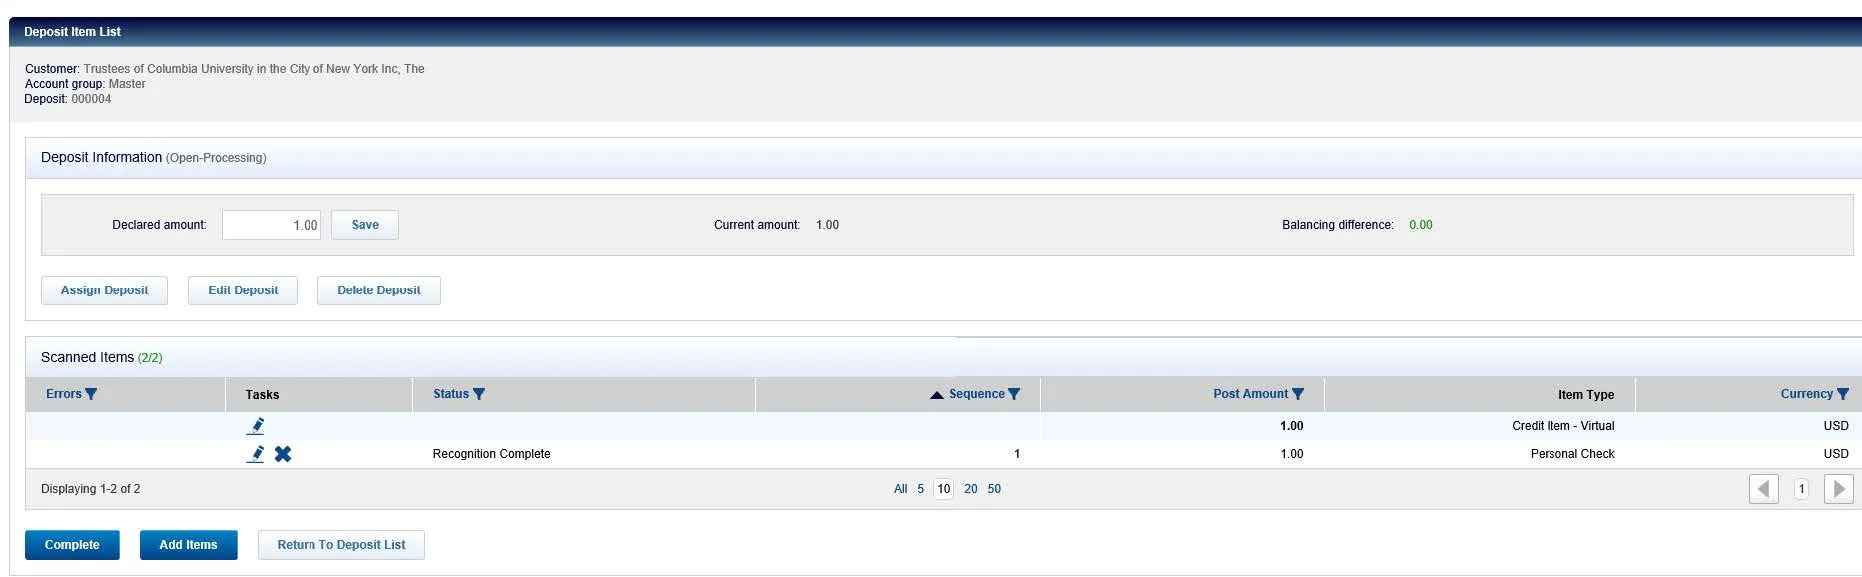
The Deposit Item List screen allows you to verify if your deposit is correct and, if necessary, edit or delete the deposit. Errors will be noted with an attention symbol and must be corrected before you can complete the deposit.
- Verify that the Scanned Items amount matches the Number of Items you entered on the New Deposit form.
- If necessary, click Edit Deposit to correct errors or Delete Deposit to abort the deposit.
- Click the X icon next to an item to delete it or click Add Items to add additional items.
- Click Complete to submit the deposit. The Deposit List screen appears displaying the deposit details with a Status of Received.
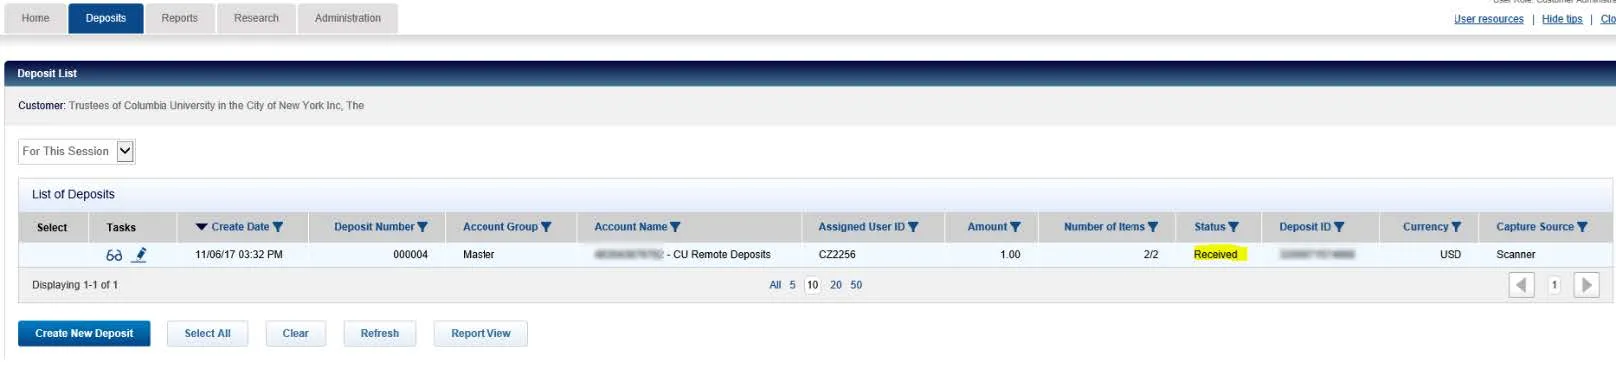
- Click Report View icon from the Deposit List for the deposit you want to print. Or, select the checkbox (if available) next the deposit item you want to print and click the Report View button.
- Print the deposit screen and retain printout with the batch. Scanned checks should be secured separately from checks that have not been scanned for at least one accounting period and a maximum of 60 days. The checks must then be shredded.
Login to Cash Pro University
Cash Pro University provides a collection of documentation and web-based training for additional guidance and troubleshooting.
After using the RDC Machine to make check deposits, Initiators must enter the deposit details in the FinSys/FFE Cash Module and Release the batch. Approvers must approve the deposit on the same day as the RDC machine deposit. Entering an RDC Machine Deposit
Details
- Login to the FinSys/FFE Cash Module.
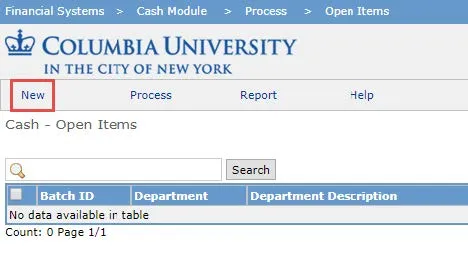
- Select New.
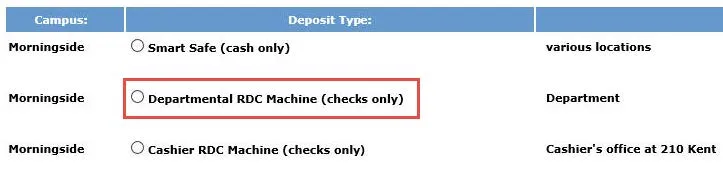
- Select Departmental RDC Machine (checks only).
- Click Next. The Cash Batch form appears.
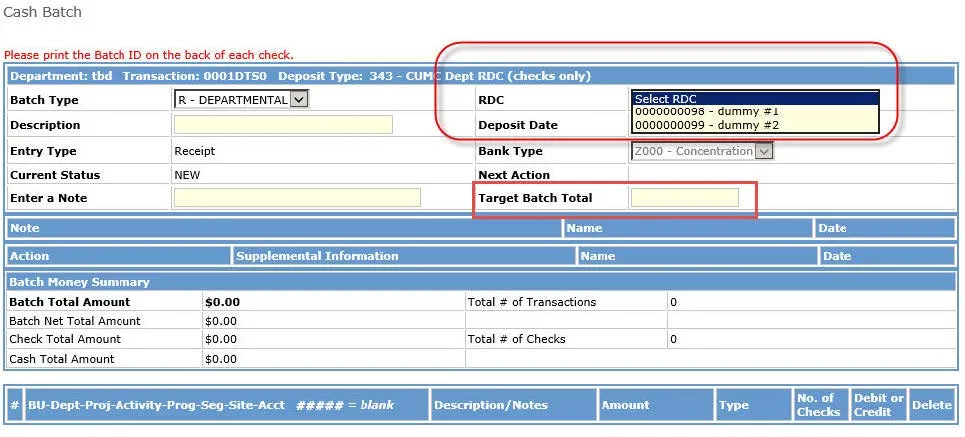
- Select the correct RDC from the dropdown (if applicable) and enter the Target Batch Total.
- Click the Add Item button from the bottom of the screen. The ChartString Selector screen appears.

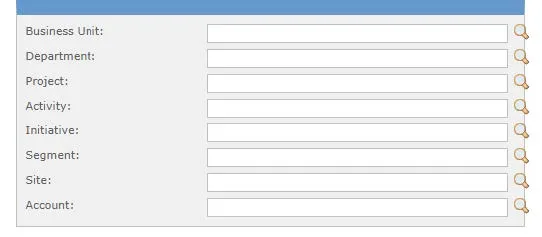
- Enter the ChartString information for each ChartField and click Next from the bottom of the screen. The Item appears on the Cash Batch form.

- Enter the UNI of the employee making the deposit in the top Description field and a detailed description in the bottom Notes field.
- Enter the Amount (equaling the Target Batch Total) of the deposit and No. of Checks.
- Click Save & Release from the bottom of the screen.
- Click the Process menu and select Items Awaiting Approval. The Cash - Items Awaiting Approval page appears.

- Click the check box for the deposit you want to approve.
- Click the Approve button from the bottom of the screen. The Cash – Department Approval View appears.
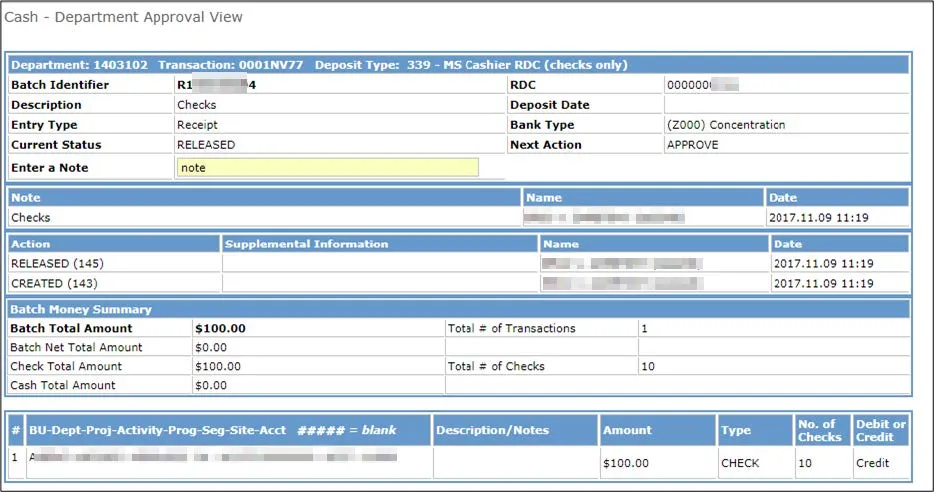
- Enter a Deposit Date.
- Click the Save & Continue button from the bottom of the screen.
- Click the Process menu and select Released Items. The Cash - Released Items page appears.
- Click the check box for the deposit you want to view.
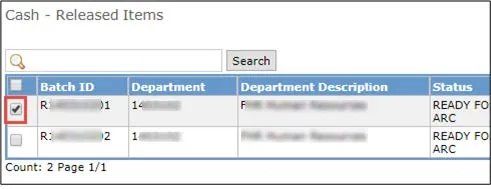
- Click the View button from the bottom of the screen. The Cash Deposit Report Detail View appears.
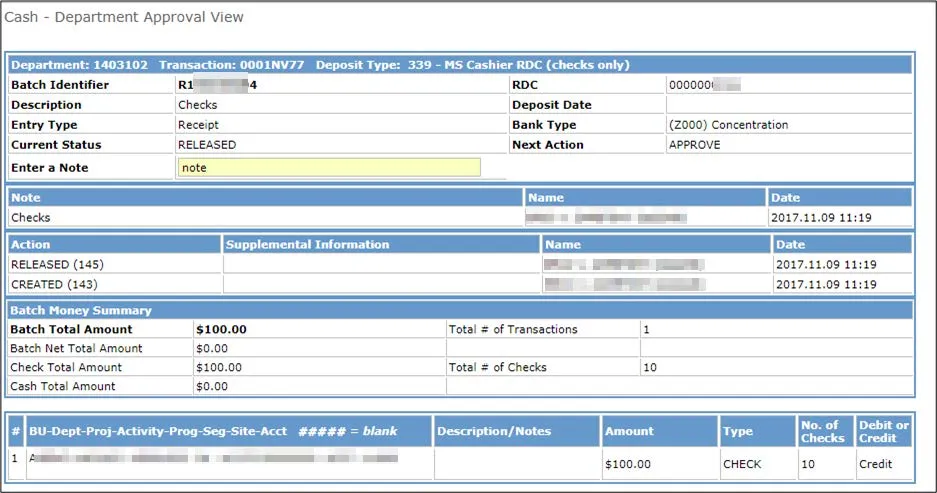
- Click Print from the upper right corner of the FinSys/FFE screen to print the deposit details.
- Retain the printout and attach it to the batch.
Nida Williams
Executive Director, Accounting and Business Management
615 West 131st Street, 6th Floor
(212) 854-5103
[email protected]
Norman L Strong
Associate Director, Payments and Deposits
210 Kent Hall
(212) 854-3020
[email protected]
Joanne Hudson
Director, Accounting and Business Management
615 West 131st Street, 6th Floor
(212) 854-7931
[email protected]