Reconciling Pre-Trip and Travel/Cash Advance Requests in Concur
This job aid demonstrates the process of reconciling pre-trip and travel/cash advance requests in Concur.
Last Revision: June 2026
If you were required to submit a Pre-Trip Request, you will need to attach the approved Request to an Expense Report in order to be reimbursed for expenses. If you submitted a Travel/Cash Advance, you will need to attach the approved Request to an Expense Report in order to reconcile the advance.
Details
When reconciling a Request to an Expense Report, you can either create the Expense Report from the Request or you can create an Expense Report first and then import the Request into the Expense Report.
Creating an Expense Report from a Request
- Navigate to Manage Requests. The Active Requests appear. The Status of the Request you are reconciling must be Approved in order to attach it to an Expense Report.
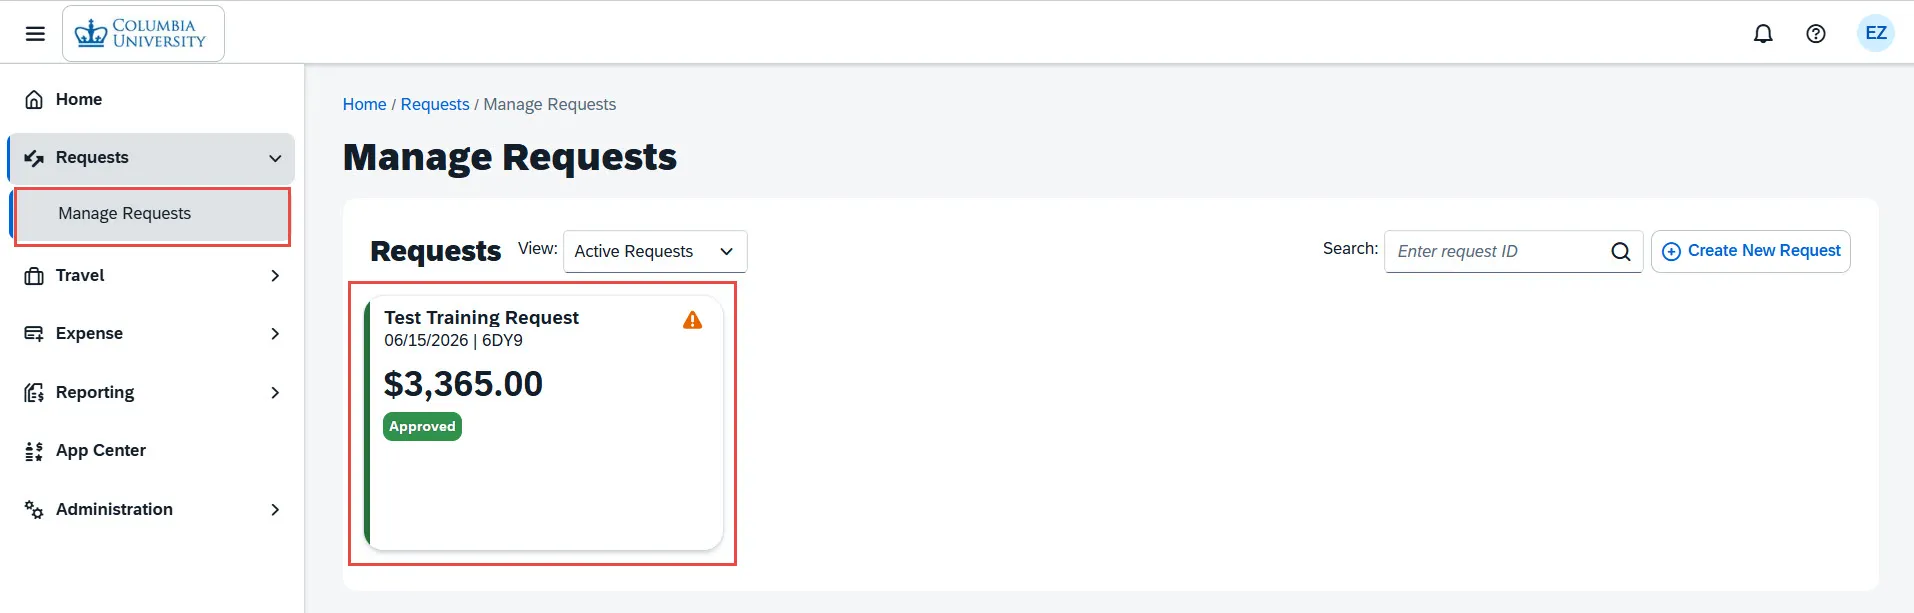
- Click the approved Request to open it.
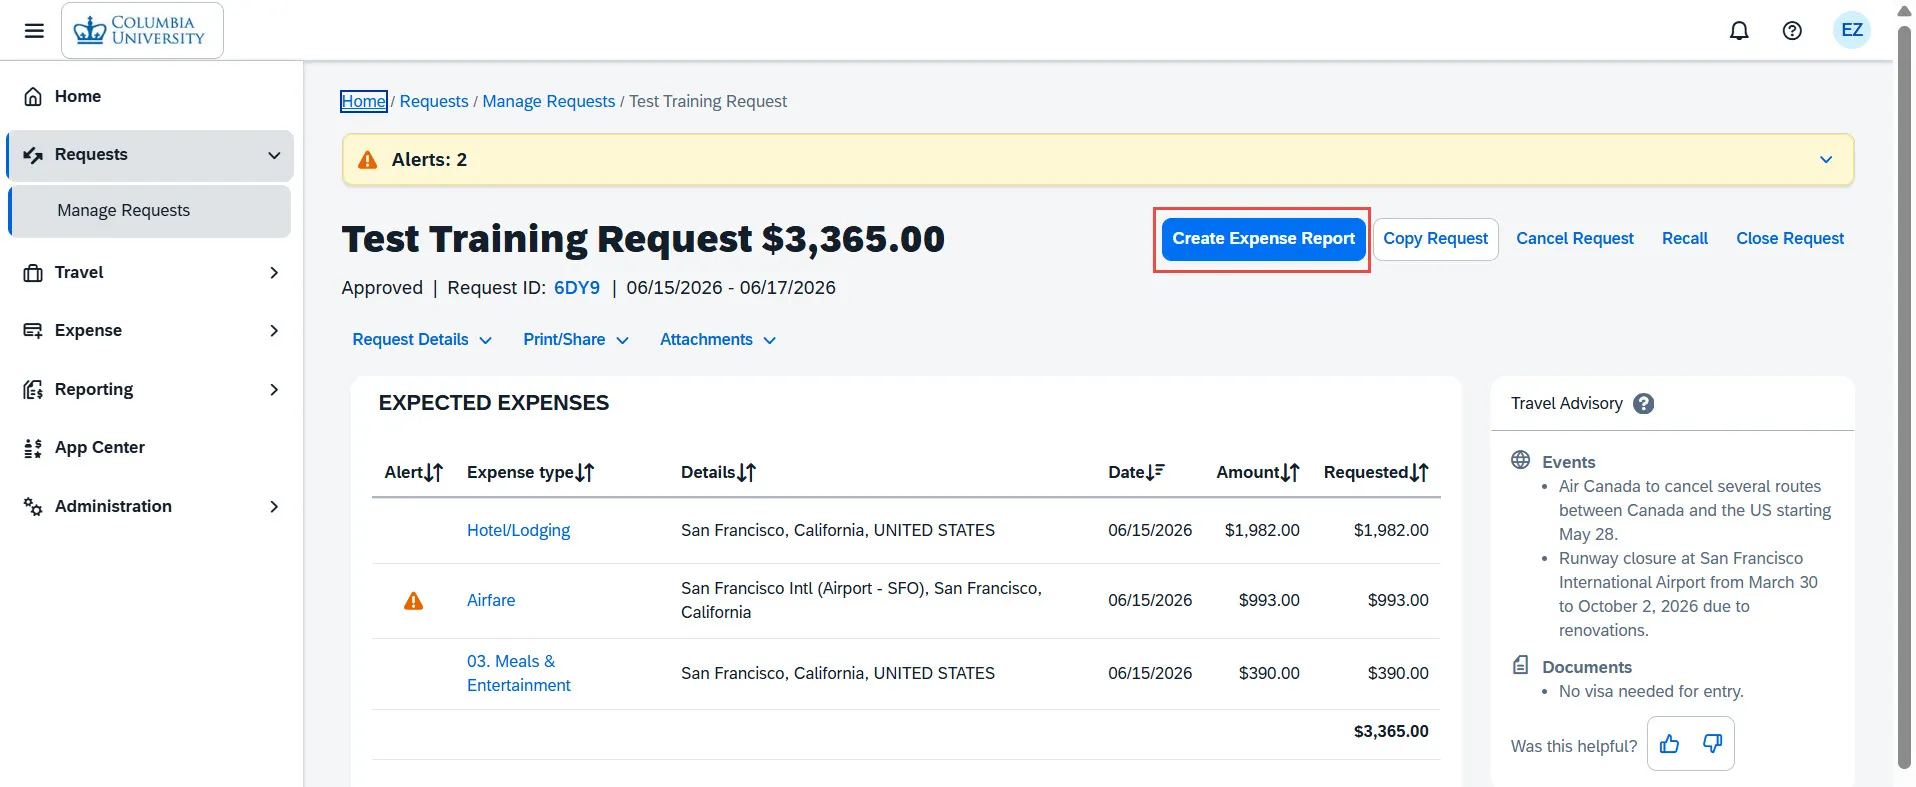
- Click the Create Expense Report button. The Request details are automatically associated with the new Expense Report. You can edit the Report Header if you need to update the Departmental or ChartString information.
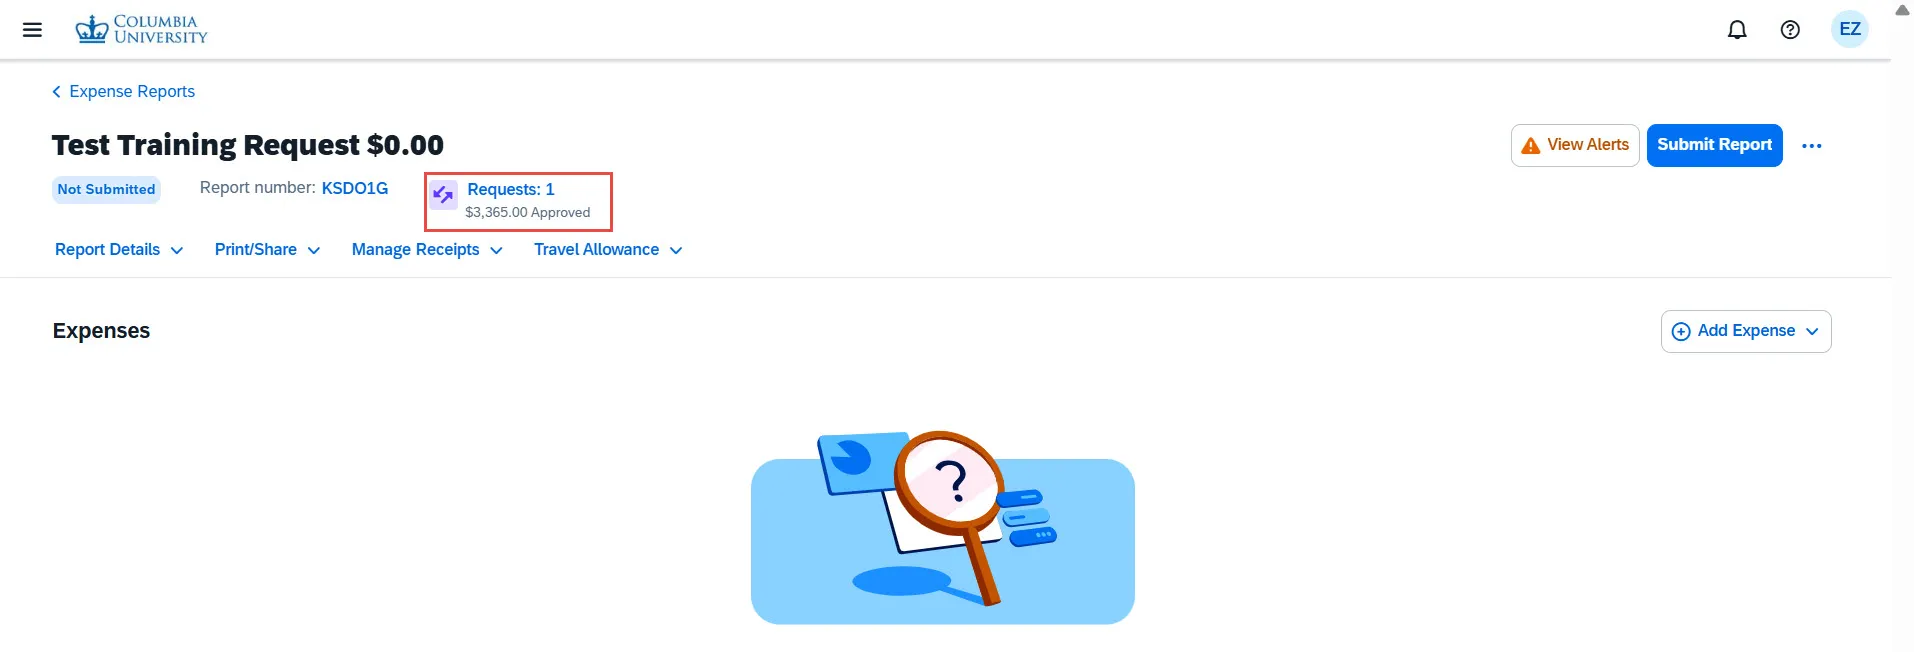
- Follow the steps in the sections for Adding Expense Items to the Expense Report and Submitting the Expense Report.
Note: Requests cannot be allocated to multiple ChartStrings when originally submitted for approval, but you can allocate your reconciliation Expense Report to multiple ChartStrings. Refer to the Allocating to Multiple ChartStrings Concur Tip for instructions.
Importing a Request into an Expense Report
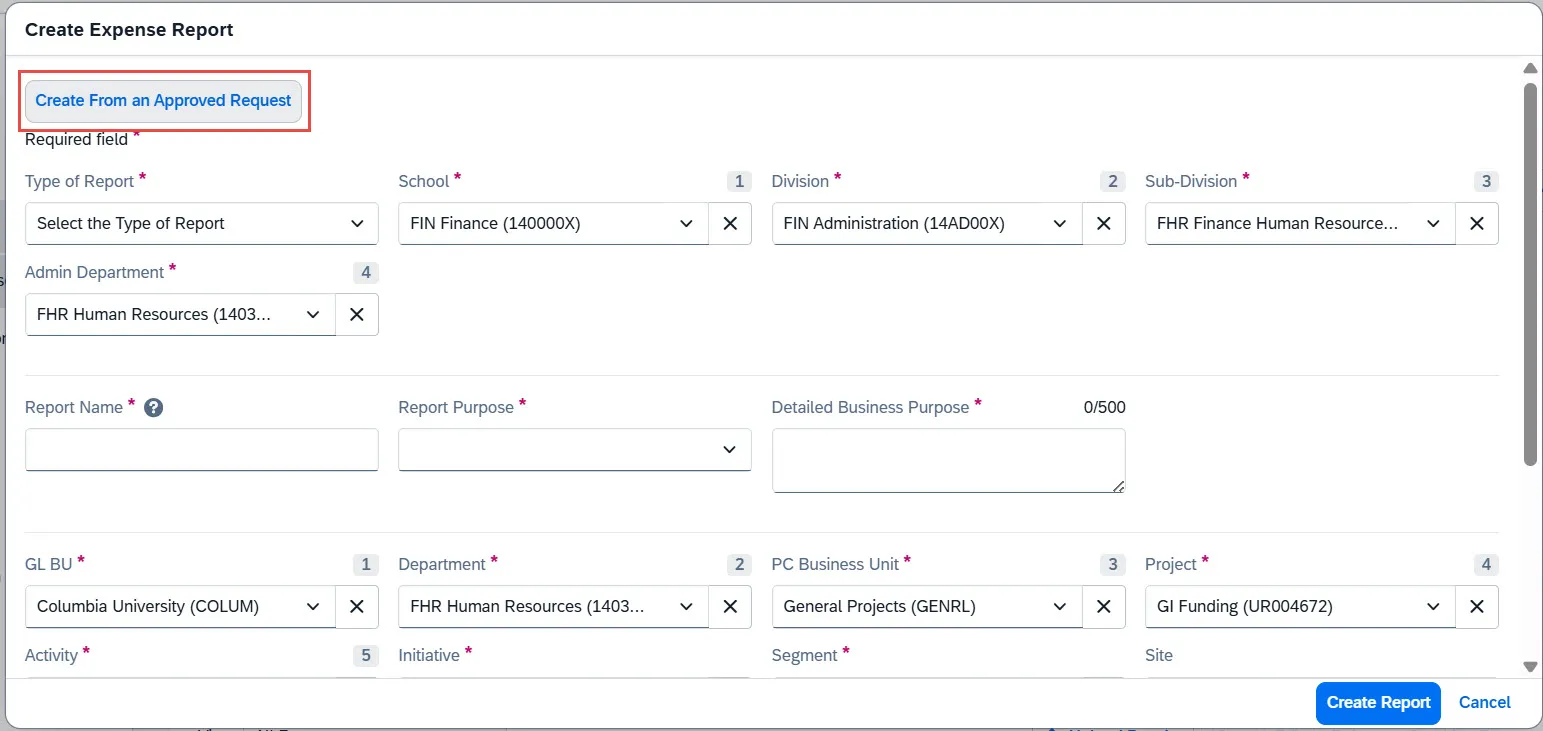
- Log in to Concur and navigate to Manage Expenses. The Manage Expenses screen appears. Click Create Expense Report. The Create New Report screen appears.
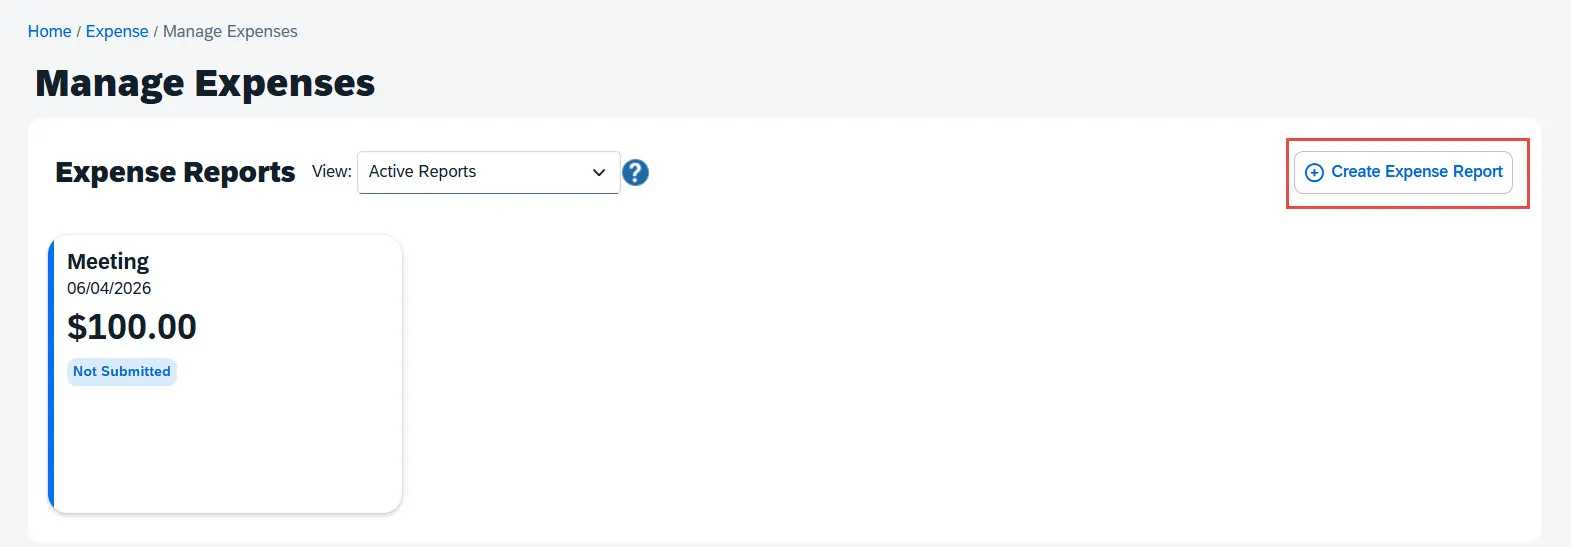
- Click the Create From an Approved Request button.
The confirmation dialog window appears.
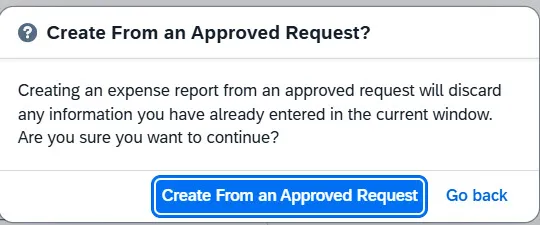
- Click the Create From an Approved Request button. The Available Requests window appears.
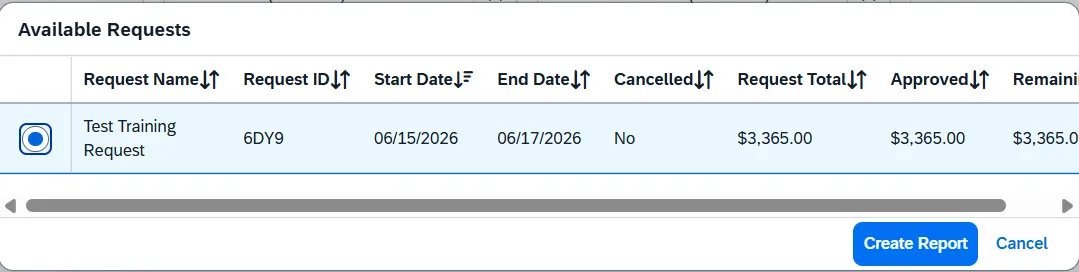
- Select the Request to be added and click Create Report. The Report Header is populated with values from the Request and ready for you to add Expense Items. You can edit the Report Header if you need to update the Departmental or ChartString information.
When reconciling a Request, you should attempt to use Expense Types that are as close as possible to those used when you submitted your Request.
- Click Add Expense to add a new Expense to your Report.
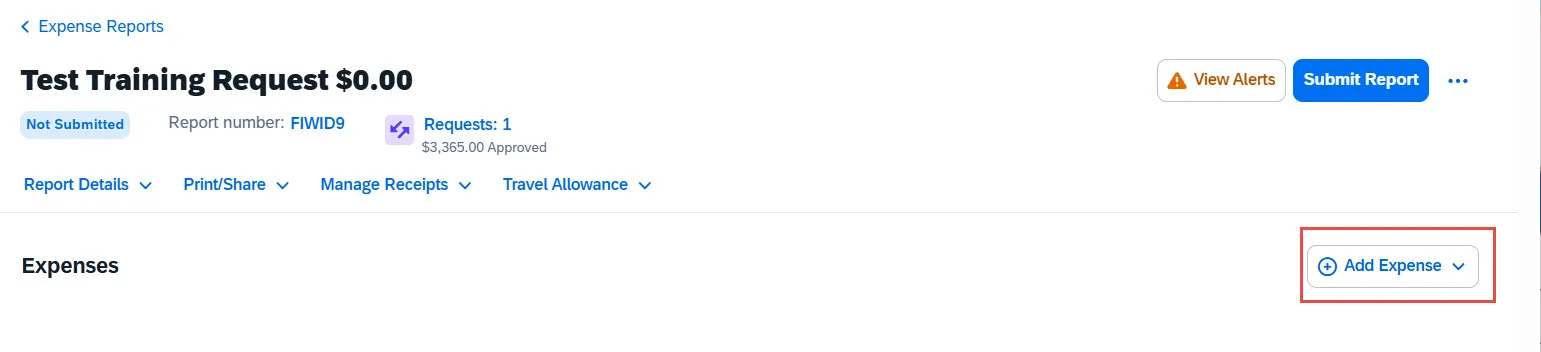
When you enter Expense Types that match with the items in your Request, the Request field displays the matching information.
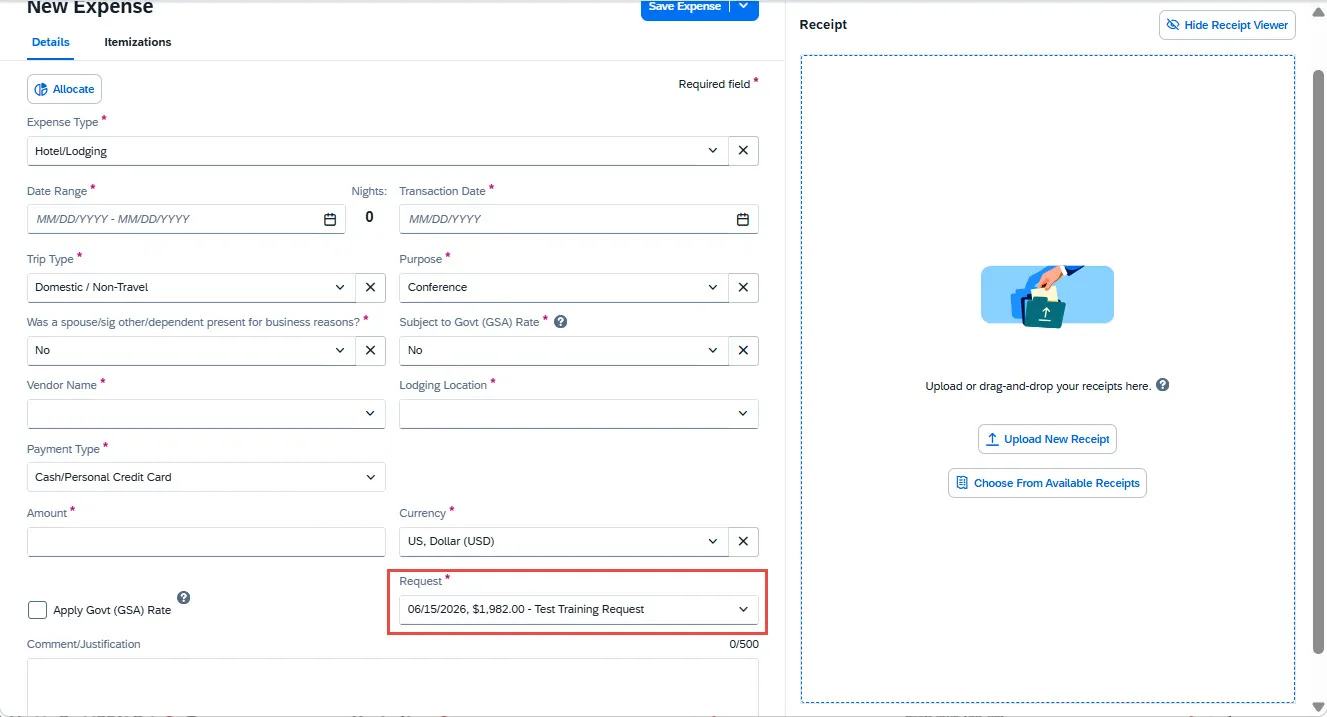
- Complete the required Expense details and click Save Expense. Continue adding Expenses as needed. If you are reconciling a Travel / Cash Advance, and did not utilize the entire amount, you will need to enter a line for the balance using the Cash Advance Return Expense Type. You will also need to reimburse the University for the Cash Advance Return.
Note: If the Expense Types in your Request and Expense Report differ or if your Expense Report total is less than the Request total, the Request status will remain open. After your Expense Report is fully processed you can Close/Inactivate the Request to remove the Request from your Active list, if desired.
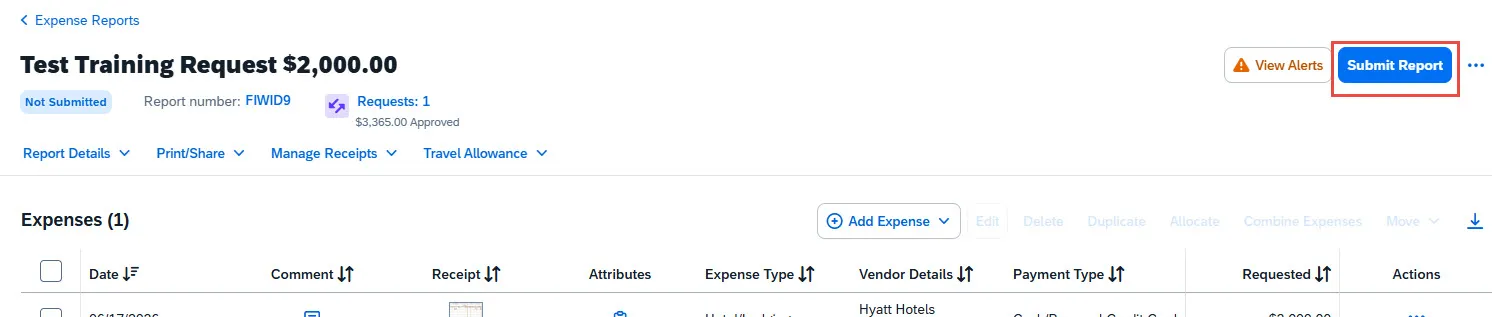
- After adding all the Expense Items into your Expense Report, click Submit Report.
- Click Submit Report.
Important Note: If you received a Cash Advance and did not use all of the funds, you must reimburse the University for the amount indicated in Employee Pays with a check made payable to The Trustees of Columbia University within 20 days from the trip end date or 20 days from the transaction date for business expenses. Please click here for more information on how to return funds to the University.
The Report Totals appears.
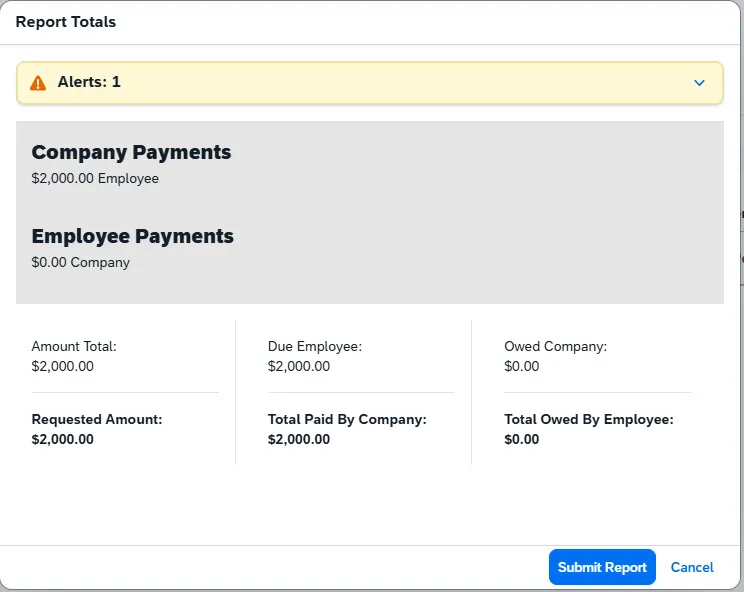
- Click Submit Report.
Important Note: If you received a Cash Advance and did not use all of the funds, you must reimburse the University for the amount indicated in Employee Pays with a check made payable to The Trustees of Columbia University within 20 days from the trip end date or 20 days from the transaction date for business expenses. Please click here for more information on how to return funds to the University.
Canceling and Closing Requests
If you are not going on the trip you requested, you can cancel the Request.
Cancelling a Request
- Navigate to Manage Requests and open the Request.
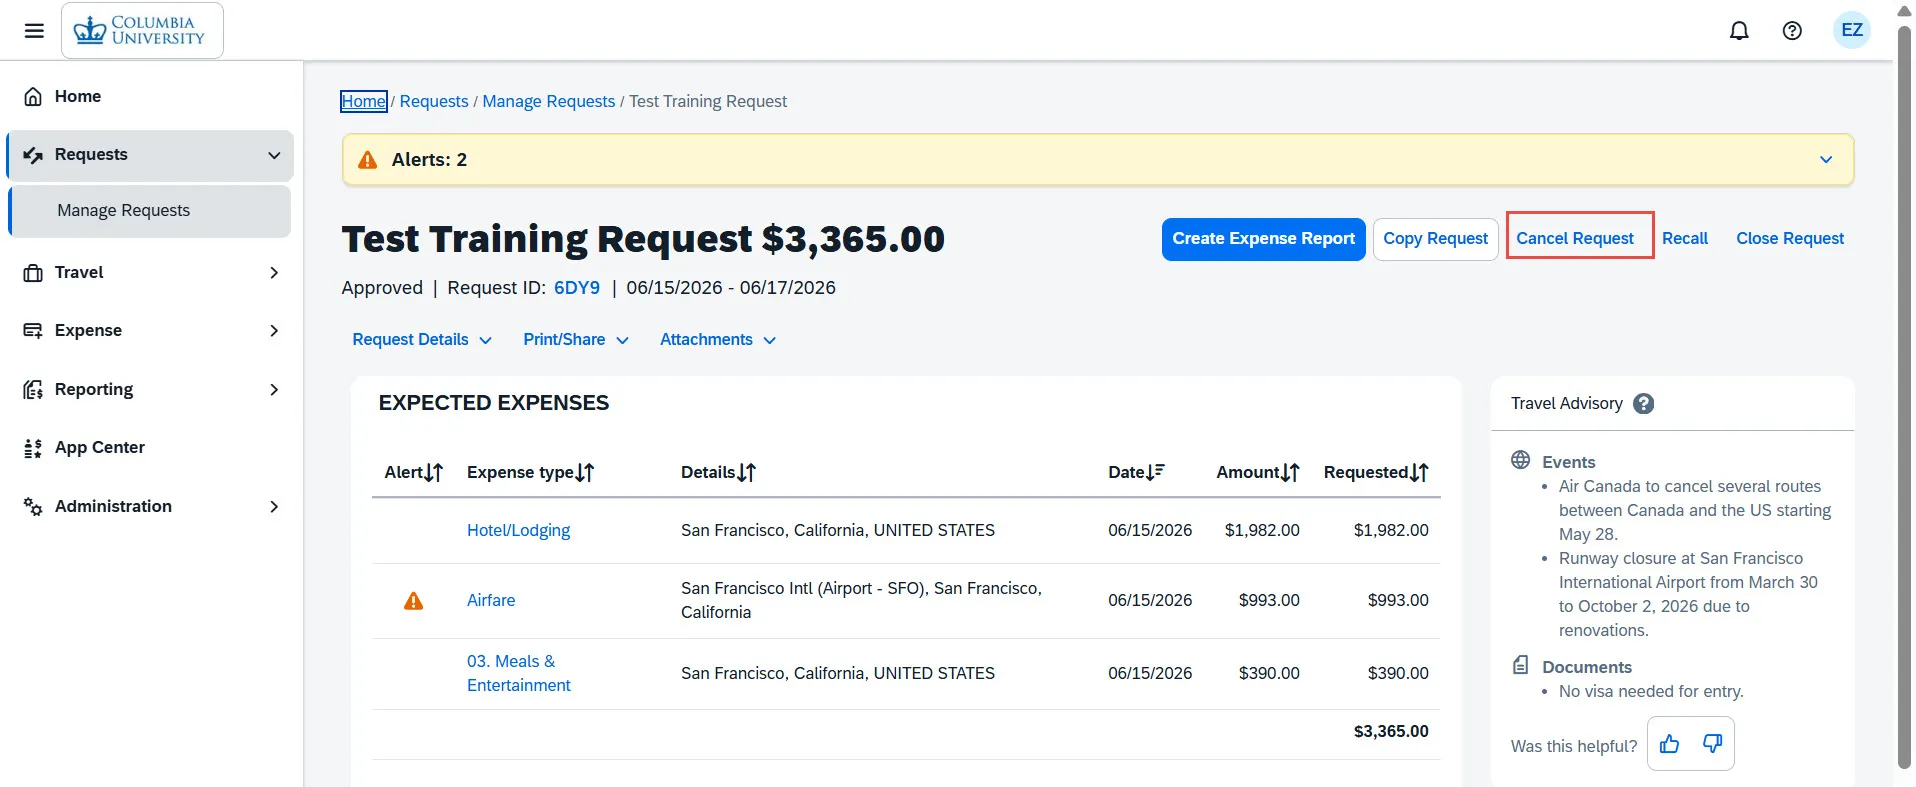
- Click the Cancel Request button. The Cancel Request dialog appears.
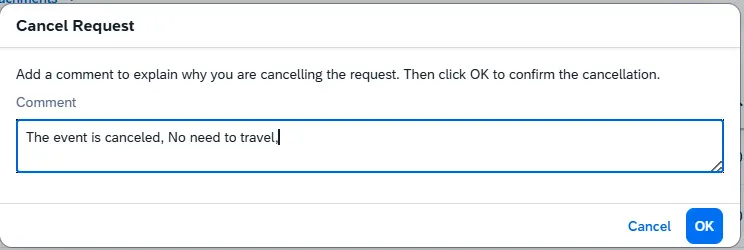
- Type a Comment to explain why you are cancelling the Request and click OK.
Closing a Request
If the Expense Types in your Request and Expense Report differ or if your Expense Report total is less than the Request total, the Request status will remain open. After your Expense Report is fully processed you can Close the Request to remove the Request from your Active list, if desired. In addition, if you have an active, approved Request where travel was canceled or did not take place, you can close/inactivate the Request.
- Navigate to Manage Requests and open the Request.
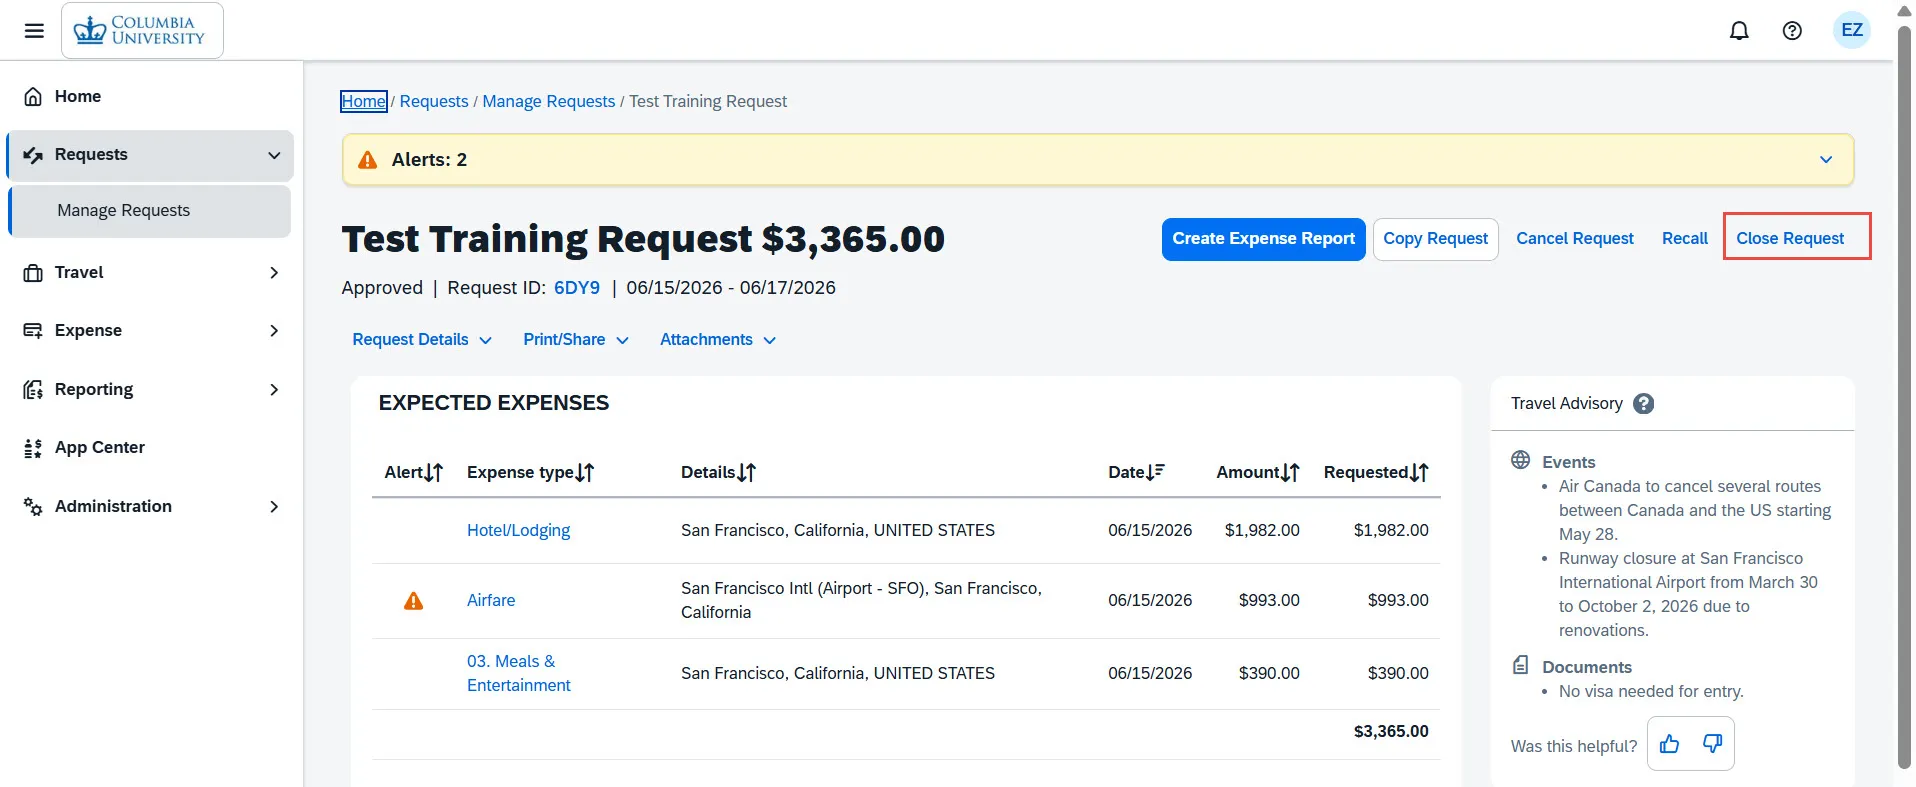
- Click the Close Request button. The Confirm dialog window appears.
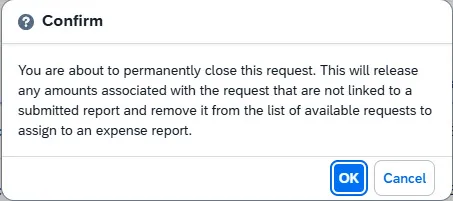
- Click OK to confirm.