Requesting a New Contract in the CU Marketplace
A contract is a legally binding agreement between two or more parties which is enforceable by law. Only an authorized representative from Central Purchasing can sign a contract on behalf of Columbia. This job aid details the steps for submitting a Contract Request. Approval of a request does not mean that a contract is created. Once a Contract Request is approved by the Purchasing team, the contract creation process begins.
Refer to the Submit a Contract Request webpage for more information on the Contract Request process.
Last Revision: March 2026
Details
You should gather all relevant information about your contract request, including vendor names and addresses, contract dollar amounts, and any supporting documentation files you will need to upload, such as quotes/proposals, proof of insurance, or draft contracts from vendors. If you are requesting a Contract for Use with a PO, initiate a Goods and Services Request first.
1. Navigate to the Procurement website, click the CU Marketplace logo, and login using your Single Sign On. The CU Marketplace launches.
Note: The CU Marketplace will automatically timeout after thirty minutes of inactivity, consistent with other University Enterprise Systems.
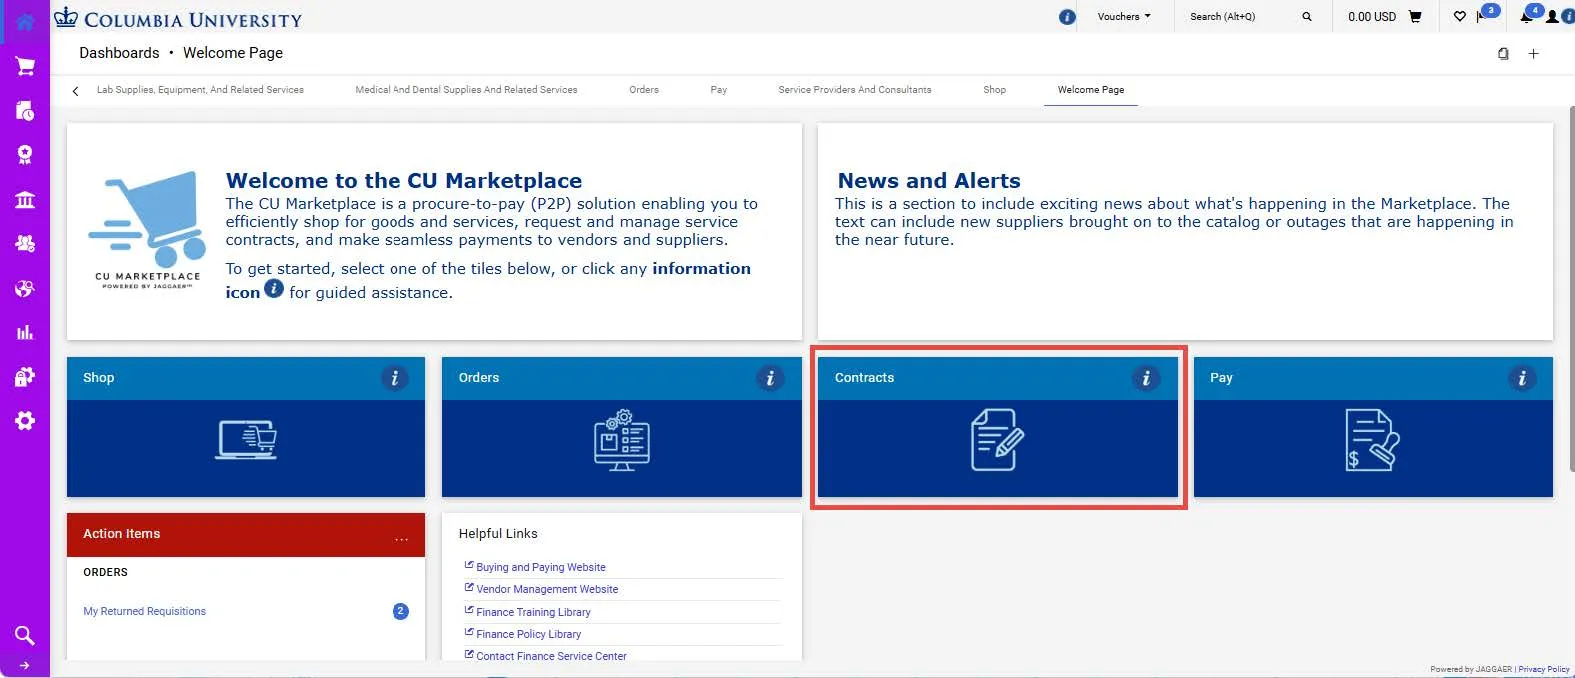
2. Click the Contracts tile. The Contract dashboard appears.
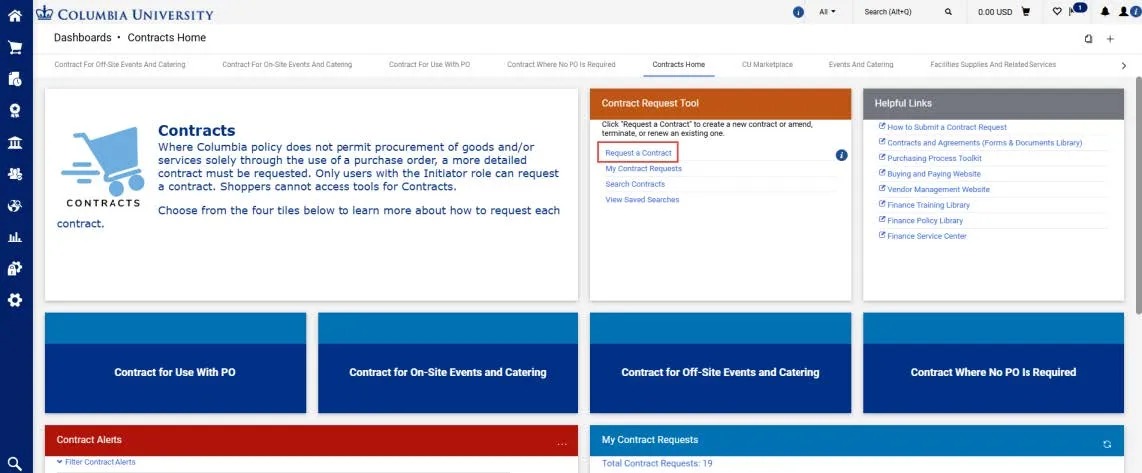
If you need further instruction on the type of Contract you are requesting, click the tile for that Contract type.
3. In the Contract Request Tool tile, click Request a Contract. The Create Contract Request window appears.
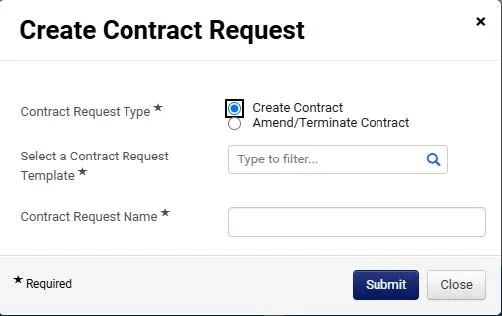
4. Select a Contract Request Template depending on the type of contract you are requesting:
- Contract For Use with a PO Note: Initiate a Goods and Service Request first before initiating a Contract Request for Use with a PO.
- Contract With No PO Required
- Contract for Offsite Events & Catering
- Event Related Onsite Contract
You can click the Search icon to view Descriptions to assist you with making the correct selection.
5. In the Contract Request Name field, enter the name of the supplier and the contract type.
6. Click Submit. The Instructions screen appears.
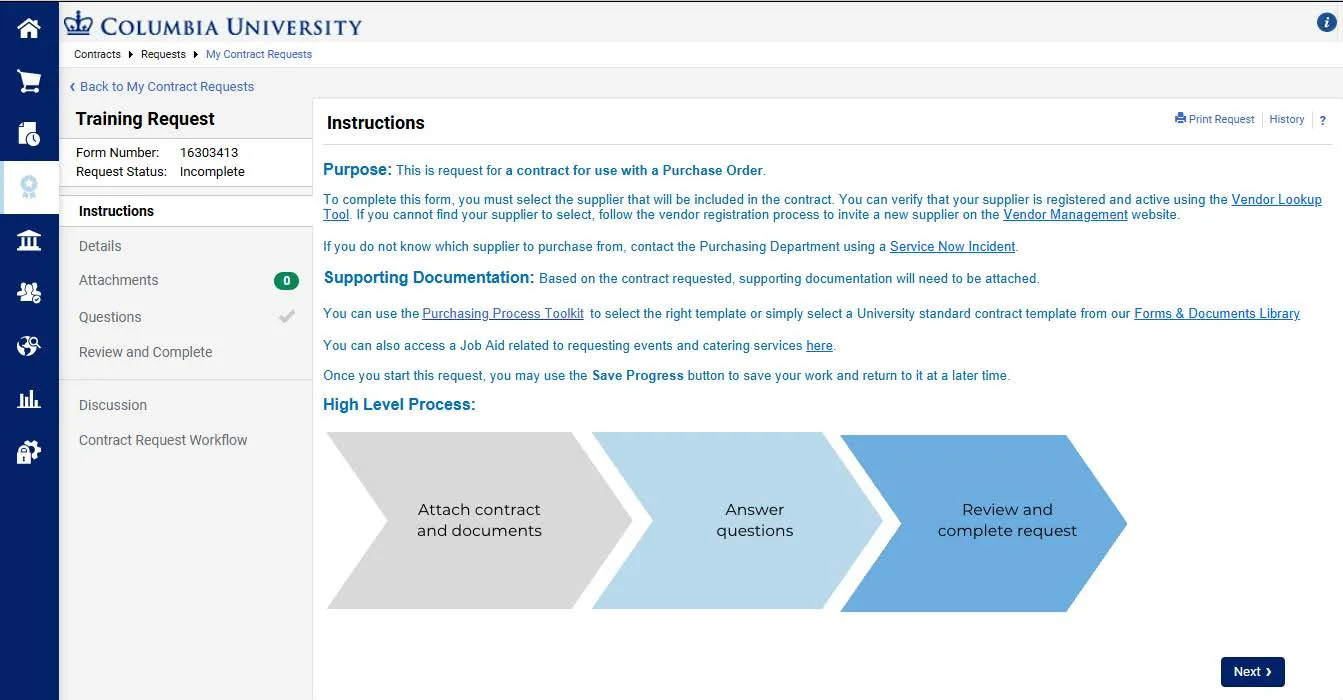
Be sure to read the instructions. Instructions differ based on type of Contract Request selected.
Click Next. The Details screen appears.

You can edit the Contract Request Name, if desired. Click the Next button and the Attachment screen appears.
Uploading Attachments
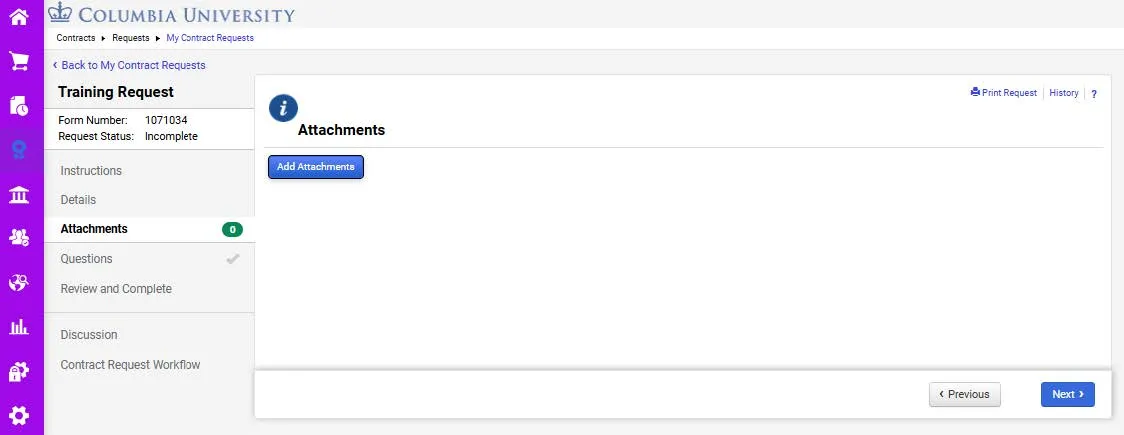
1. Click the Information icon in the Attachments section. This will link to information about the required documentation you must attach to your request. Before adding your attachments, save your files with the name that reflects the document you are attaching (i.e., Contract, Scope of Work, Certificate of Insurance, etc.).
2. Click the Add Attachments button. The Add Attachments window appears.
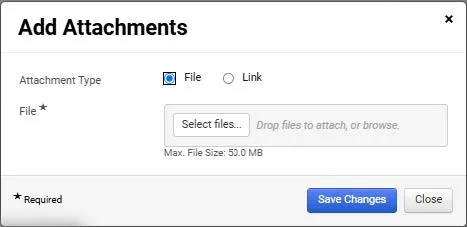
3. You can Select Files or you can drag and drop your files. Multiple files can be selected.
4. Click the Save Changes button after uploading all required files.
5. Click Next. The Questions screen appears.
Completing General Questions
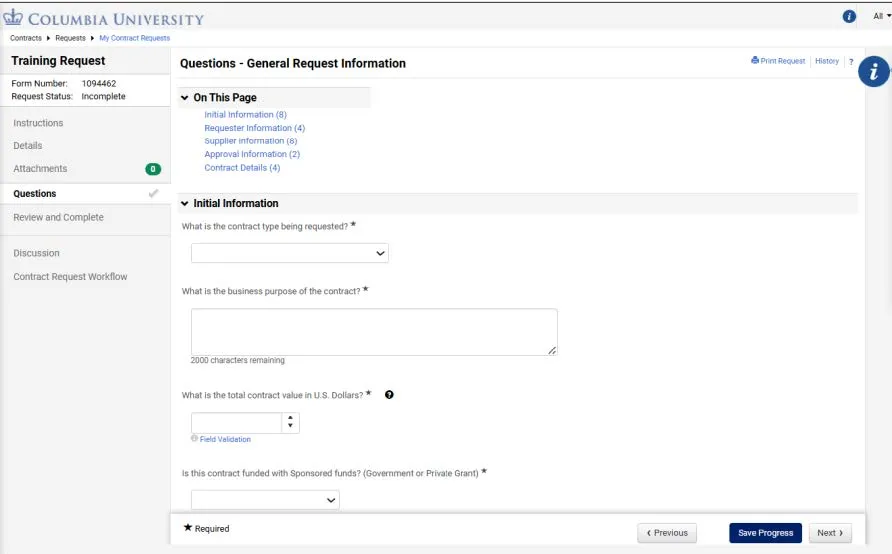
You must answer all questions on the form with an asterisk *. If you are unsure of how to answer a question or complete a field, look for the Question icon next to the question for more information regarding that field.
For additional assistance, click the Information icons to the right of the form to launch a guide.
Completing Supplier Information
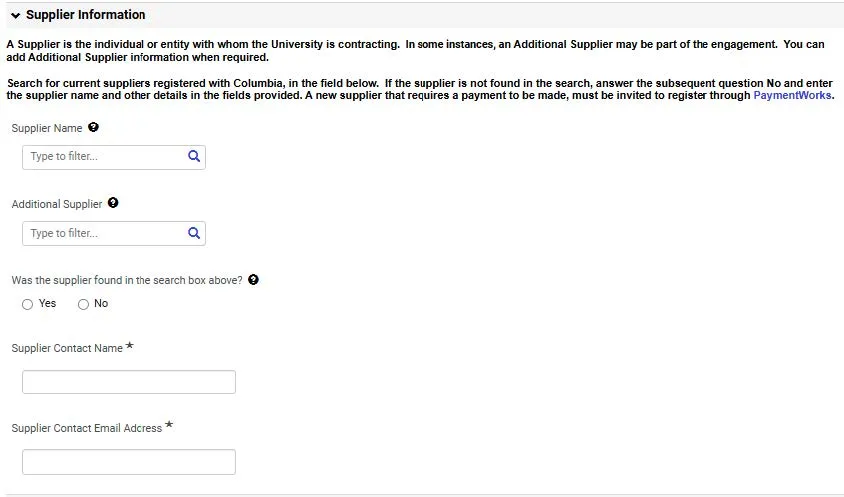
- If the Supplier is registered as a Columbia Supplier, you can search and select them in the Supplier Name field. You can also search and select an Additional Supplier if they are to be included on the contract.
- If you cannot find the Supplier in the Supplier Name field, answer No to the Was the Supplier Found? question. Then answer the question for Will a payment be made to the Supplier? If you plan on making a payment to the Supplier and they are not already registered as a Columbia supplier, you must invite them to register via PaymentWorks. Click the checkbox that appears if you have already done so.
- Manually enter the Supplier Name and other information as required if you did not find the Supplier.
Completing Contract Details
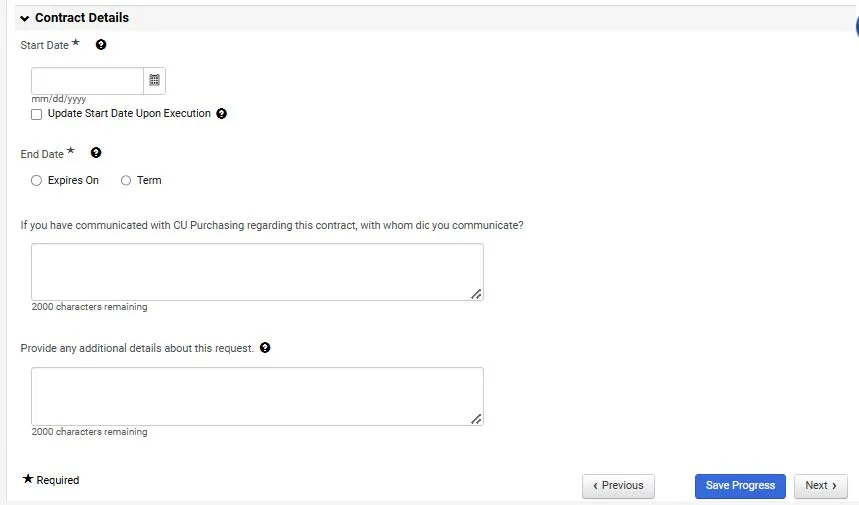
1. Enter a Start Date for the Contract.
2. When selecting the Contract End Date, select Expires On to enter a specific end date. Do not select Term.
You do not need to complete Auto-Renew, Renewal Term, and Renewals Remaining. Leave these fields blank.
Submitting Your Request
1. Click Next at the bottom of the Questions page. The Review and Complete page appears.
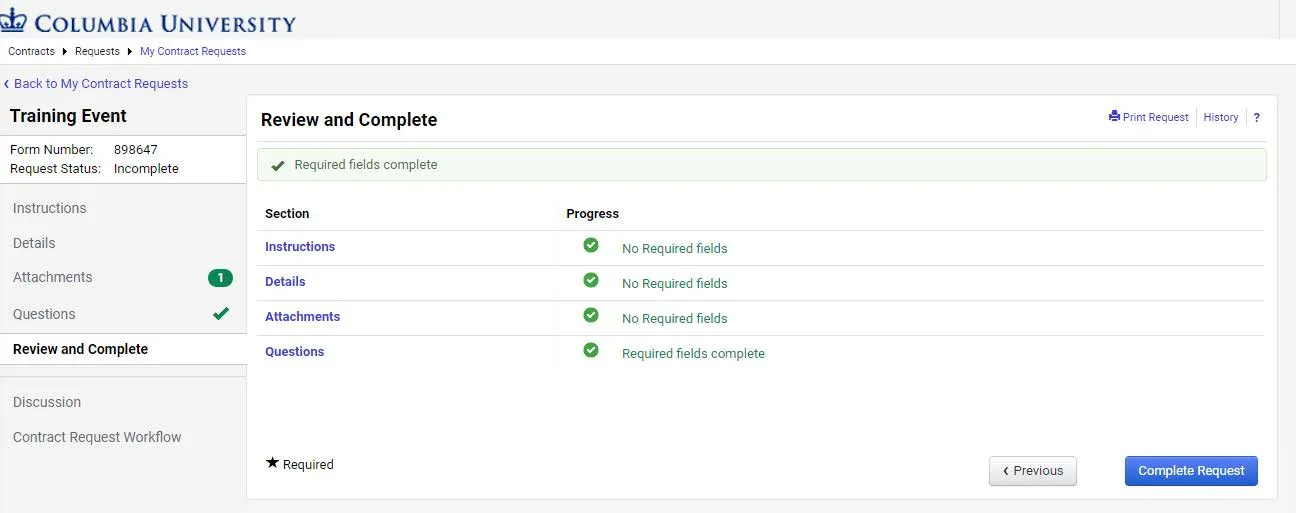
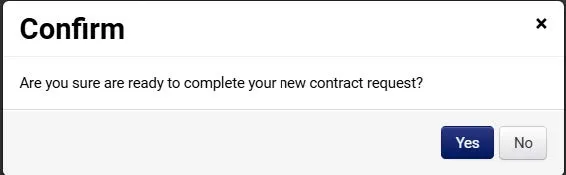
2. Click the Complete Request button and click Yes in Confirm window.
Note: The Contact Request goes to the Purchasing Team for review and approval, there is no departmental approval in the approval workflow.
You can view the status and access your Contract Requests using the Contract Requester Dashboard. If you need to continue working on, edit, or delete a Request that you have not completed, you can do so here.
To edit or delete a Contract Request that you have submitted, you can send a message to the Central Purchasing team in the Discussion section of the request.
From the Contract Request Tool tile on the Contracts dashboard, click My Contract Requests.
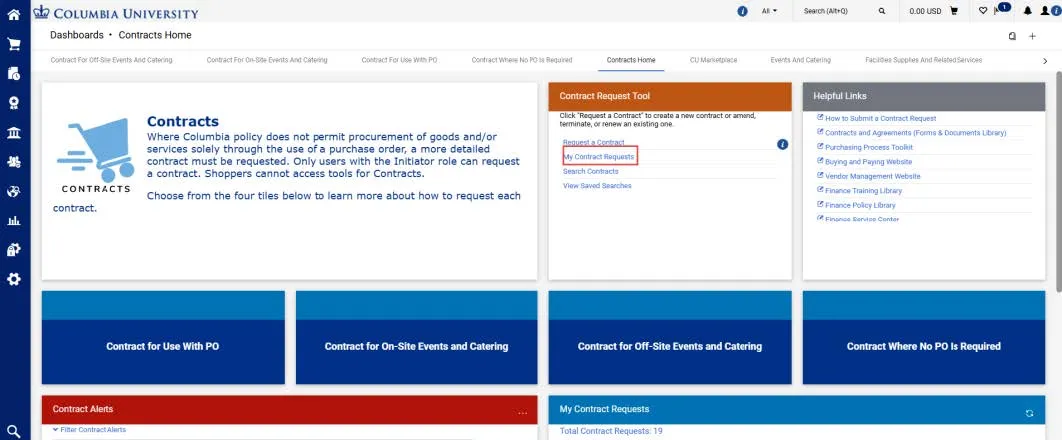
The My Contract Requests screen appears.
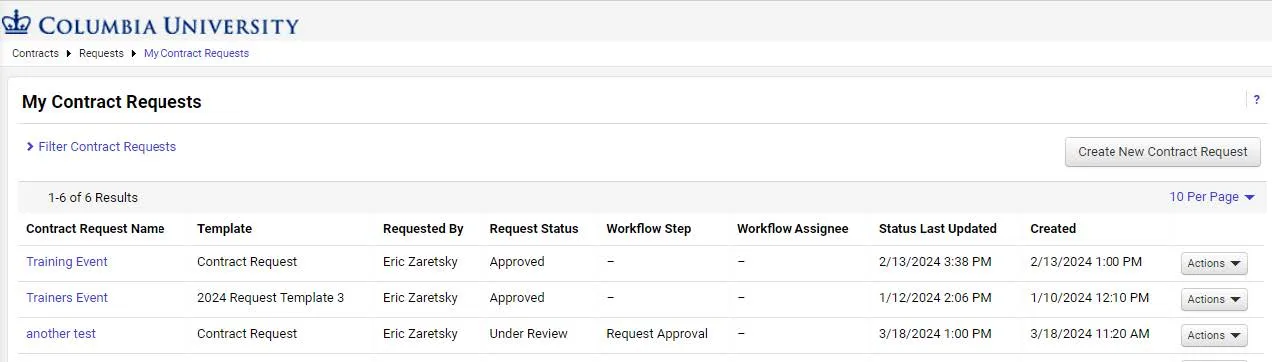
Contract Request Statuses
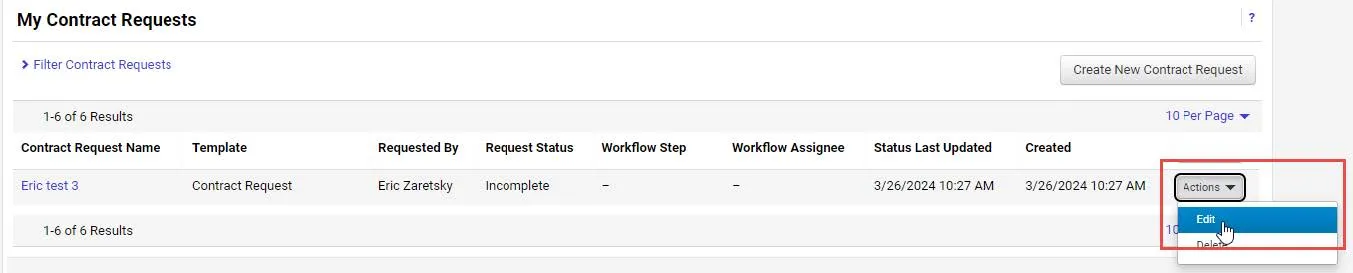
Editing an Incomplete Contract Request
You can edit, complete, and submit a Contract Request that has a status of Incomplete. If you need to edit a Contract Request that you have already submitted that has a status of Under Review, see the section below on Editing a Contract Request Under Review.
In the row for the Incomplete Contract Request to be edited, click the Action dropdown and select Edit.
The Instructions page for the Contract Request appears.
You can navigate to the desired page to edit. After entering all required fields, review and complete the request.
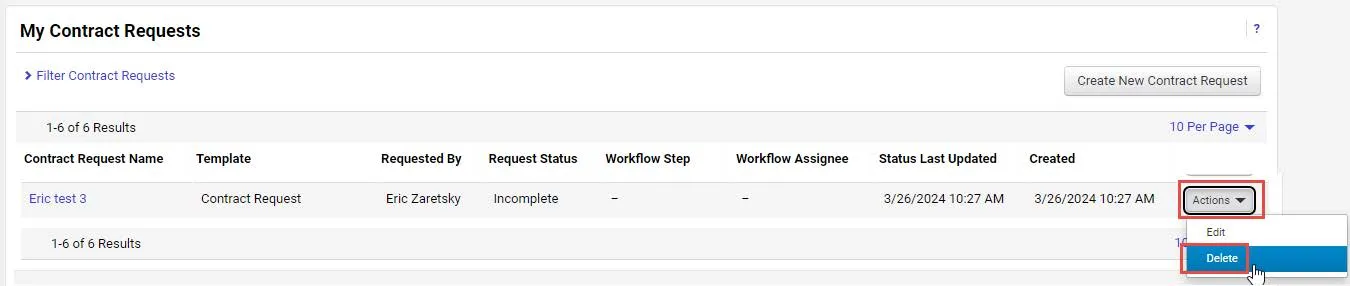
Deleting an Incomplete Contract Request
You can delete a Contract Request that has a status of Incomplete. If you need to edit or delete a Contract Request that you have already submitted that has a status of Under Review, see the section below on Editing or Deleting a Contract Request Under Review.
In the row for the Incomplete Contract Request to be edited, click the Action dropdown and select Delete.
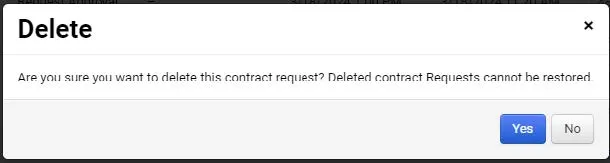
The Delete confirmation appears. Click Yes to complete the deletion.
Editing or Deleting a Contract Request Under Review
Once your Contract Request is submitted and has a status of Under Review you cannot edit or delete it directly from your list. If you need to edit or delete a Contract Request that has a status of Under Review, you can view the Contract Request and post a message in the Discussion section of the request to the Central Purchasing team requesting to have the request returned. After the Contract Request has a status of Returned, you can edit or delete it.
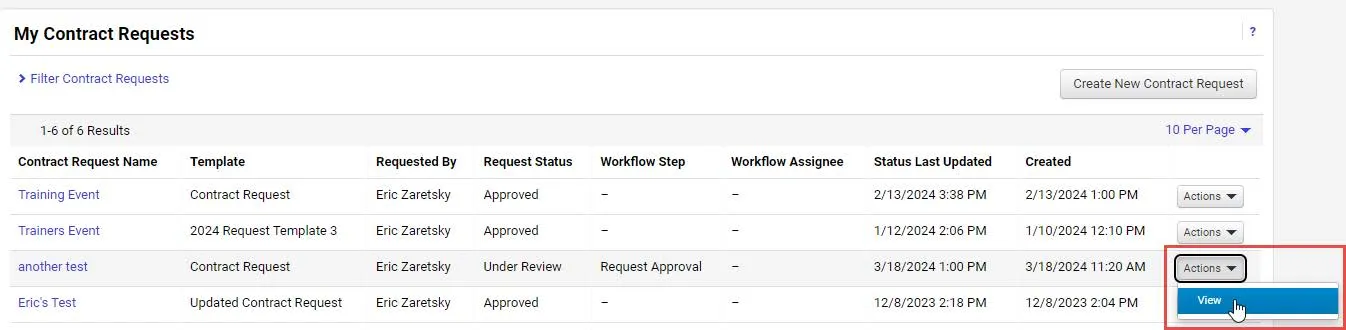
1. In the row for the Under Review Contract Request, click the Action dropdown and select View.
The Instructions page for the Contract Request appears.
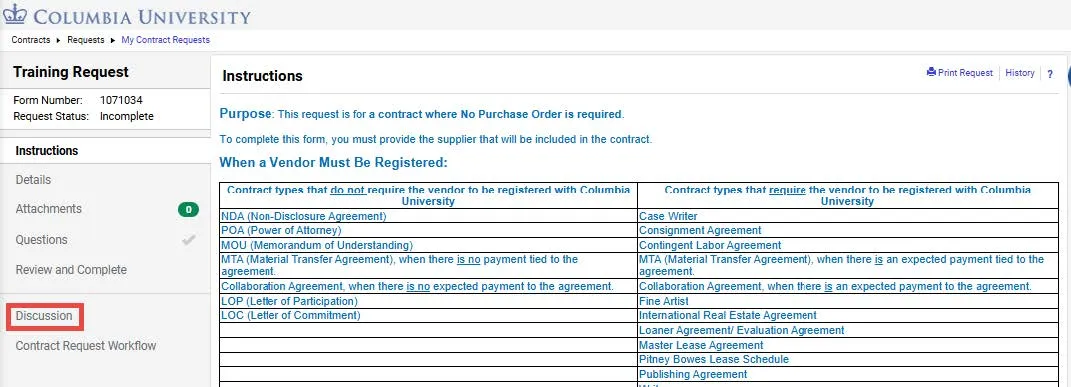
2. Select the Discussion page. The Discussion page appears.
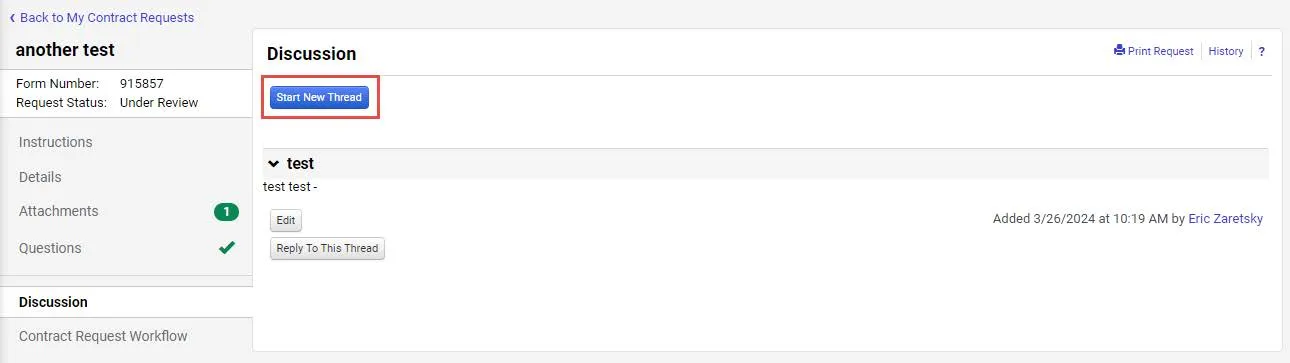
3. Click the Start New Thread button. The Post a New Message window appears.
The Send Notification To section is automatically populated with the names of the Purchasing team.
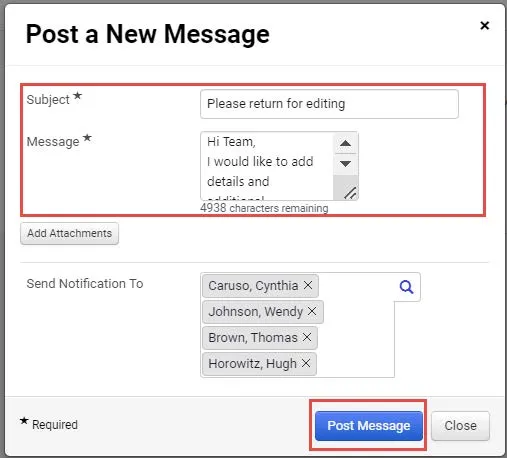
4. Enter a Subject and Message to the Purchasing team asking them to return your request.
5. Click the Post Message button.