Concur Expense Report Quick Guide
This Quick Guide details how to create Business and Travel Expense Reports in Concur, adding Expenses to your Report, and submitting it for approval. For more detailed instruction, please refer to the Creating Expense Reports in Concur job aid. For Expense Type examples, please refer to the Concur Travel and Expense Training.
Last Revision: November 2021
Details
Navigate to the Travel and Expense website to log into Concur.
-
Click the Home dropdown and select Expense.
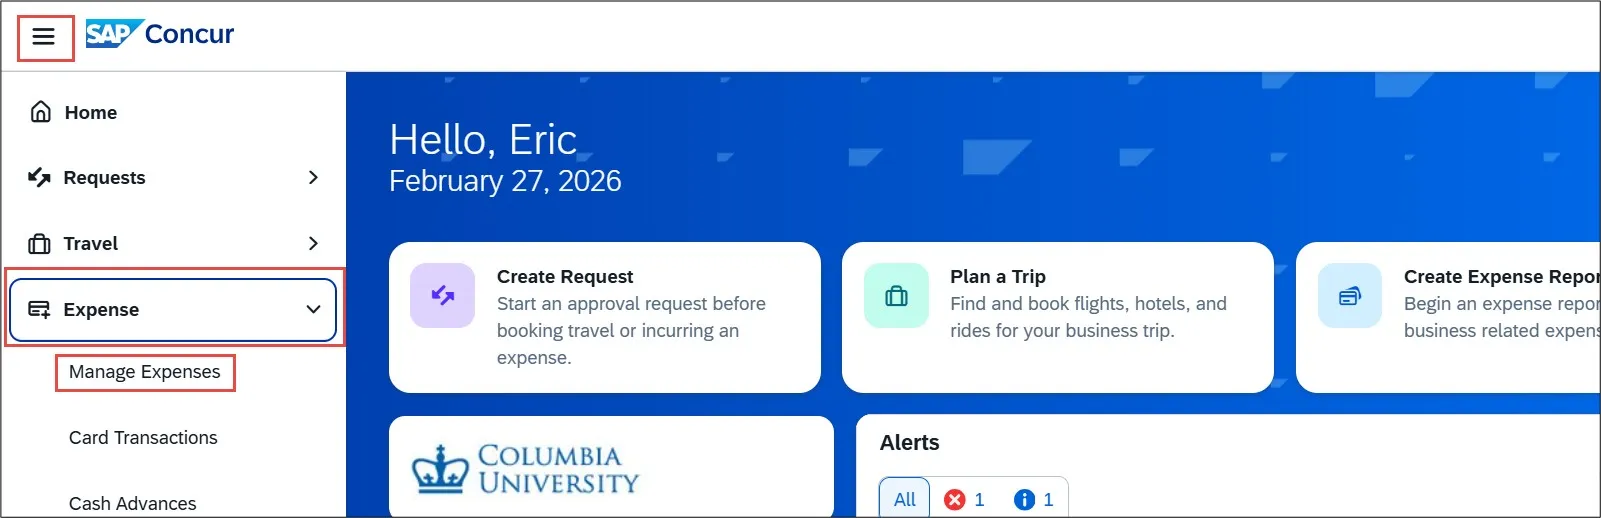
The Manage Expense screen appears.
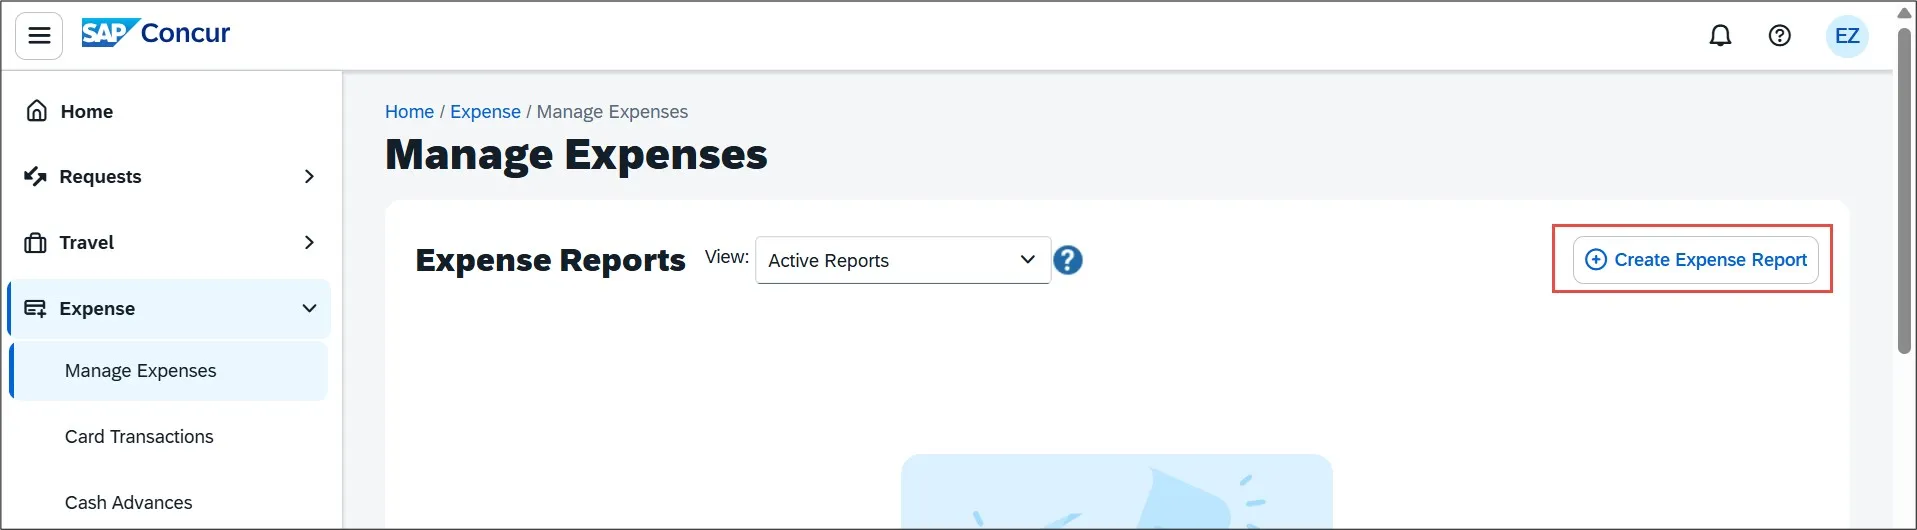
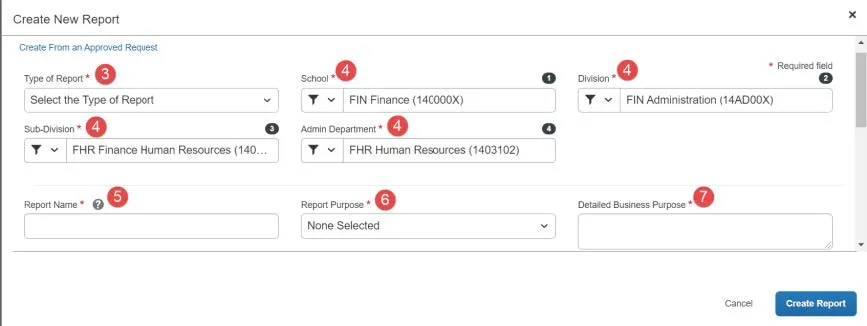
- Click the Create New Report button. The Create New Report screen appears. The red markers in the graphic correspond to steps 3 through 7 below.
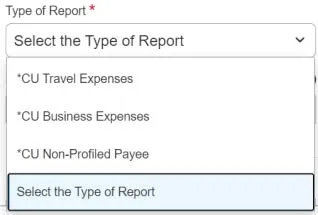
- Choose the Type of Report from the dropdown. Selection of Travel and Non-Profiled Payee Report types will change the fields you must complete (see Travel Report Expense section below). The Non-Profiled Payee Expense Report Type can be used to reimburse individuals who do not have an active Concur profile (Guests or Students).
- The School, Division, Sub-Division and Admin Department default from your Concur Profile. You can edit them for this Report, if necessary. The Admin Department will drive approval workflow routing to the Initial Reviewer when applicable.
Note: The completed fields displayed in the graphic above are for example purposes only.
- Enter a Report Name (whatever you want to call it so that the Report will be easily identifiable to you).
- Select a Report Purpose from the dropdown
- Enter a Detailed Business Purpose.
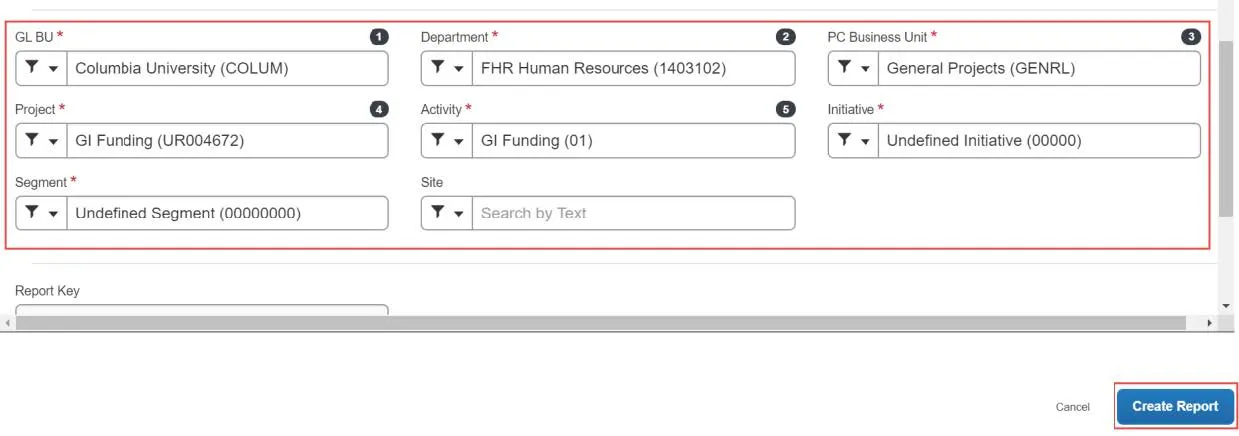
- The ChartFields default from your Concur Profile. You can edit them for this Report, if necessary. The values drive workflow routing to the Financial Approver and can be modified by the Financial Approver, if needed. The values are a connected list and need to be entered in sequential order. You can also allocate your Expense Report to multiple ChartStrings. Refer to the Allocating to Multiple ChartStrings Concur Tip.
Note: The ChartFields displayed below are for example purposes only. Please ensure that your ChartFields are relevant and correct for your Expense Report. If you are not sure which ChartFields to use, ask your Departmental Administrator.
- Click Create Report. You can add Expense Items such as Meals, Ground Transportation, and Supplies.
CU Travel Expense Report Fields
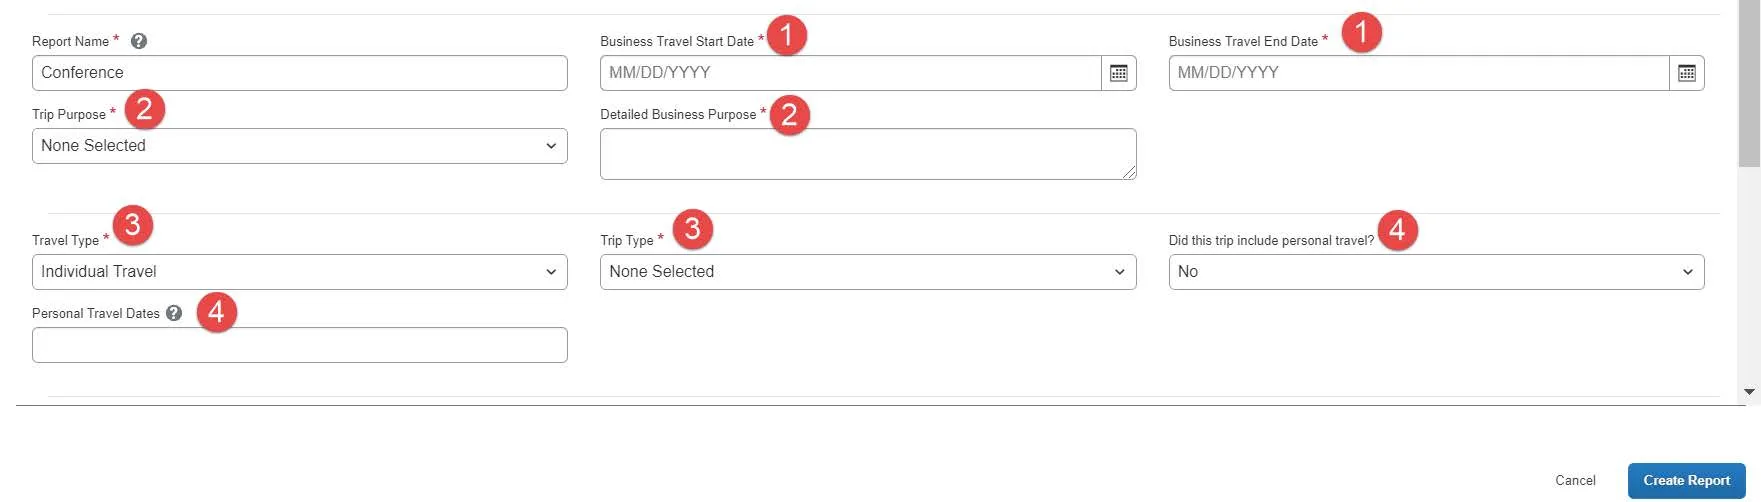
The red markers in the graphic below correspond to steps 1 through 4 below.
- Enter the Business Travel Start Date and the Business Travel End Date.
- Select the Trip Purpose from the dropdown and enter a Detailed Business Purpose.
- Select the Travel Type (Individual, Group, or Team) from the dropdown and Trip Type (Domestic or International).
- Select from the dropdown to answer Did this trip include personal travel? If Yes, enter the Personal Travel Dates.
View the Concur Travel and Expense Training for examples of how to add various Travel and Business Expense Items to your Expense Report.
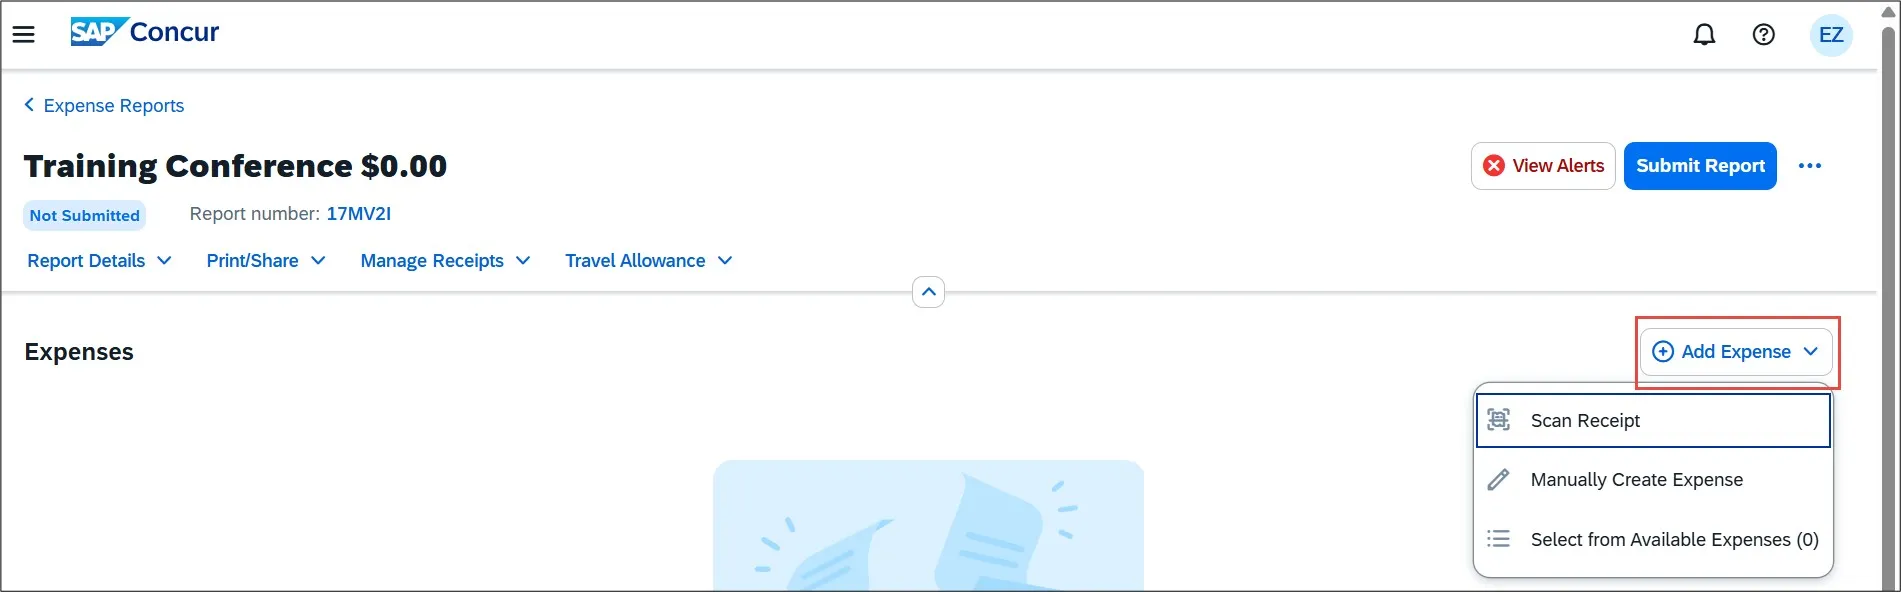
- Click the Add Expense dropdown.
- Select Available Expenses to add a Corporate Card or Concur Travel transaction to your Expense Report or Create New Expense to manually enter the Expense details.
- If you are manually creating a new expense, search and select the Expense Type. The Expense Details screen appears.
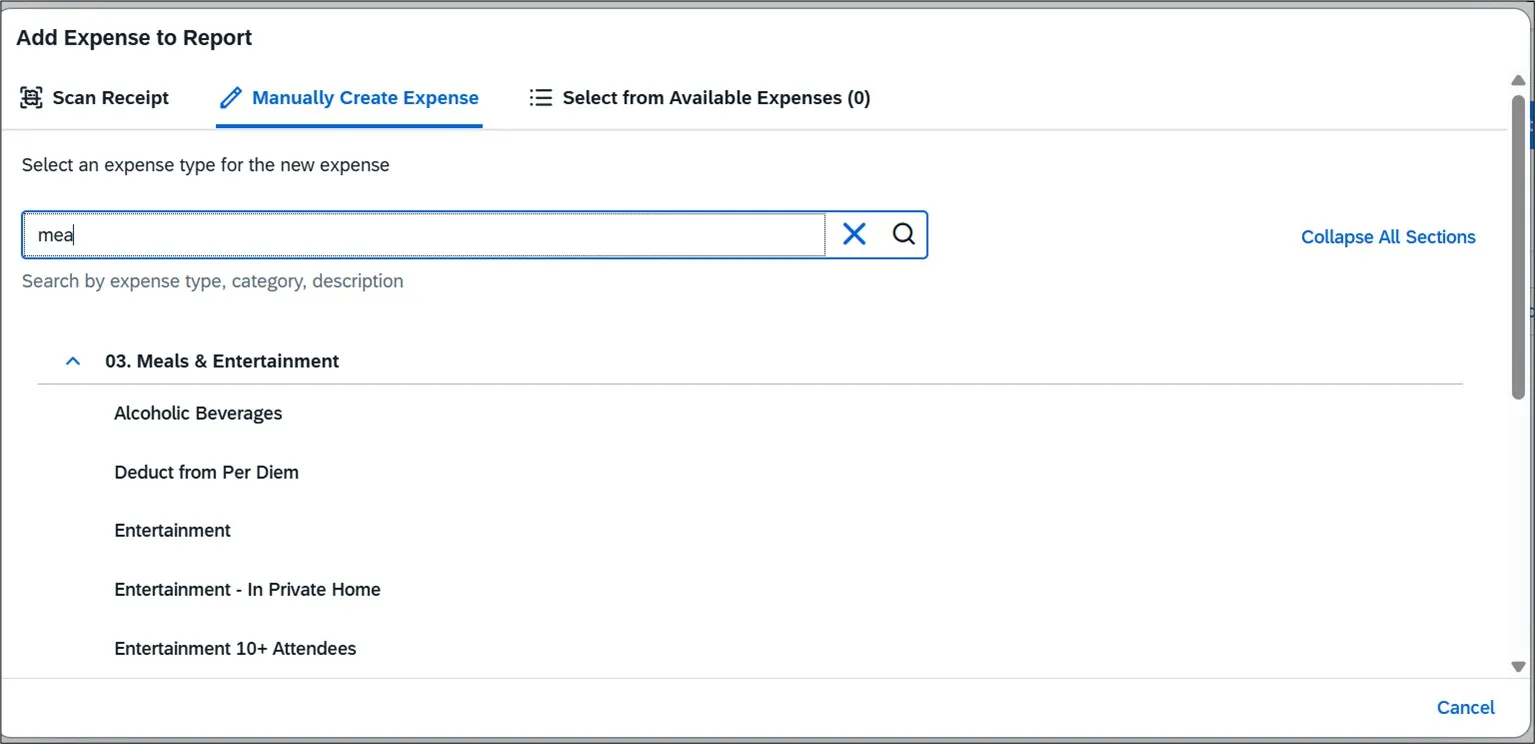
The Expense Details screen appears.
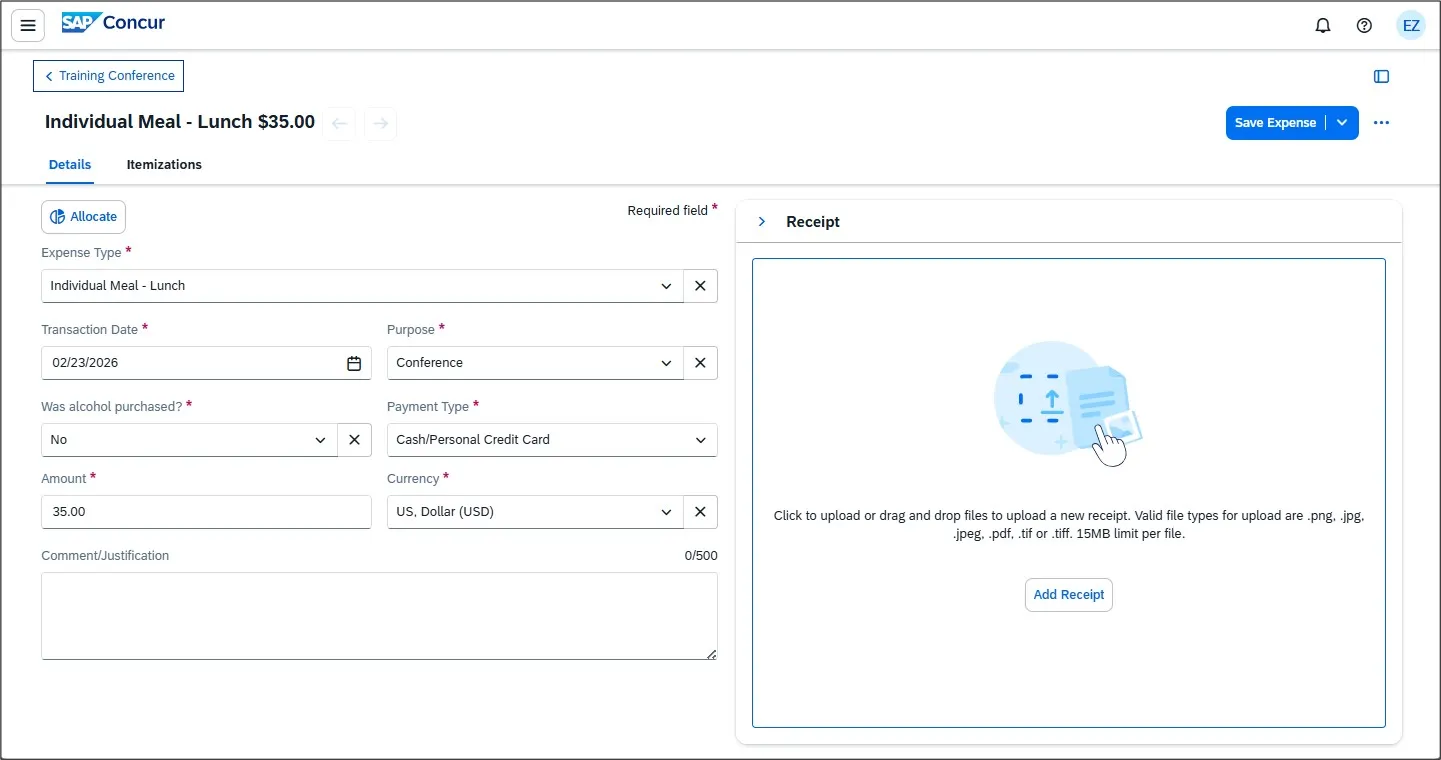
- Complete all the required fields and, if necessary, attach any required receipts or documentation.
Note: If you are unable to change or detach an incorrect receipt you attached to your expense using the Concur Mobile app, delete the expense item and create a new one with the correct receipt. - Click Save Expense to save and return to Manage Expenses.
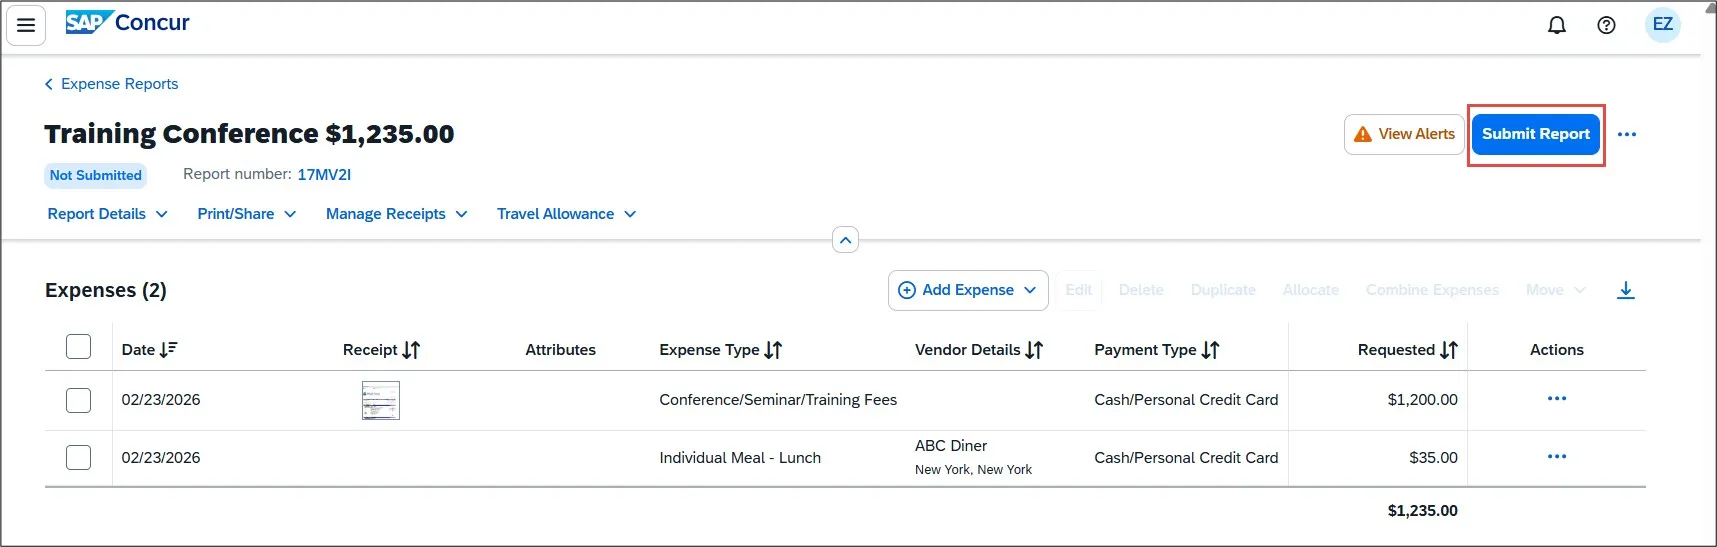
- After adding all the Expense Items to your Expense Report, click Submit Report. The User Electronic Agreement appears.
- Click Accept & Continue on the User Electronic Agreement and then Submit Report.
Note: Depending on your browser view (zoom), after clicking Submit, you may need to scroll down the User Electronic Agreement text to activate the Accept & Continue button. If desired, you can zoom out on most browsers by pressing Ctrl – (Control key and the minus sign) on your keyboard in order to read the User Electronic Agreement text without scrolling and keep the Accept & Continue button active.
If you require an Initial Reviewer, the Edit Approval Flow window appears.
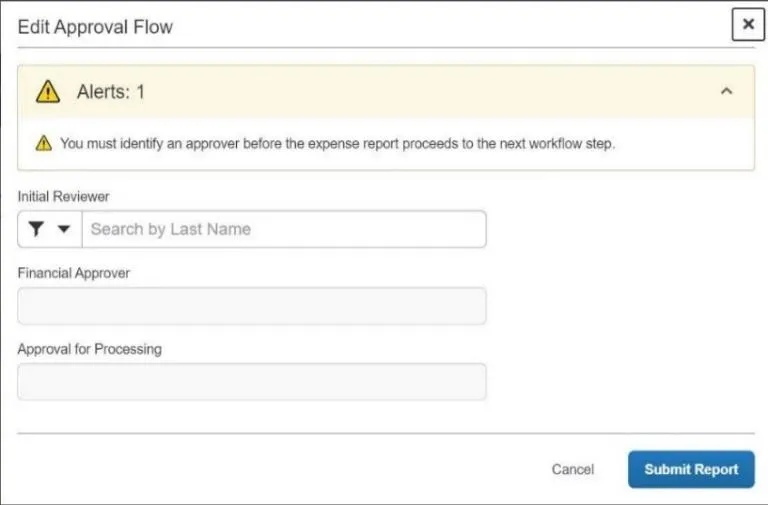
- Enter an asterisk “*” in the Initial Reviewer field. The names of all the available Initial Reviewers for your Department appear.
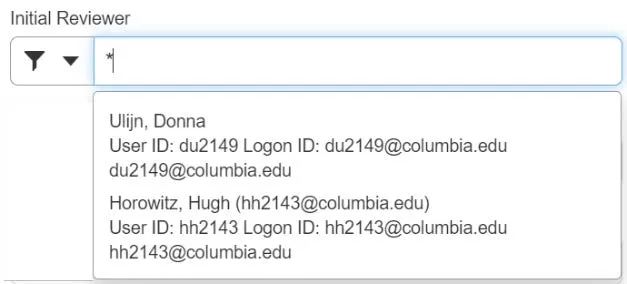
- Select an Initial Reviewer from the list (if you are unsure as to which Initial Reviewer to select, ask your Departmental Administrator).
- Click Submit Report.