Creating PayCard Funding Vouchers in the CU Marketplace
This job aid covers how to create Vouchers for PayCard Funding in the CU Marketplace. Those with the Procurement Initiator role can create and submit PayCard Funding Vouchers into approval workflow.
Last Revised: June 2025
Details
Creating a Non-PO Voucher
1. Navigate to the Procurement website, click the CU Marketplace logo, and log in using your Single Sign On. The JAGGAER application launches.
Note: The CU Marketplace will automatically time out after thirty minutes of inactivity, consistent with other University Enterprise Systems.
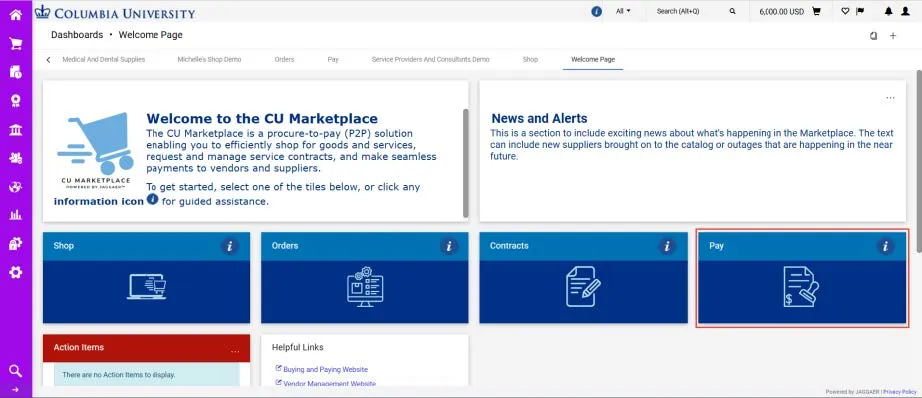
2. Select the Pay tile. The Pay dashboard appears.
3. In the Create Vouchers and Receipts section, select Voucher from the Type dropdown and Non PO from the From dropdown.
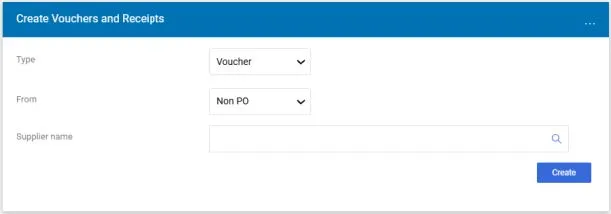
4. In the Supplier name field enter “US Bank”. Click the Search icon to find and select US Bank.
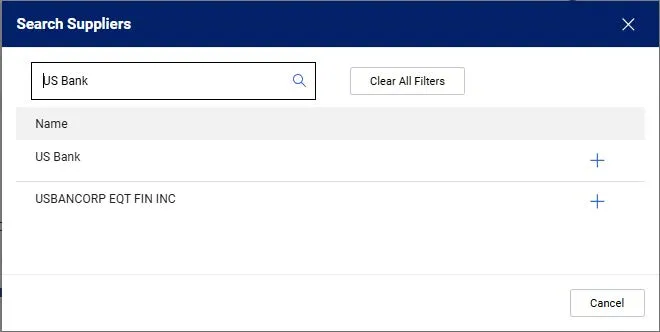
Type your criteria in the Quick Search field, press Enter, and click the Add icon for US Bank.
5. Click the Create button. The Voucher form appears.
Completing the Voucher Form
The Voucher Entry screen appears with the Summary pane indicating the required fields. If you setup a Default Accounting Code (ChartString) in your Profile (refer to the Modifying Profile Settings in the CU Marketplace job aid), that ChartString information will be automatically populate and won’t appear as missing information in the Summary section.
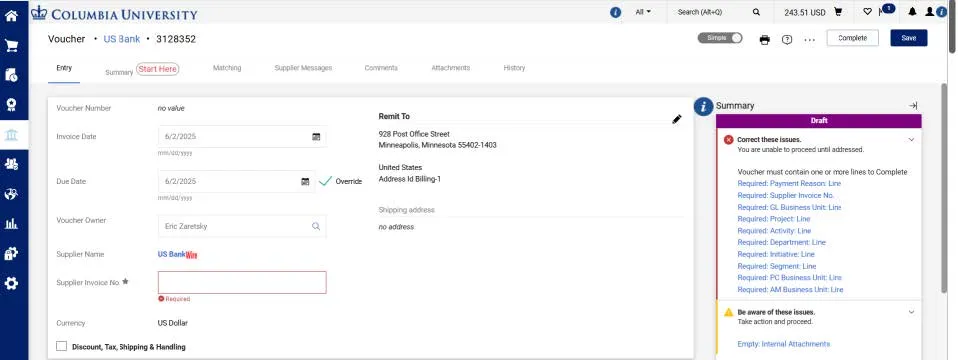
1. Navigate to the Summary tab to begin completing the required information.
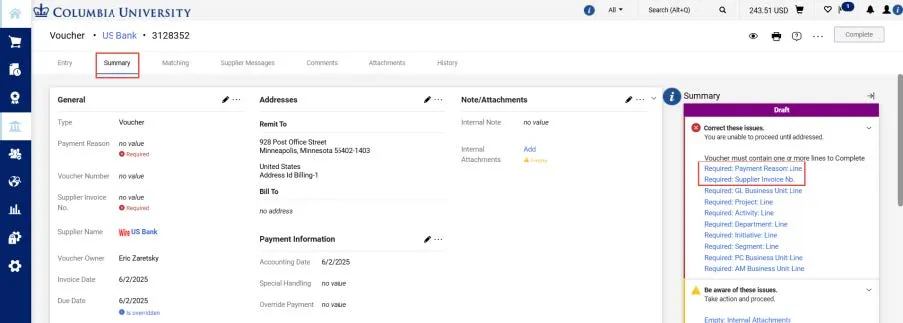
2. Click the link for the Required Payment Reason Line. The Edit General window appears where you can enter the required Payment Reason and the Supplier Invoice No.
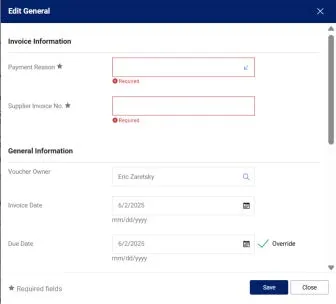
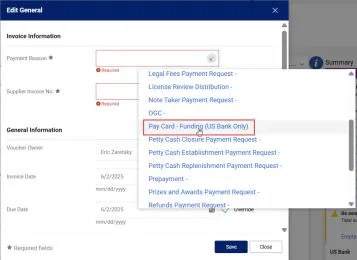
3. Select Pay Card – Funding (US Bank Only) from the Payment Reason dropdown.
4. For the Supplier Invoice No, enter using the format PayCard Type (Rewards or Focus) + Department Number + Miscellaneous Number. The miscelleneous number can be any unique number your Department uses, such as a counter or the IRB number. For example, if the card type is Rewards PayCard, your Department is 680000X, and your miscellaneous number is 123, the Invoice number would be “REWARDS680000X123”.
5. Click the Save button.
Ensure that you have the correct ChartString information populated in the Accounting Codes section. If you set up a Default Accounting Code (ChartString) in your Profile (refer to the Modifying Profile Settings in the CU Marketplace job aid), that ChartString information will be automatically populated. You can edit the Accounting Codes, as needed. In addition, you have the option to edit Accounting Codes for each Line of your Voucher.

1. In the Codes section, click the Edit Codes Section icon. The Edit Codes window appears.
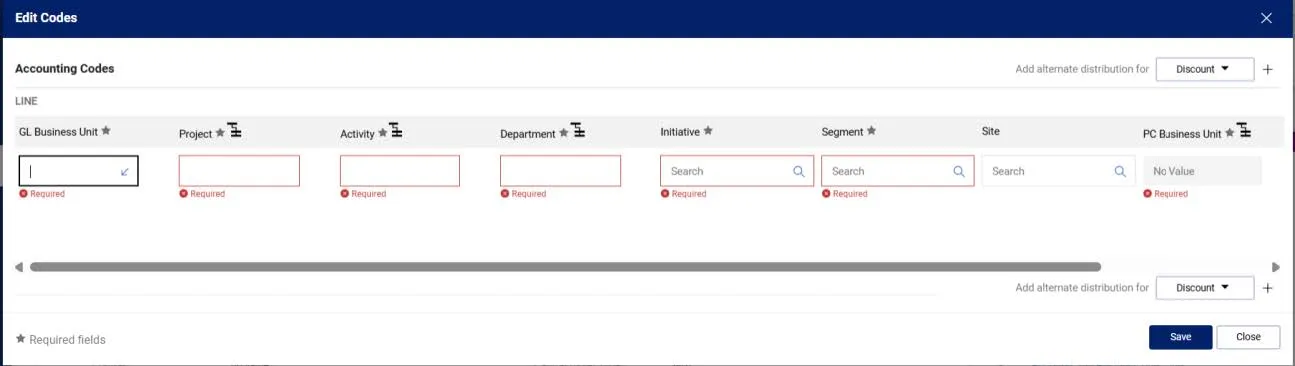
2. Update the ChartFields as needed. ChartFields must be entered in order left to right as the available values are dependent on the value in the previous field. You can click the Dropdown arrow in the field you are populating to view the available values.
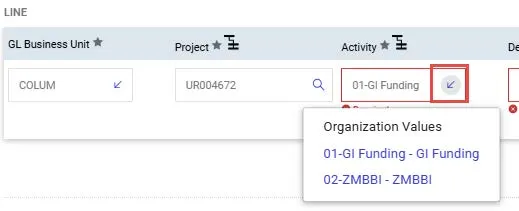
3. Click the Validate icon to ensure your ChartFields were entered correctly. If you corrected a ChartField and it still appears as Required, click the Validate icon again. You can click the Add Split icon to add an additional ChartString line and indicate a percent distribution. You can click the Code Favorites icon to select a favorite ChartString you created in your Profile.
4. Click the Save button.
You must enter a Line to describe the payment, the price, and the quantity. You must indicate the Account for the category.
1. In the Lines section, click the Add Non-PO Item link.

The Add Non-PO Item window appears.
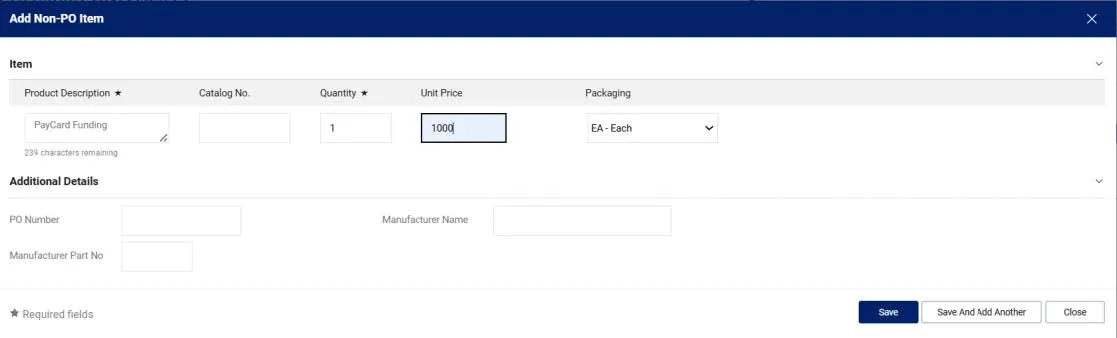
2. Enter the Product Description as “PayCard Funding”, Quantity as “1”, and Price Estimate (the amount of the PayCard funding).
3. Click the Save button to add the Line.
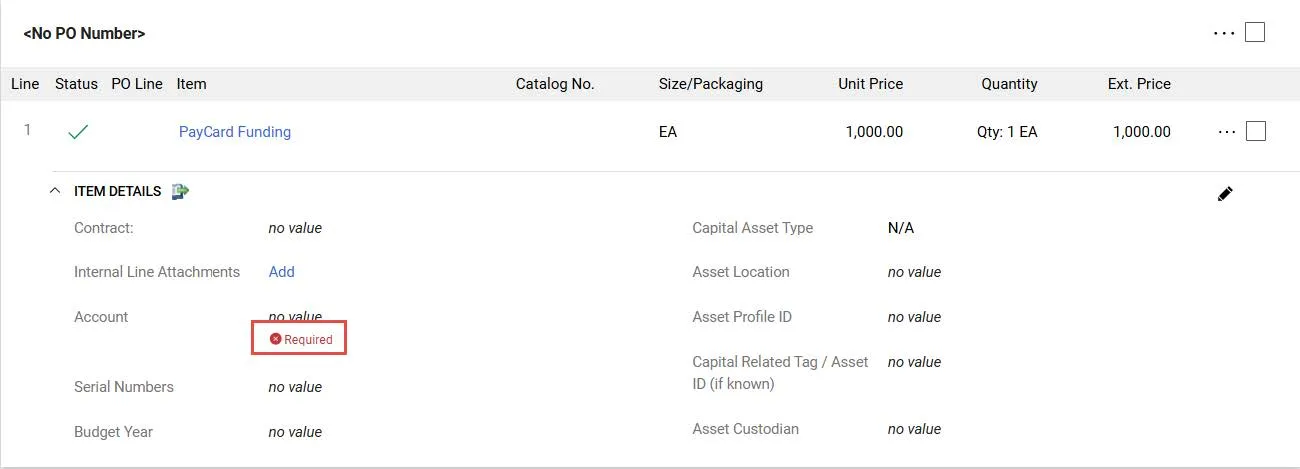
4. Notice the Account field is indicated as Required. Click the Required link to edit the Account field.
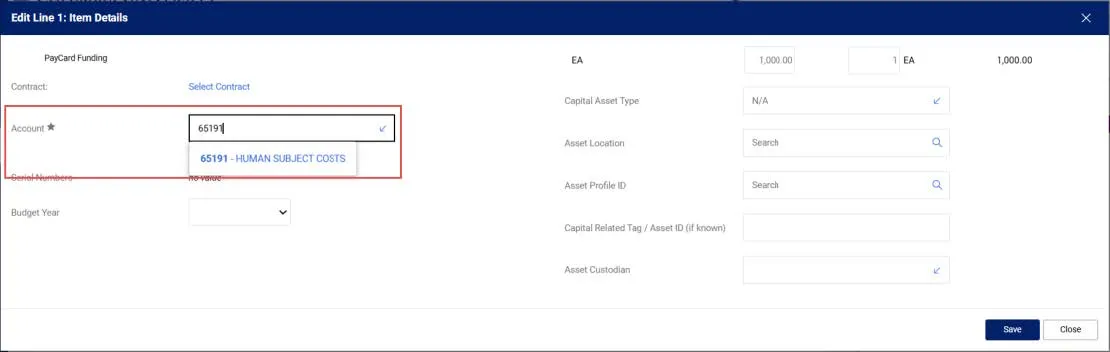
5. Search and select the Account. 65191 -Human Subject Costs.
6. Click the Save button.
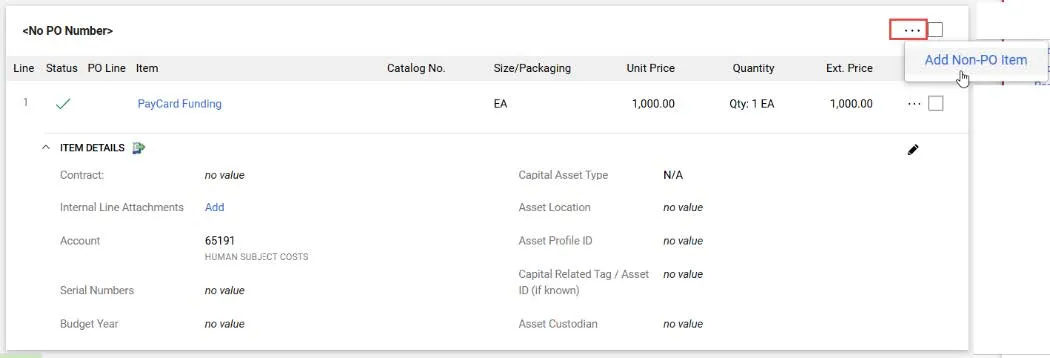
Adding an Additional Line
Click the Actions link at the top right of the Line section and select Add Non-PO Item.
Editing Line Accounting Codes (ChartString)
The Accounting Codes that you entered in the main Accounting Codes section automatically copies to your Voucher Lines. If you have multiple Lines, you can edit Accounting Codes for each Line as needed.
1. Click the Actions button to the right of the Line detail and select Accounting Codes.
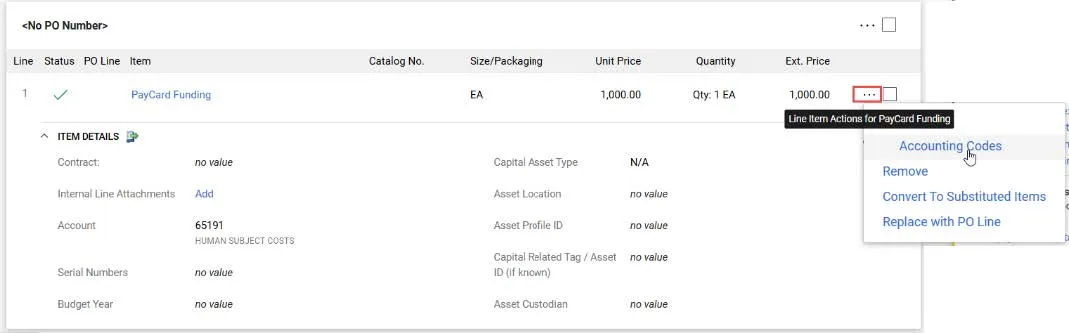
2. The Override Line Accounting Codes window appears.

3. Click the Add alternate distribution for Line icon.
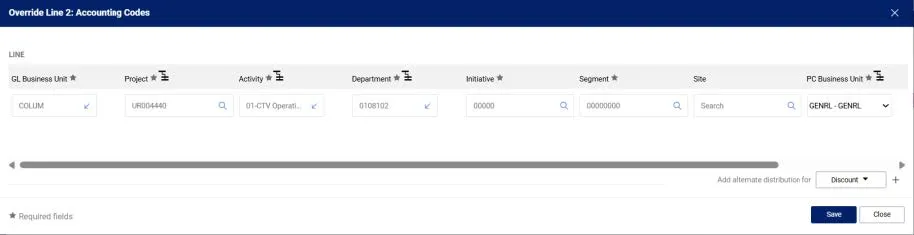
Note: ChartFields displayed in the graphic above are for example purposes only. Your ChartString information depends on your Project and Department information.
4. Update the ChartFields as needed. They must be entered in order left to right as the available values are dependent on the value in the previous field. You can click the Dropdown arrow in the field you are populating to view the available values.
5. Click the Validate icon to ensure your ChartFields were entered correctly. If you corrected a ChartField and it still appears as Required , click the Validate icon again. You can click the Add Split icon to add an additional ChartString line and indicate a percent distribution. You can click the Code Favorites icon to select a favorite ChartString you created in your Profile.
6. Click the Save button.
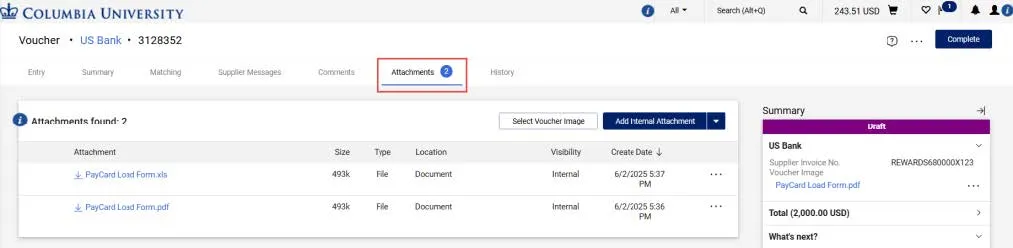
Attach the signed version of PayCard Load Form and an Excel copy of the Load Form. The Load Form and the Voucher total must match.
1. In the Summary pane, click the Empty Internal Attachments link.
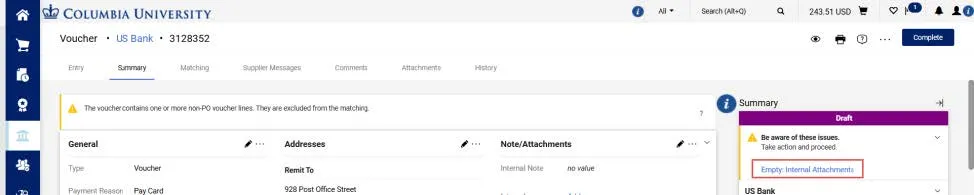
The Add Attachments window appears.
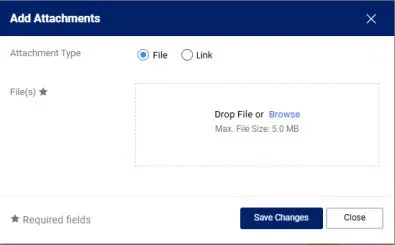
2. Drag or drop your file(s) to the File(s) section or click the Browse link to search and select your file. You can add additional documentation to this window, if needed.
3. Click the Save Changes button. You can view and attach additional documents via the Attachments tab.
Optionally, add Comments with an email notification to colleagues so they are notified of the PayCard Voucher funding status.
1. Navigate to the Comments tab.

2. Click the New Comment icon. The Add Comment window appears.
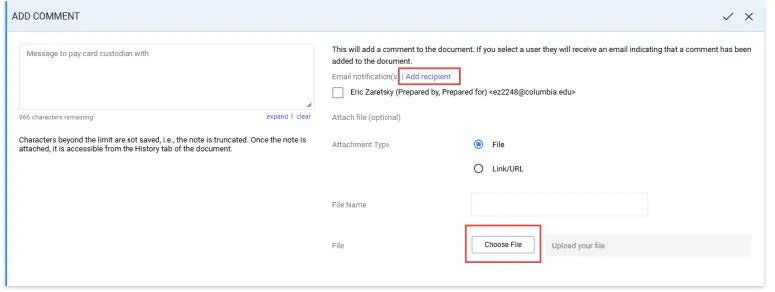
3. Type your Comment.
4. Click the Add Recipient link to search and select the recipient of the email notification.
5. Click the Add Comment icon to add the Comment to the Voucher and send the notification.
Click the Complete button to submit your Voucher.

The Voucher Submitted confirmation screen appears.
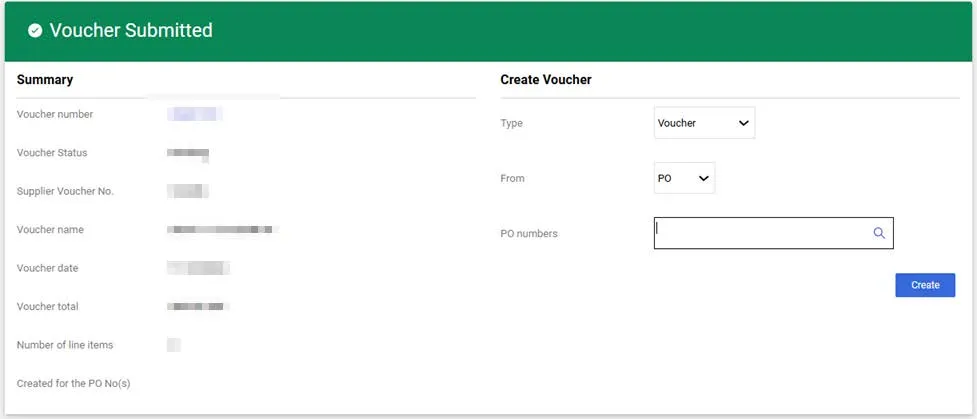
You can click the Voucher number to view the Voucher details.
Additionally, you can create a new voucher from this screen.
Once the PayCard Voucher is submitted for funding, the PayCard team will
- Fund the PayCards noted on the Load form via the US Bank systems.
- Once complete, an email will be forwarded to the Initiator and Approver to confirm that all of the PayCards have been loaded and are ready for the study to distribute.
Contact the Finance Service Center
Contact the PayCard team
Log an incident or request a service via Service Now