CU Marketplace Requisition Checkout Quick Guide
The CU Marketplace powered by JAGGAER provides access to negotiated contracts and pricing with Columbia’s preferred suppliers. This Quick Guide covers how to proceed to Checkout from a Shopping Cart and submit the Cart as a Requisition for approval. Only Requisition Requesters can submit a Requisition into workflow.
Last Revision: 2025
Checking Out a Shopping Cart
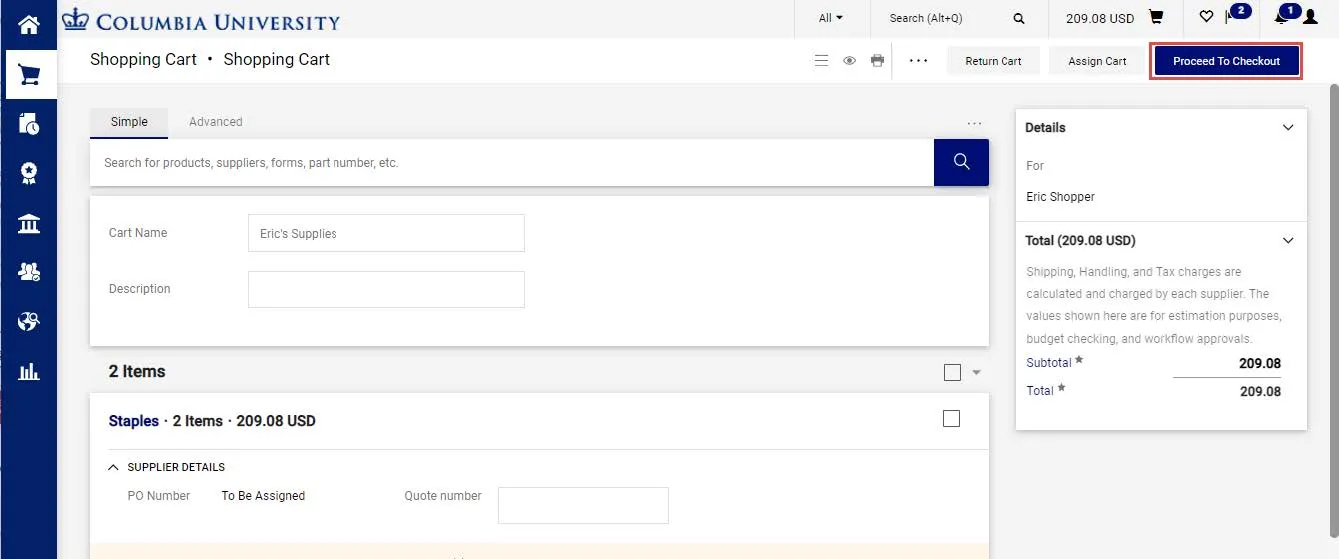
After shopping for items from Catalog vendors or completing a Non-Catalog Goods or Service Request, you will be viewing your Shopping Cart. From your Cart, you can Proceed to Checkout.
At checkout you must ensure that the Ship-To/Bill-To Addresses and the ChartString information is complete and correct. If you created default values in your Profile (refer to the Modifying Profile Settings in the CU Marketplace job aid), those values will be populated. Ensure this information is complete before placing your order.
On the Shopping Cart page, click the Proceed to Checkout button.
The Checkout screen appears.
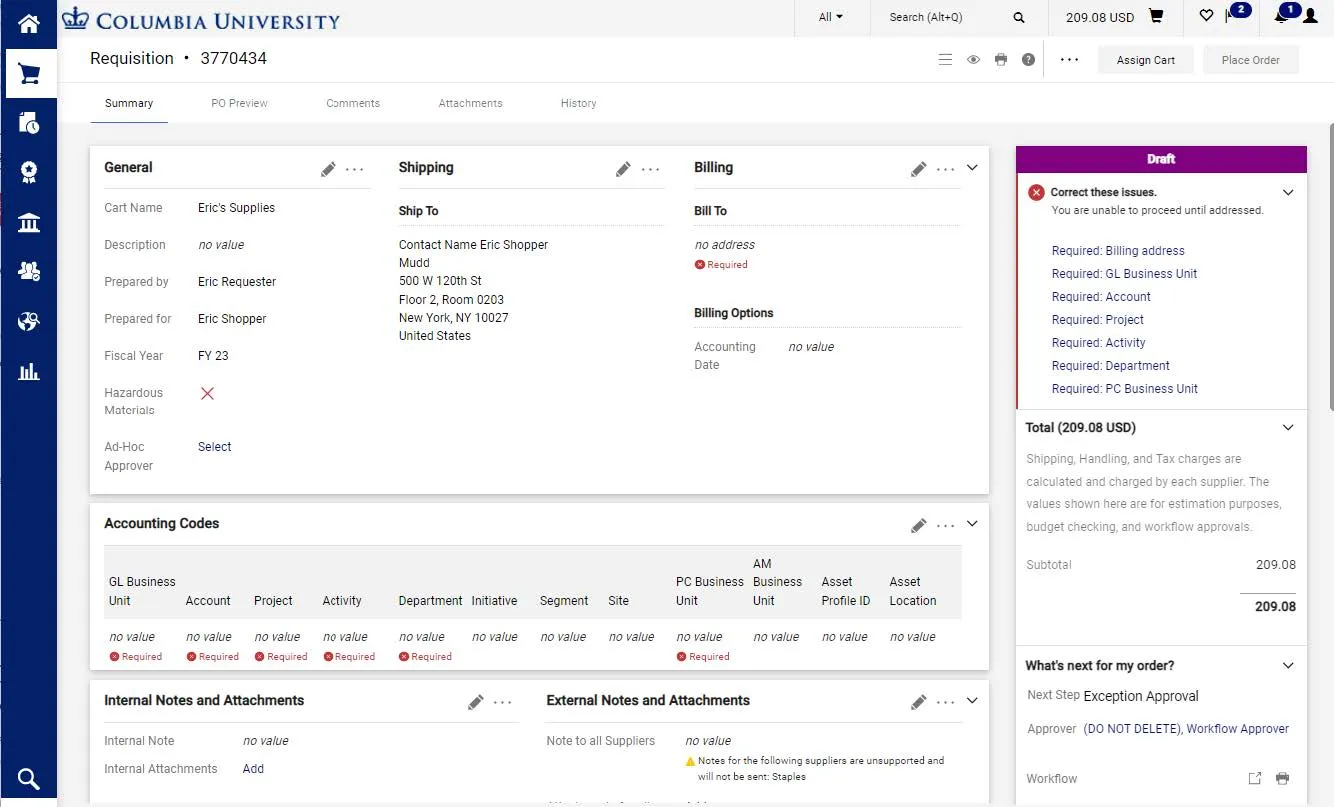
The Status panel on the right indicates all the required information that you must complete. You can click the link to access the field to update it. Fields within the form that require completion will be labeled Required.
Completing the Requisition
Updating Shipping and Billing
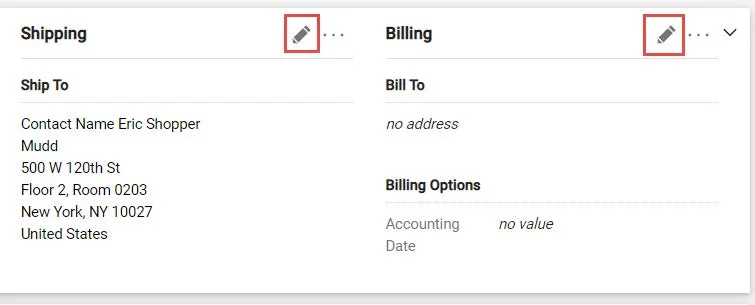
On the Checkout screen, click the Edit icon for Shipping or Billing.
The Edit window will appear for the item you selected. It will display the Current Address populated, if any, and a selection of Favorites you created in your profile, if any.
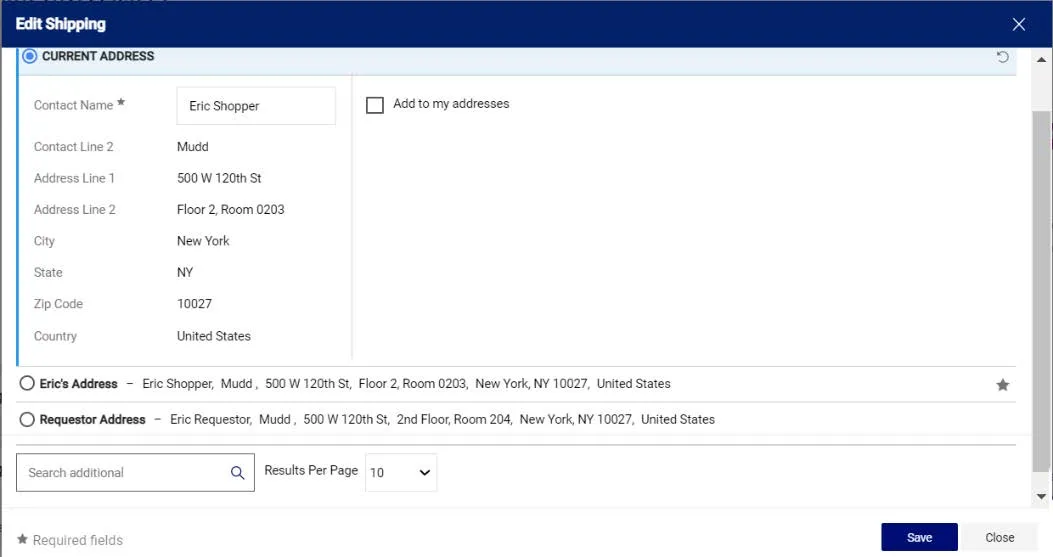
Select one of your Profile favorites or type in the Search additional field to find and select an address.
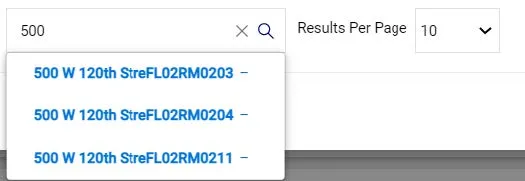
Click the Save button.
Updating the ChartString (Accounting Codes)
On the Checkout screen, click the Edit icon for Accounting Codes.

The Edit window will appear. It will display the default ChartFields from your Profile.
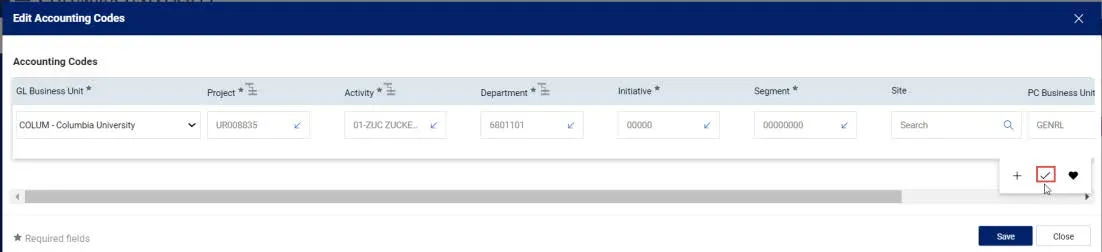
Update the ChartFields as needed. They must be entered in order left to right as the available values are dependent on the value in the previous field. You can click the Dropdown arrow in the field you are updating to view the available values.
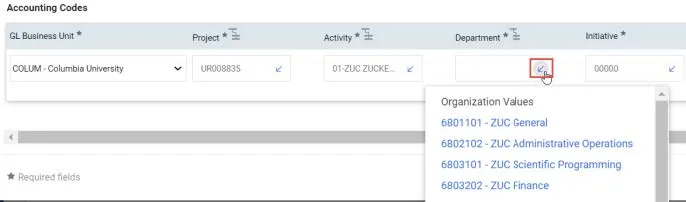
Click the Validate icon to ensure your ChartFields were entered correctly. If you corrected a ChartField and it still appears as Required , click the Validate icon again. You can click the Add Split icon to add an additional ChartString line and indicate a percent distribution. You can click the Code Favorites icon to select a favorite ChartString you created in your Profile.
Click the Save button.
Note: You can assign different ChartStrings to each item in your Cart as needed. Click the Edit icon in the ChartString section for the item. Some product Categories map to multiple Accounts. If that is the case, you will be required to select the appropriate Account number from a dropdown in the Account field.
Placing Your Order
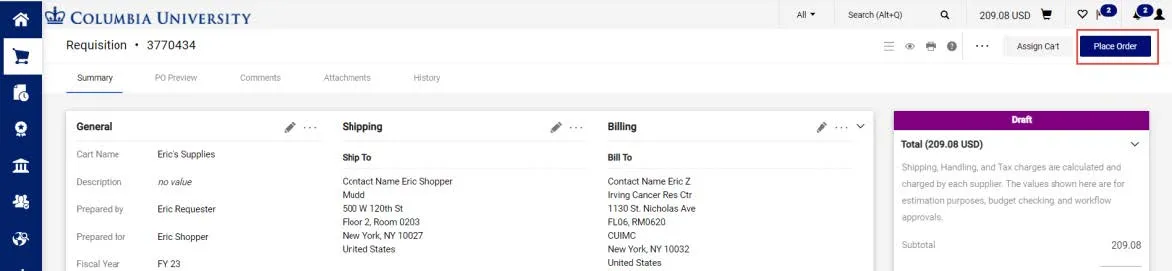
After ensuring that all required fields are populated, the Status pane will not list any further requirements. Click the Place Order button. The Cart has now been entered as a Requisition into approval workflow.