Downloading and Using the Journal Import Tool
This job aid contains instructions on how to download the Journal Import tools for General Journals and Internal Transfers, creating journals in the import tools, and importing journals into ARC.
Last Revision: August 2025
For more information on the process of journal entry creation in ARC please refer to this training guide: Creating and Approving Internal Transfer Journal Entries in ARC
Details
- Create a new folder on your workstation. Give the folder a recognizable name, such as “ITF Journal Uploads” or “General Journal Uploads”.
- Log in to https://my.columbia.edu/, click ARC, and scroll down to the Resources section. Click the Journal Entry Spreadsheet Upload tab.
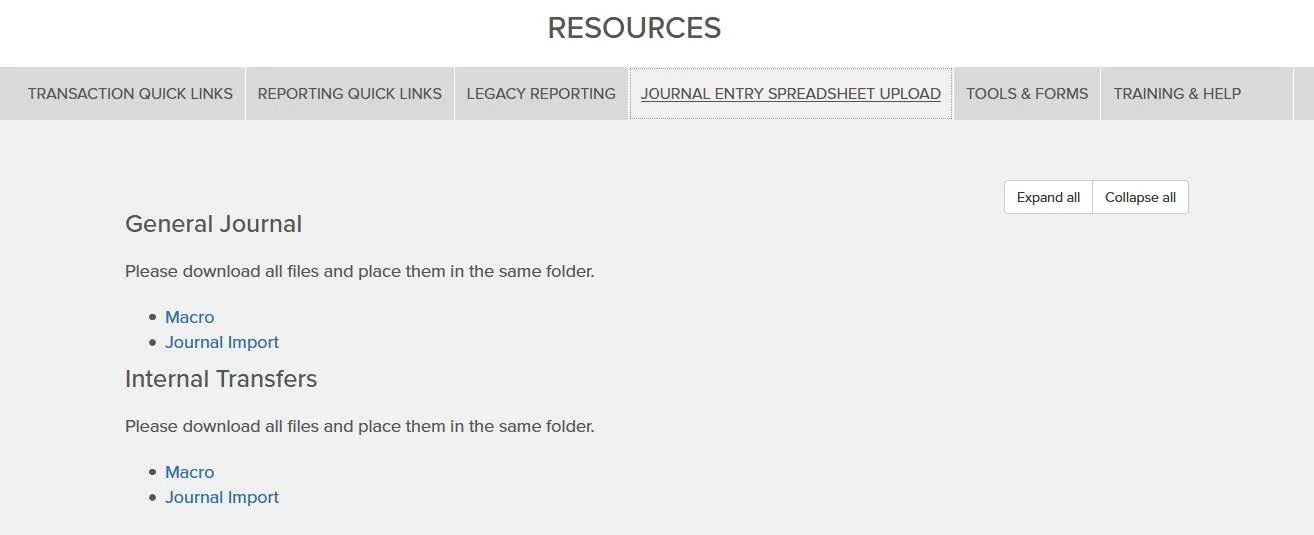
- Right click on the Macro and Journal Import links and select Save link as… from the menu.
- Save each file in the folder you created. Both the JRNLMCRO_WS.xlam and the JRNL1_WS_ITEF.xlsm (internal transfers) or the JRNLMCRO_WS.xlam and the JRNL1_WS_JE.xlsm (General Journal) files must be saved in the same folder.
If you are using both ITF and General Journal upload templates, the files for each must be stored in separate, respective folders.
After download, the folder should contain the following two files for Internal Transfers:

Or, the following two files for General Journals:

Note: The Journal Import tool works only on PC’s running Windows operating systems. The Journal Import tool is not compatible with computers running MacOS.
- Open the folder and double click on JRNL1_WS_ITEF file to open the Journal Import Tool for Internal Transfer Journals or JRNL1_WS_JE file to open the Journal Import Tool for General Journals.
Note: The first time you open these files you will be prompted to Enable Editing and to Enable Content. Click those buttons on the
top of the spreadsheet.
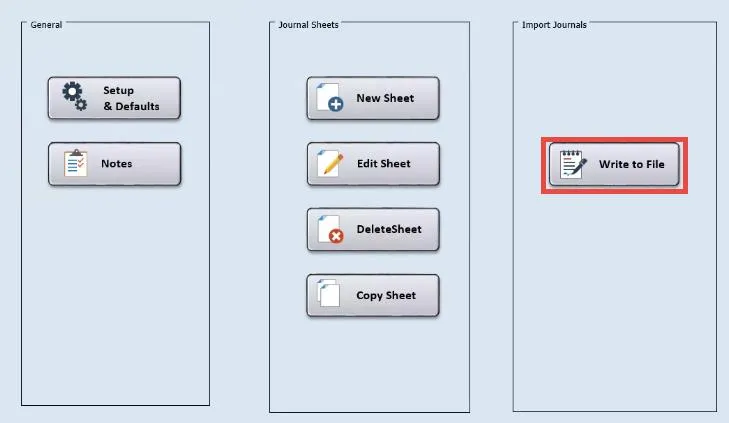
- From the Home screen click the New button.
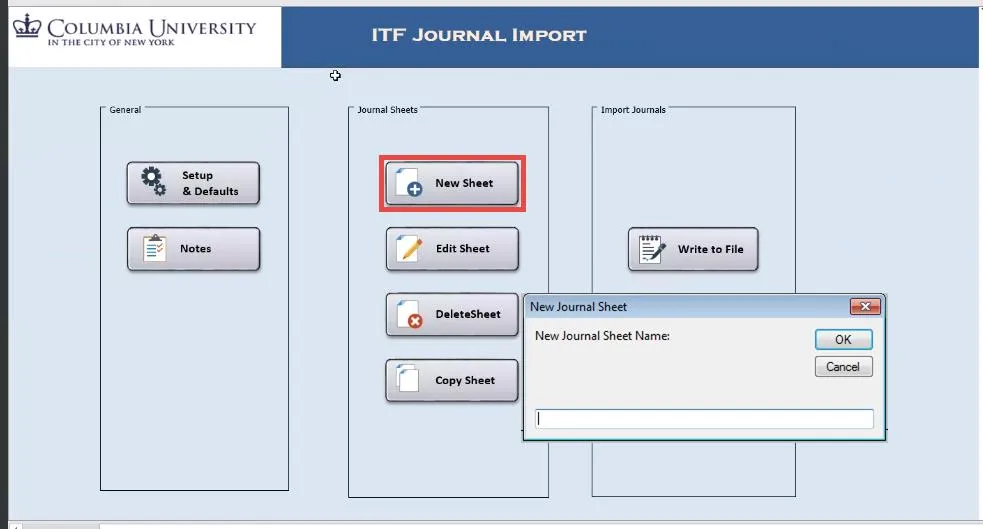
- Type a New Journal Sheet Name and click OK.
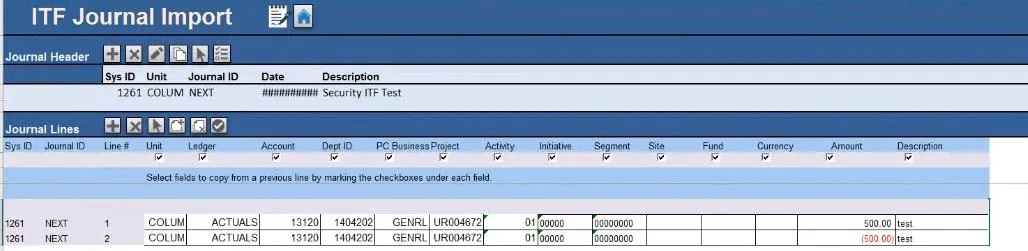
- In the new Journal Sheet, click the + button in the Journal Header Section.

The New Journal Header window appears.
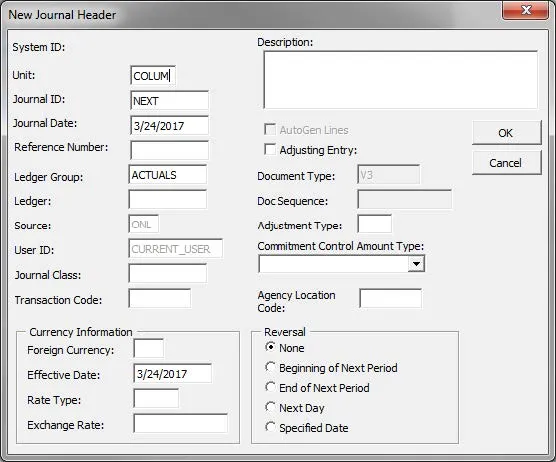
- Enter a journal Description and click OK. You can edit Business Unit, Journal Date, Ledger Group, if required.
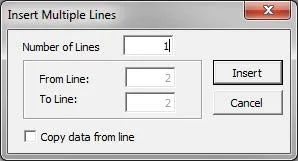
- Click the Add Line or Add Lines buttons to add Journal Lines to the journal. If you clicked the Add Lines button you will be prompted to Insert the Number of Lines.

- Enter ChartField values into the journal rows. This can be achieved either through copying and pasting or manually typing in the values.
Note: When copying and pasting ChartStrings from another Excel file, make sure each column in your source spreadsheet is aligned with the journal template columns and that the values are pasted as values.
Make sure the ChartFields Deptid, Activity, Initiative, Segment, Sit, Fund, and Function are formatted as text in your source so that you can copy and paste the leading zeroes into the template. Changing the formats of the cells in the template will result in errors when you import the journals.
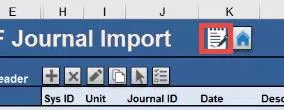
- Click the Write File button on the Journal Sheet or, click the Write to File button the on the Home Page.
The Write Journals to File window appears with the Journal Sheet Name(s).
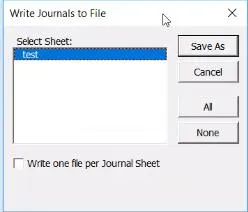
- Select the Journal(s) for which you want to create an upload file and click Save As. You can use your Shift or Ctrl keys to select multiple journals.
A Write to File Explorer window appears with the filename defaulted to whatever you named the Journal Sheet, which will be saved in Text (.txt) format.
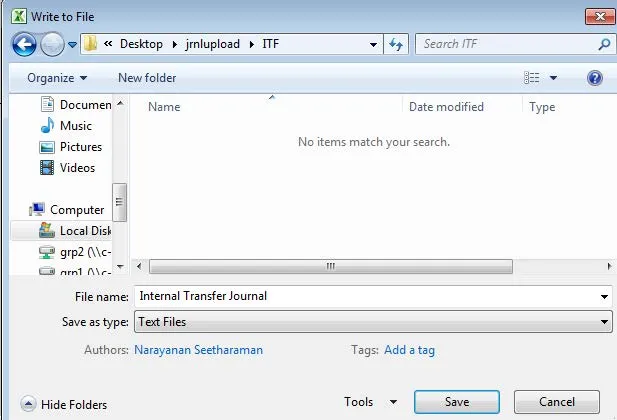
- Navigate to the Folder where you want to save your file and click Save.
Note: The last location you selected to save the upload file will become the default folder for the next time you save a Journal file.
Other Journal Upload Template Functions
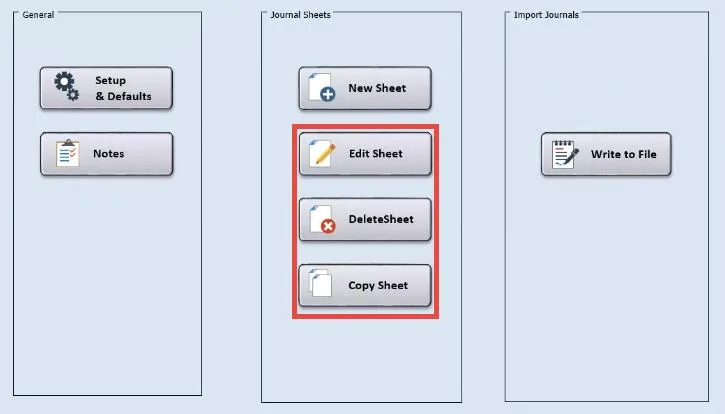
- Edit Sheet – edit an existing journal sheet and make changes to it
- Delete Sheet – delete any journal sheets that you have previously saved in the template
- Copy Sheet – copy a previously saved journal sheet into a new one
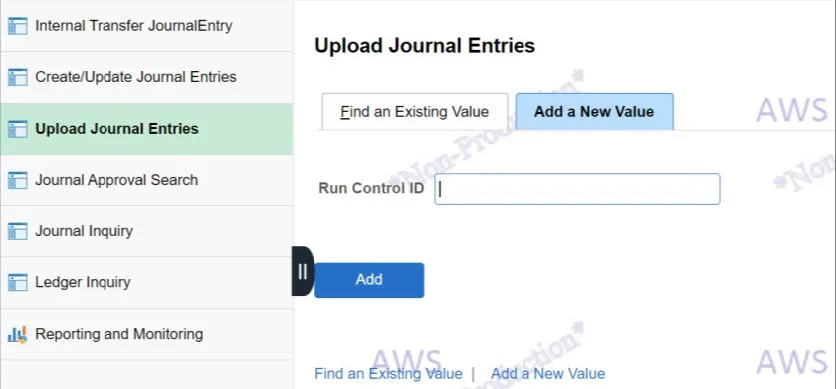
- Log into ARC and click the Journals tile and the Upload Journal Entries menu.


Or, navigate to NavBar >Columbia Specific > General Ledger > Processes > Upload Journal Entries. The Upload Journal Entries page appears.
- If you are a first time user, click Add a New Value to enter a new Run Control ID and click Add. If you are a returning user, click Find an Existing Value.

Enter your previous Run Control ID and click Search.
Note: You should not create a new run control for each journal you are uploading. An existing run control can be used indefinitely.
- Click the matching Run Control ID to open the Spreadsheet Journal Import Request page.
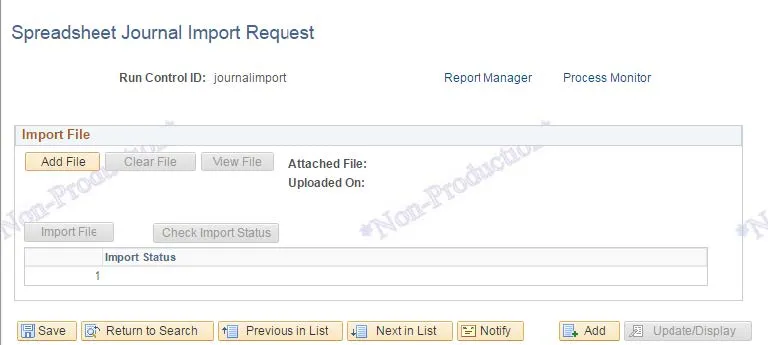
Note: If you previously uploaded a journal file, you must click the Clear File button to remove it before you can add a new file for upload.
- Click the Add File button. The File Attachment window appears.
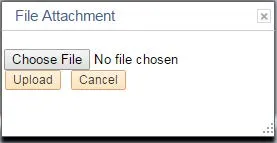
If the window does not appear, check that the pop up blocker in the browser is disabled for this site.
- Click Choose File and navigate to the location of your saved upload file.
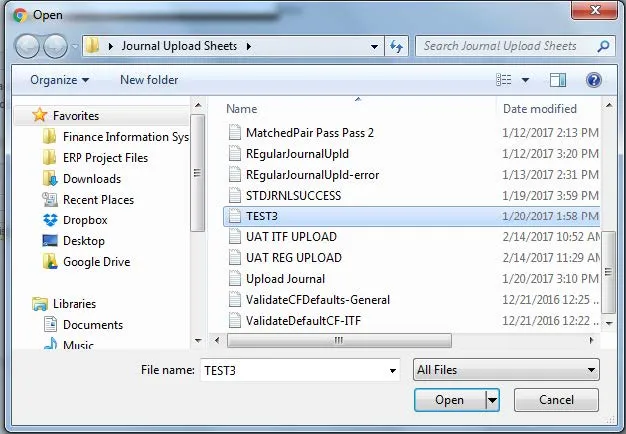
- Select the file and click Open.
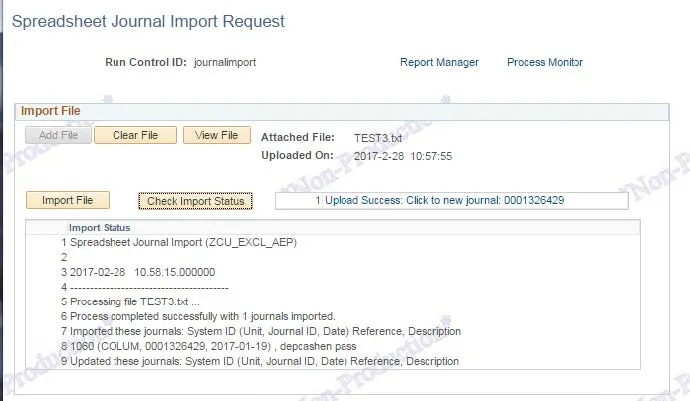
- Click Upload in the File Attachment window. The file information appears and the Import File button becomes active.
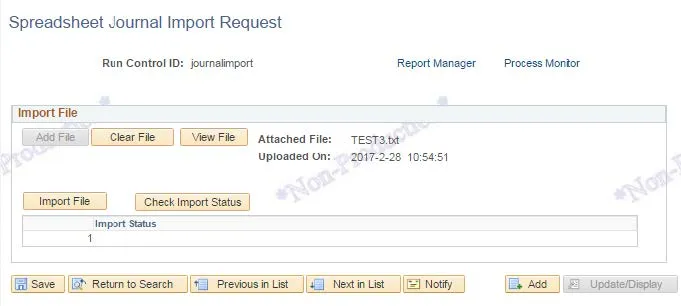
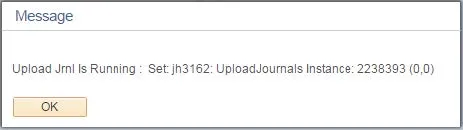
- Click Import File and click OK in the Message window that appears.
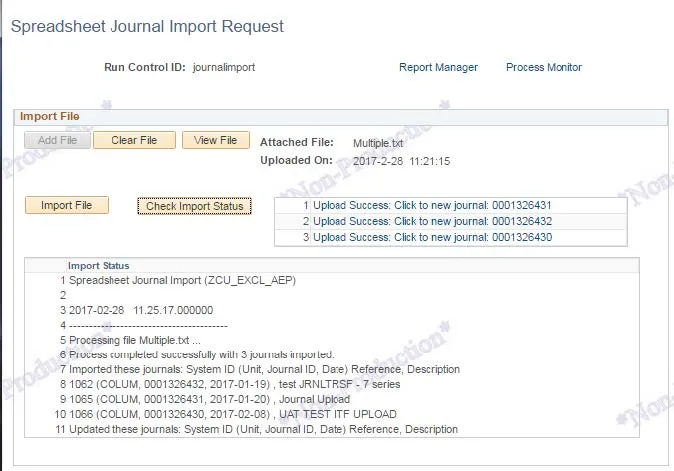
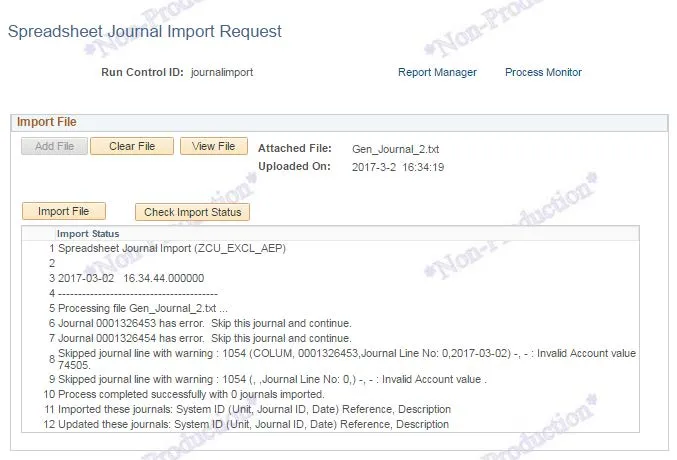
- Click Check Import Status to refresh the upload status until the process is complete.
After the process is complete, information from the process message log will appear in the Import Status section. Link(s) to the new journal(s) will appear next to the Check Status button.
Journal Error Messaging
If the journal upload process failed, a link to the error log appears next to the Check Import Status button so you can get more information on why the journal failed to import.
Click the Upload Failed: Go to Log link.
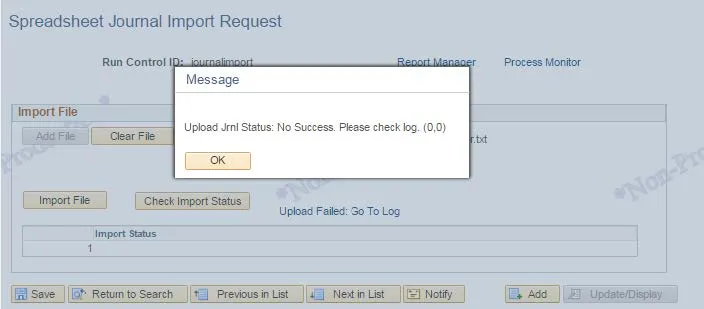
An error log window appears showing the reason for the import failure.
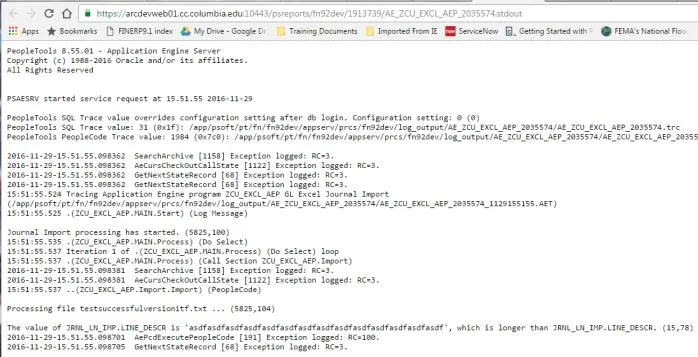
If the journal upload process ran successfully but there are other issues with the journal rows, such as invalid or missing ChartField values, the errors will appear in the log messages box.
- Click the link to the journal that appears on the Spreadsheet Journal Import Request Page after a successful upload. The journal appears.
- Run the Edit Process and Submit the journal into workflow.