CU Marketplace Tip: How do I add a Line to a Non-PO Voucher?
What is it?
When initiating a Non-PO Voucher in the CU Marketplace, first click on the Summary tab to begin entering all information. Complete required information in the header section, including Payment Reason, Invoice No. and Accounting Codes, which can be quickly accessed by using the Correct these issues links in the Summary Pane on the right side of the screen. Don’t forget to update the Invoice Date, which defaults to today’s date, to match your documentation.
To enter the non-PO lines on the Voucher, follow the steps below. Refer to the Creating Non-PO Vouchers in the CU Marketplace job aid for complete step-by-step instructions or click the icon in the Voucher for guidance.
Adding Lines to a Non-PO Voucher
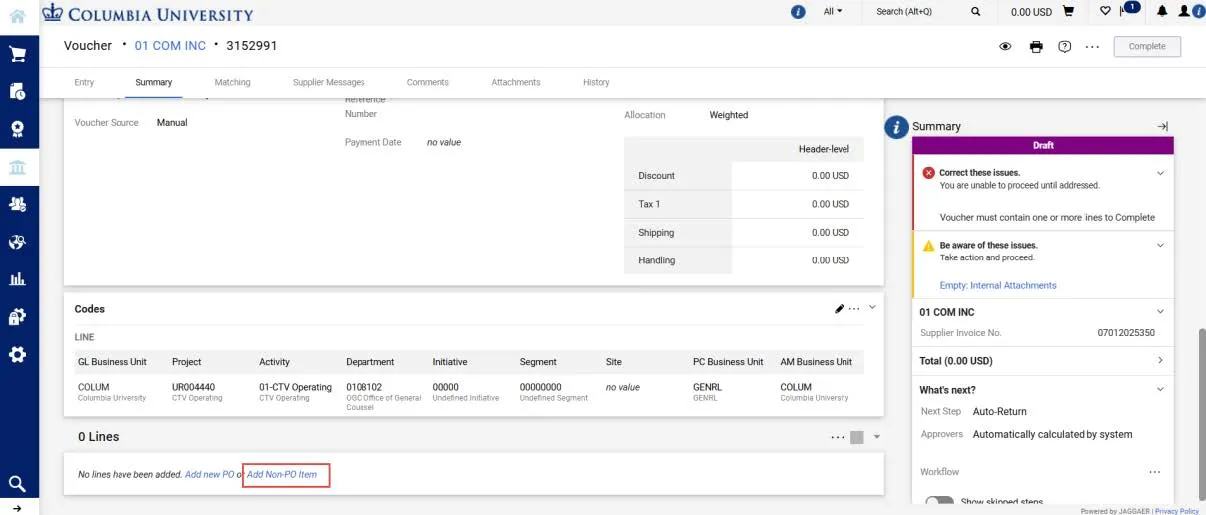
1. On the Summary tab of the Voucher page, scroll down to the Lines section, click the Add Non-PO Item link.

The Add Non-PO Item window appears.
2. Enter the Product Description, Quantity, and Price Estimate (the amount of the payment). If applicable, you can enter a Catalog No. and a Packaging unit of measure.
3. Click the Save button to add the Line. The Item Details appear and the Account field appears as required.

4. Click the Required link for the Account value. The Item Details screen appears.
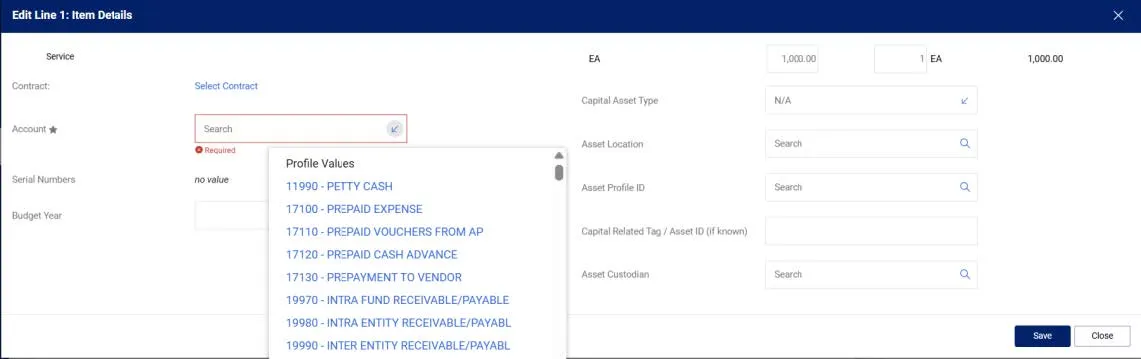
5. In the Account field, you can type a descriptive keyword to find a matching Account code or select the dropdown arrow to scroll throught the available values.
6. Click the Save button.
Adding an Additional Line
Click the Actions link at the top right of the Line section and select Add Non-PO Item.

Editing Line Accounting Codes (ChartString) for a Line
The Accounting Codes that you entered in the main Accounting Codes section automatically copies to your Voucher Lines. If you have multiple lines, you can edit Accounting Codes for each line as needed.
1. Click the Actions button to the right of the Line detail and select Accounting Codes.
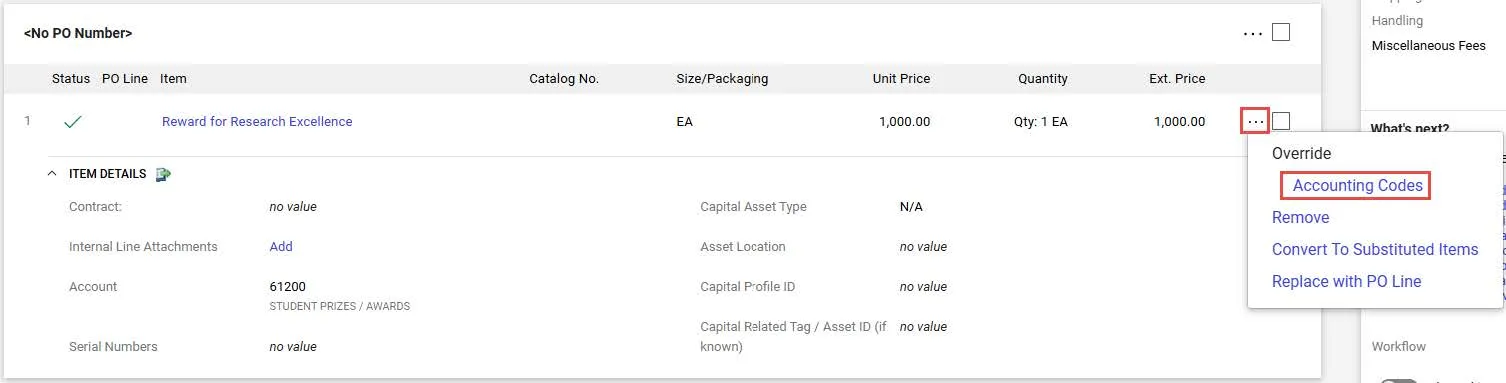
2. The Override Line Accounting Codes window appears.

3. Click the Plus icon to Add alternate distribution for Line. The fields appear ready to populate.
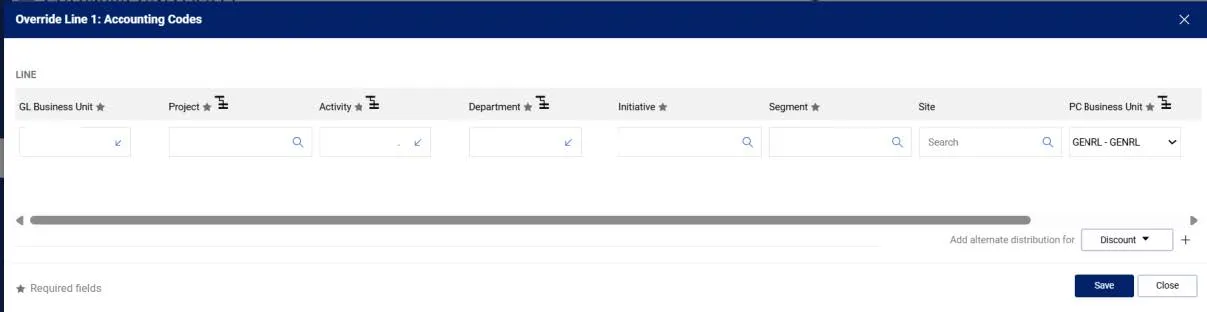
4. Update the ChartFields as needed. They must be entered in order left to right as the available values are dependent on the value in the previous field. You can click the Dropdown arrow in the field you are populating to view the available values.
5. Click the Validate icon to ensure your ChartFields were entered correctly. If you corrected a ChartField and it still appears as Required , click the Validate icon again.
You can click the Add Split icon to add an additional ChartString line and indicate a percent distribution.
You can click the Code Favorites icon to select a favorite ChartString you created in your Profile.
6. Click the Save button.